
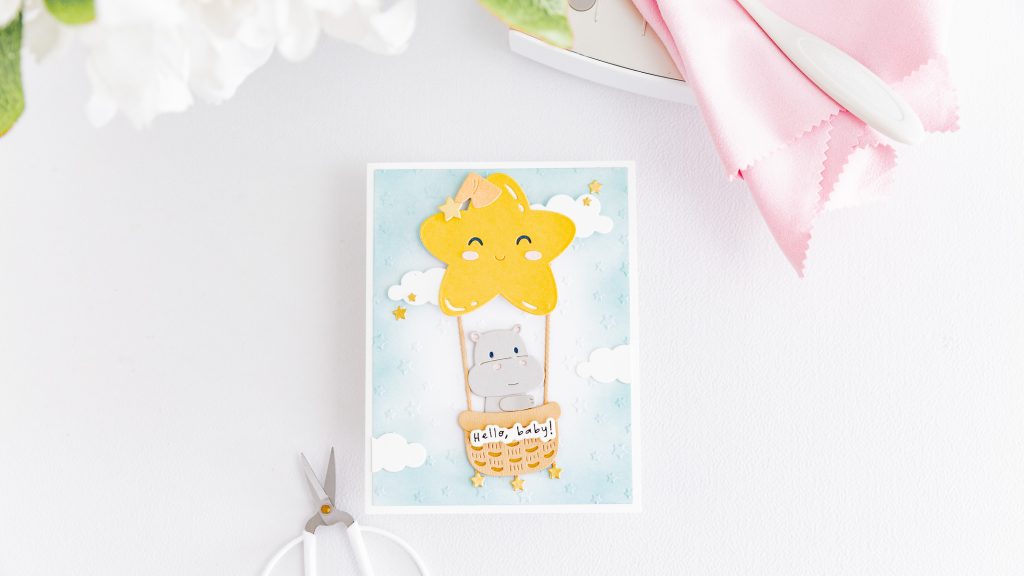
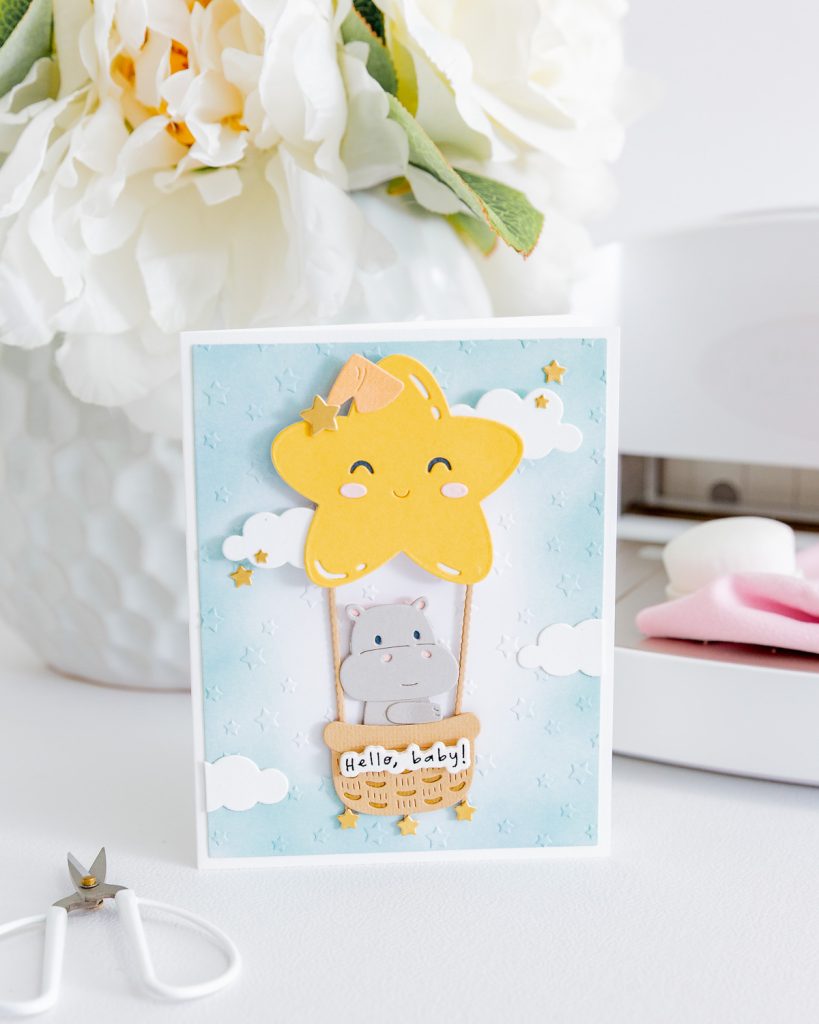
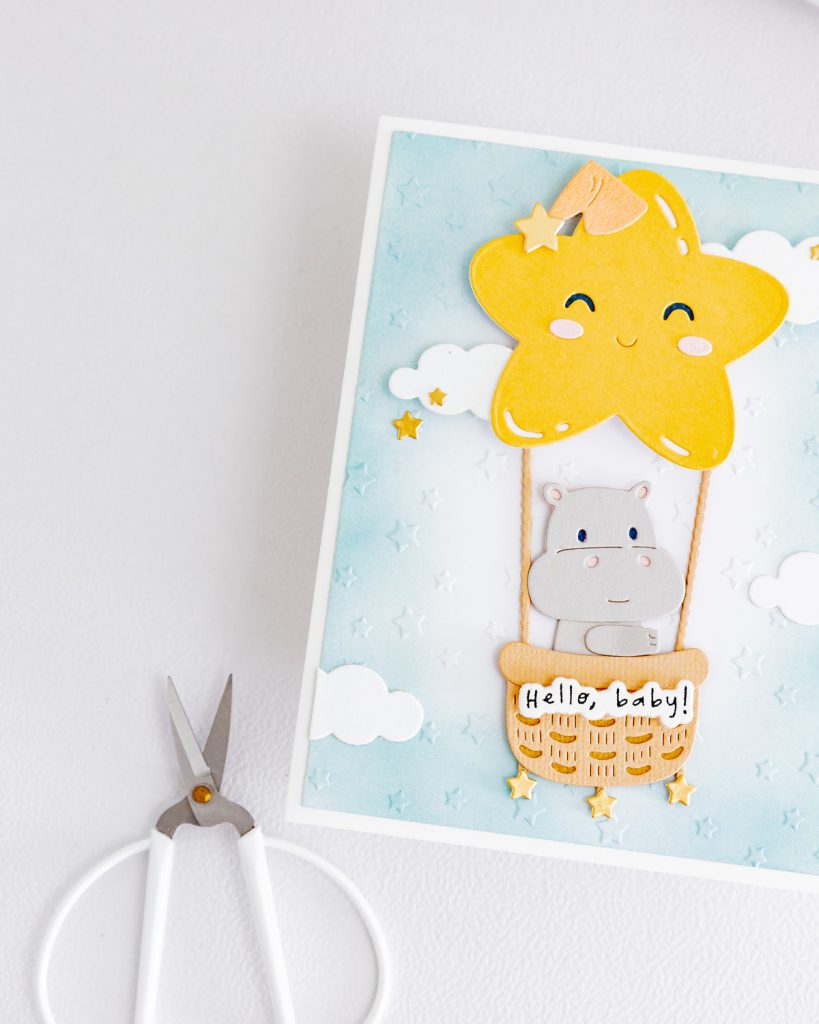
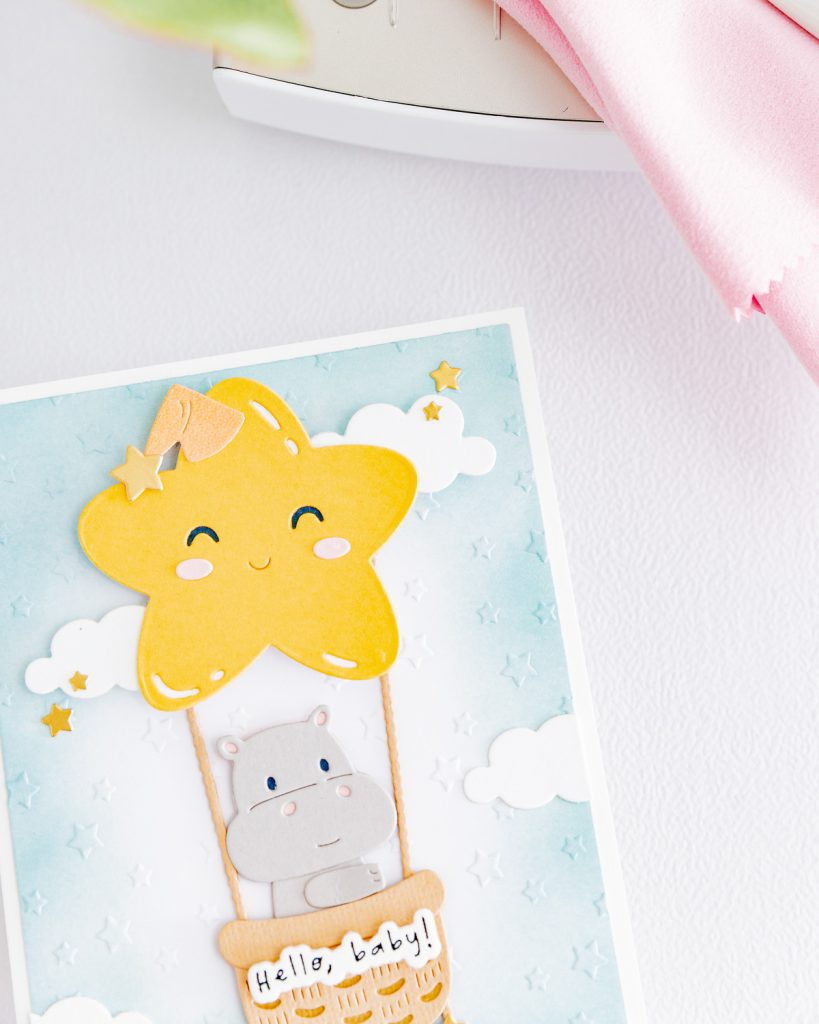
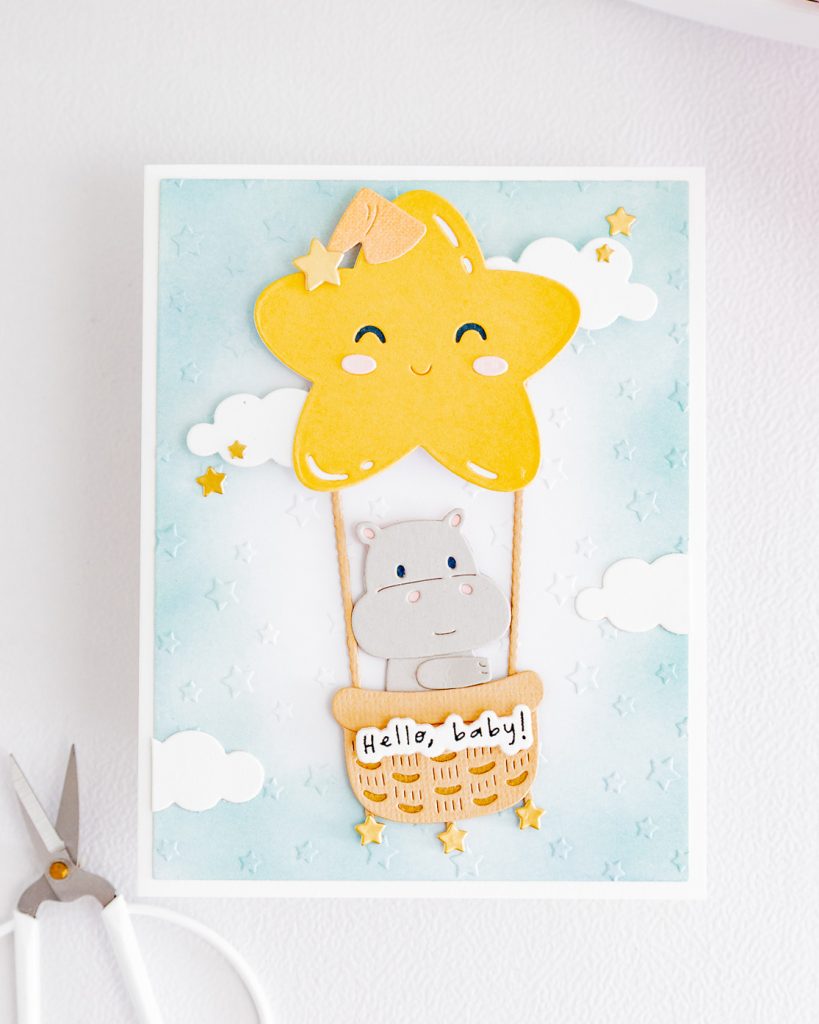
Hi, crafty friends! Time to create! I’m so happy to share a sweet and playful new card with you today! This time, I created an interactive card using the Little Smiles collection by Spellbinders — and it turned out just as magical as I imagined! I couldn’t resist turning one of those adorable characters into the star of the show (literally!) with a dreamy sky background, layered clouds, soft colors, and little interactive details that bring the whole scene to life.

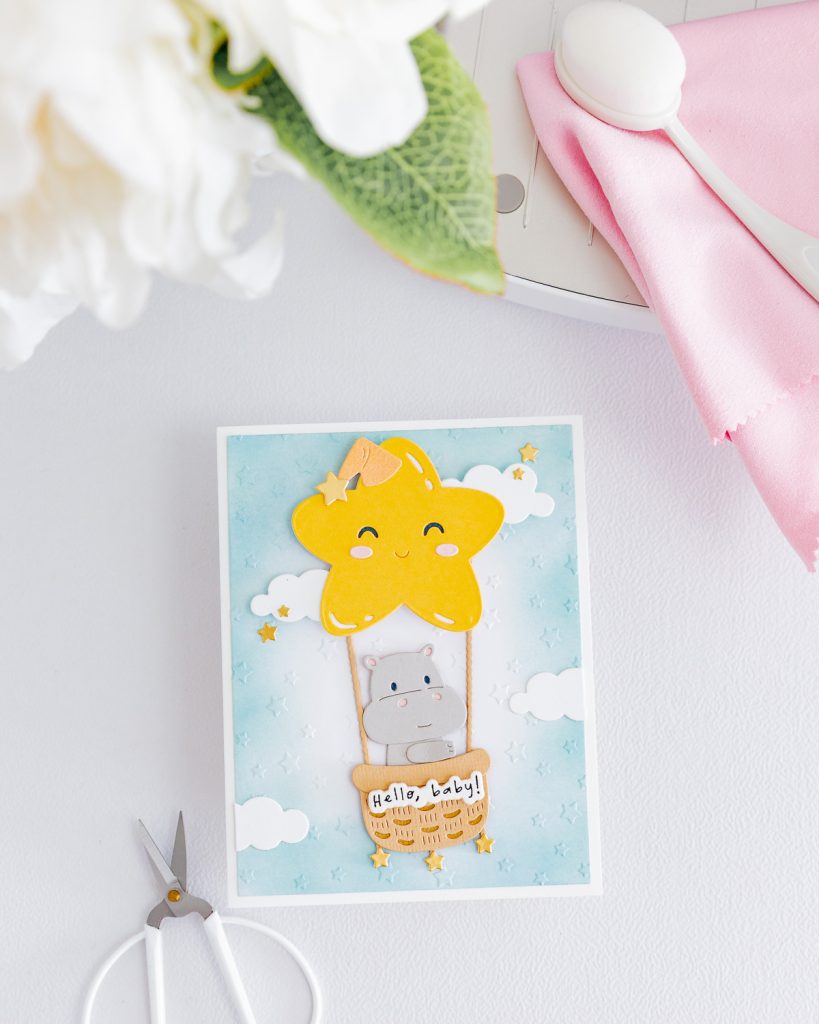
It’s the perfect project to welcome a new baby or simply to celebrate joyful moments with a handmade touch. In this post, I’ll walk you through the design process, share tips for assembling your card, and show how I added dimension and movement in a fun, easy way. Let’s take a closer look and start crafting some smiles!
For today’s card, I used:
- Swinging Among the Stars die set
- BetterPress Plates And Dies – Sentiments
- Embossing Folder – Stargazer
- Precision Layering Basics – A2 A
- Cardstock 8,5″x11″: Classic White, Beewax, Tuscan, Tutu, Anchor, Acorn, Fawn, Blush, Raven, Mint, Gold Assortment.
- A2 WHITE CARD BASES – SIDE FOLD – 25 PACK
- Platinum SIX Machine
- Glimmer Hot Foil System
- Glimmer Hot Foil Roll – Black
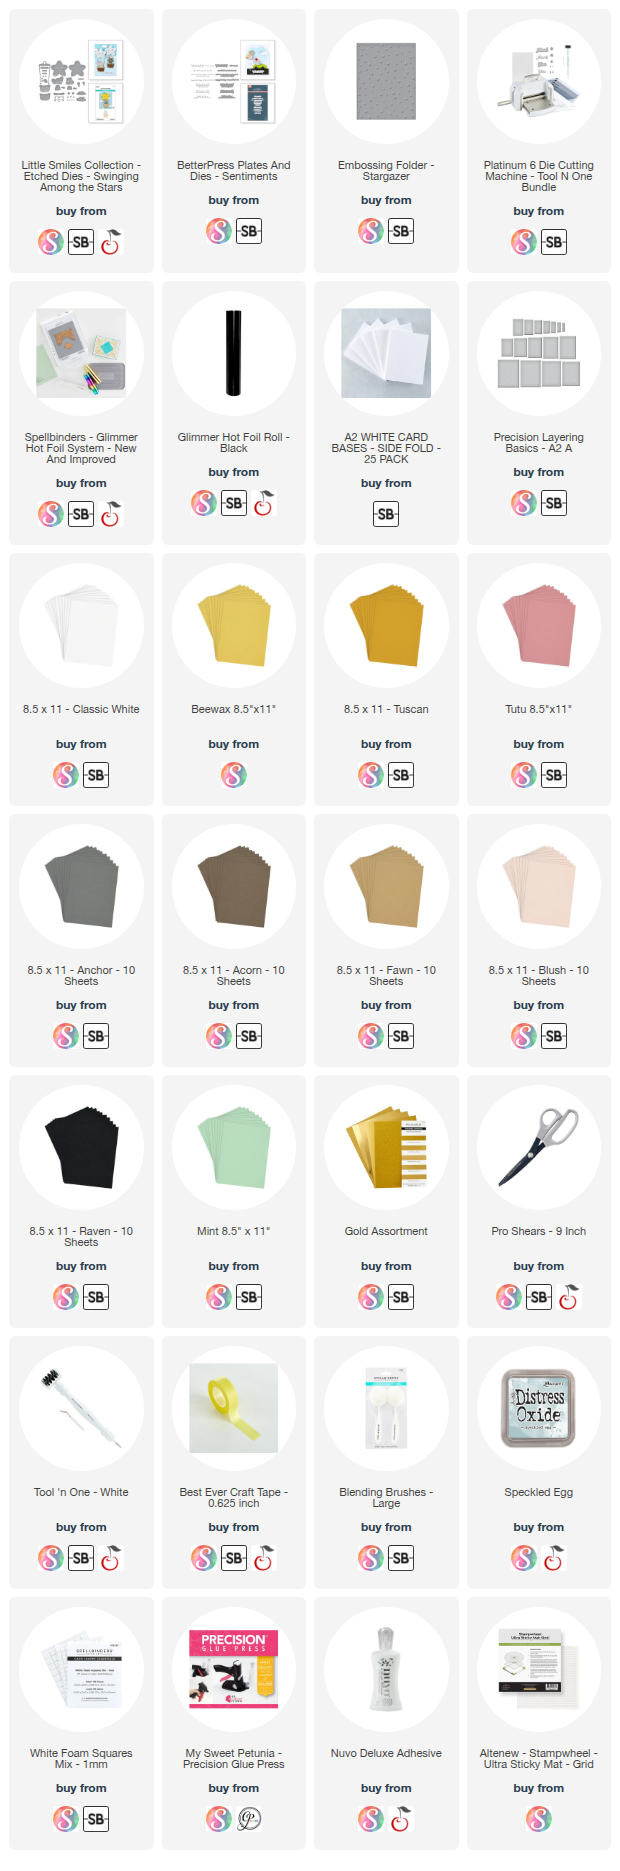
*** Complete Product list – HERE ***

Card Base:
- For the card base, I used A2 WHITE CARD BASES – SIDE FOLD – 25 PACK
- I’ve put together a pack of 10 cardstock colors. The colors I used are: Classic White, Beewax, Tuscan, Tutu, Anchor, Acorn, Fawn, Blush, Raven, Mint. die cut the pieces from the Swinging Among the Stars set using these colors and my Platinum SIX Machine.
- I also die-cut some stars from the die set using the Gold Assortment pack.
- Additionally, I prepared a background panel using the Stargazer embossing folder and the Precision Layering Basics – A2 A die set.
- To add a lovely touch, I applied Distress Oxide ink in Speckled Egg using my blending brushes and my Ultra Sticky Mat from Altenew.


Decorative details:
- We take all the hippo and star-shaped hot air balloon pieces and assemble everything.
- We adhere some clouds to the background panel — they should be glued flat, without using 3D foam.
- Then, we add the hippo along with the balloon basket using a single foam dot to make it interactive. It’s important that this foam piece is round.
- Next, we attach the star balloon on top of that foam dot — and that’s how we bring the interactive element to life on this card.
- The final touch is the sentiment “Hello, Baby!” which we’ll create using the BetterPress Plates And Dies – Sentiments set along with our Glimmer Hot Foil System and Platinum SIX Machine. For the foil, we’ll be using black to give it a bold and elegant finish.


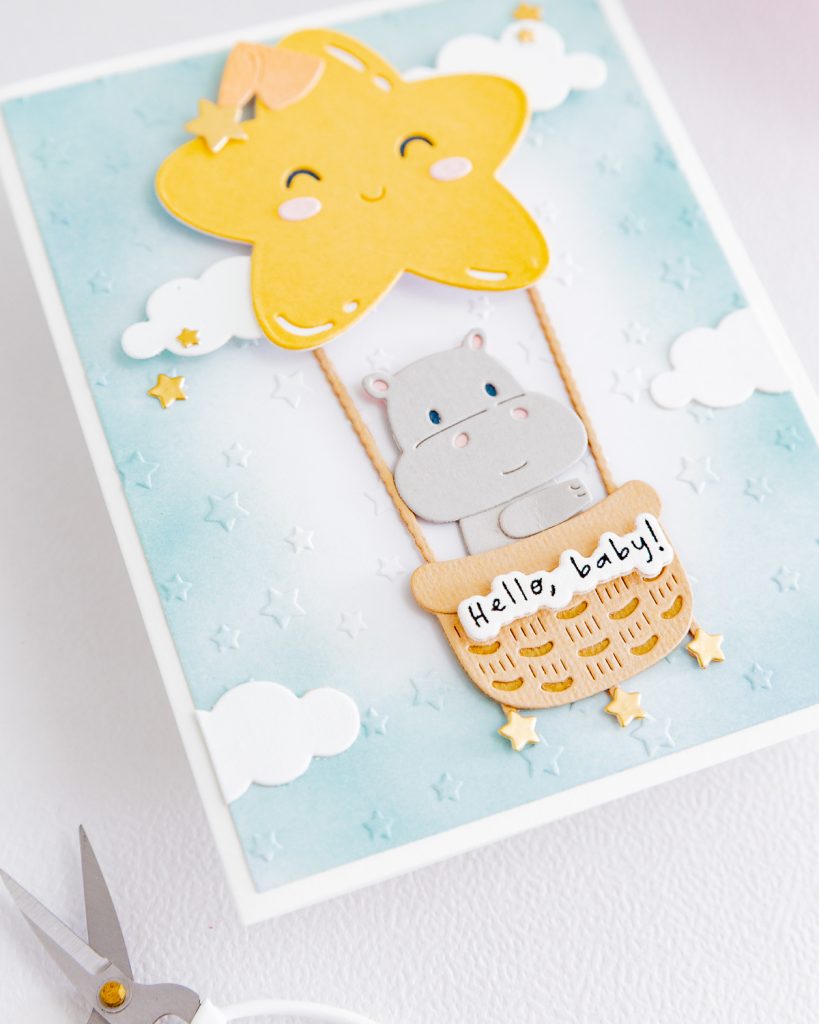
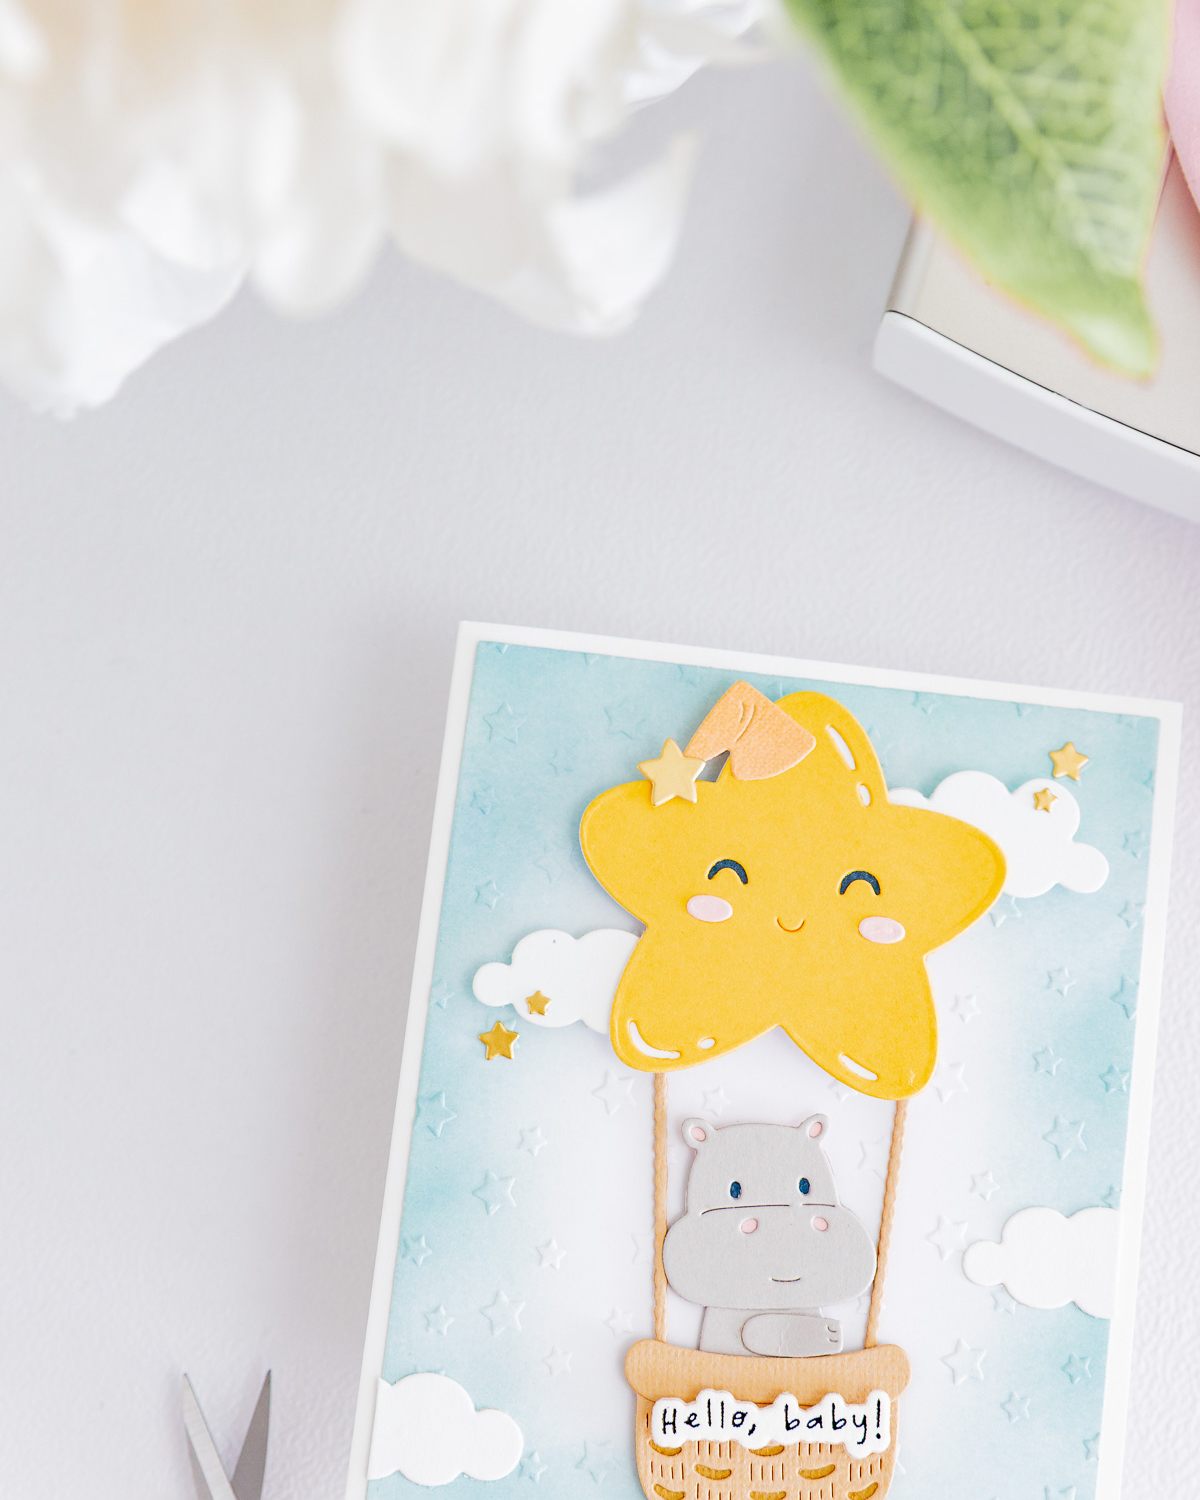
I think the result is wonderful! You look at it and can’t help but smile!
Reel and YouTube Short to see it in detail
Check out the details in the IG Reel here

Thank you for joining me. See you!
Affiliate links apply at no extra cost to you. Thanks for your support!
Visual Supplies List
