Forever Sweet Memories with Arden Creative Studio

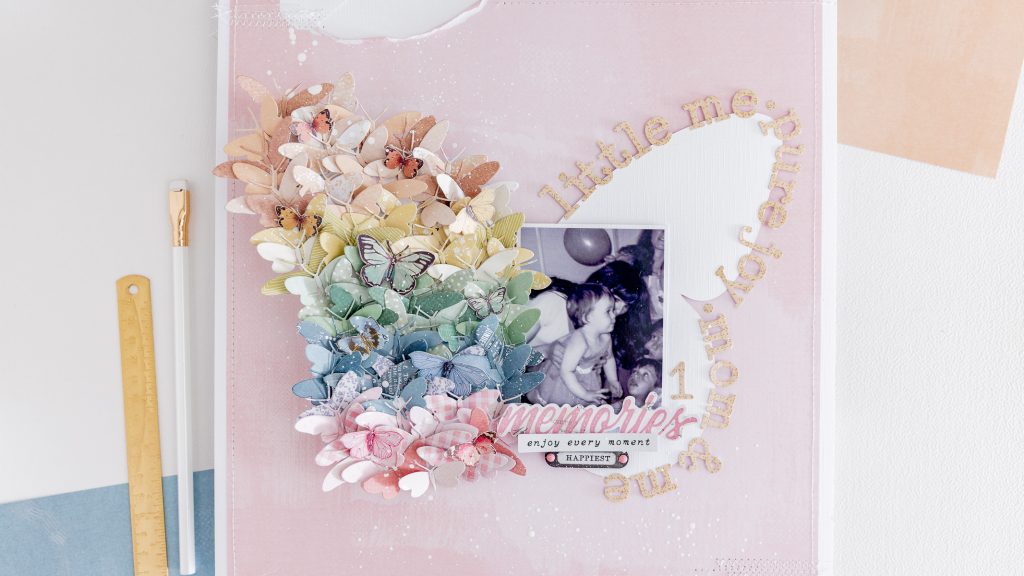
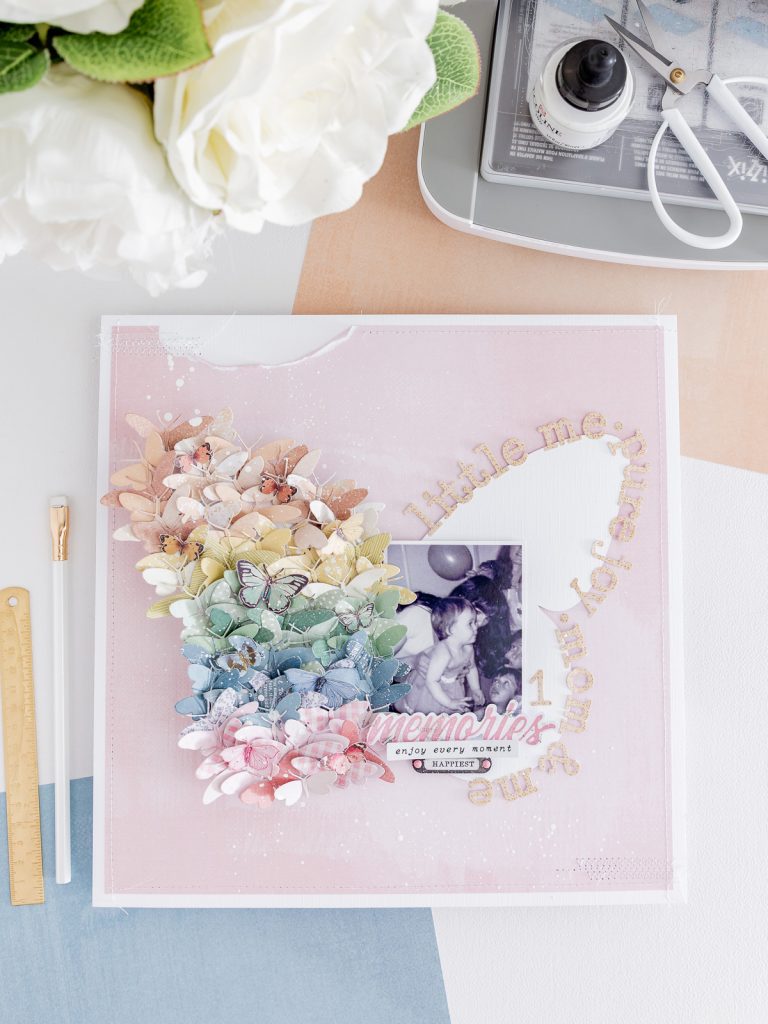
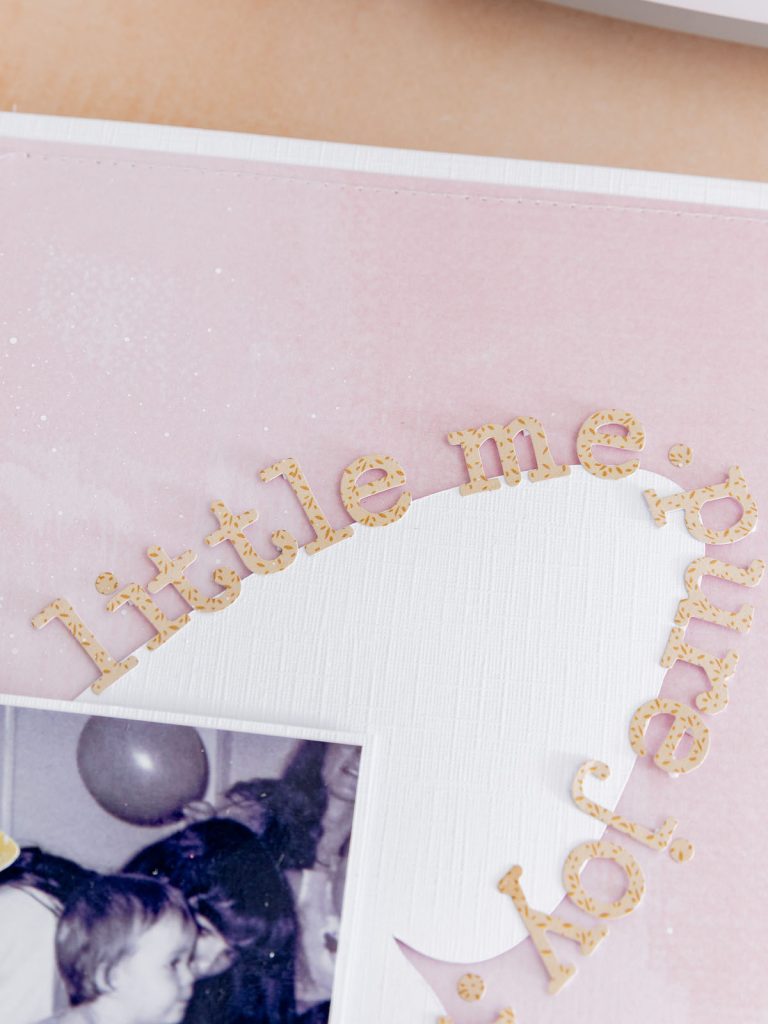
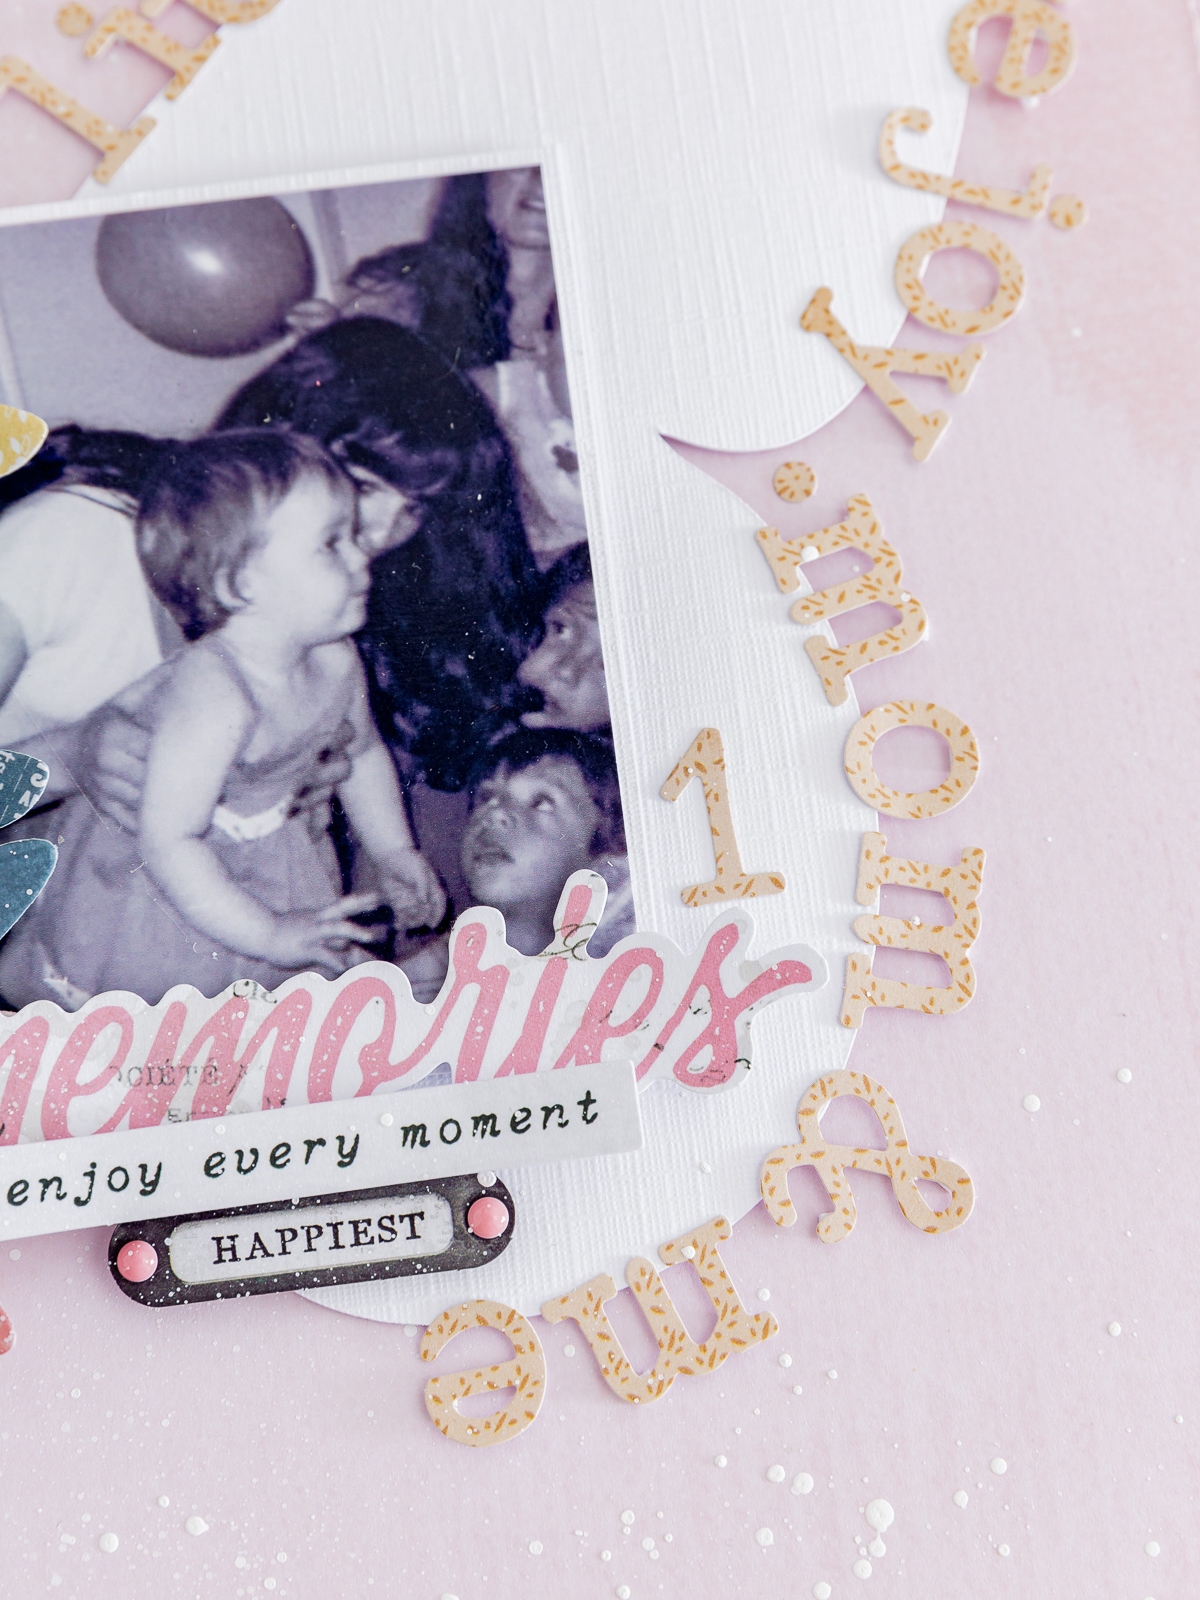
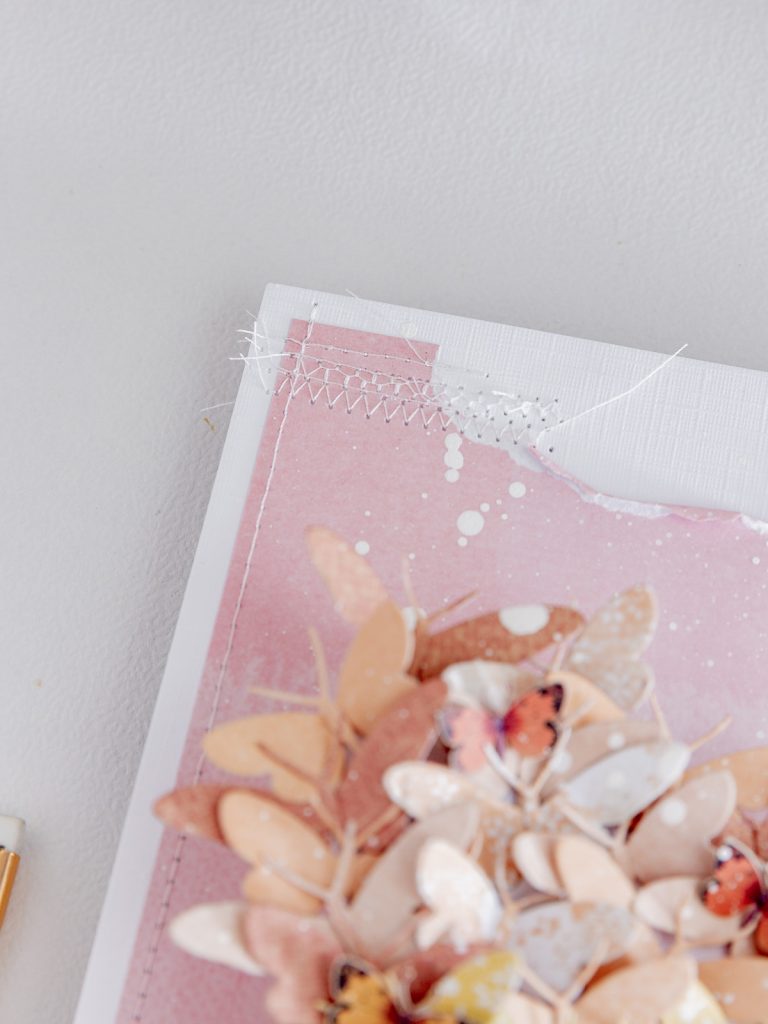
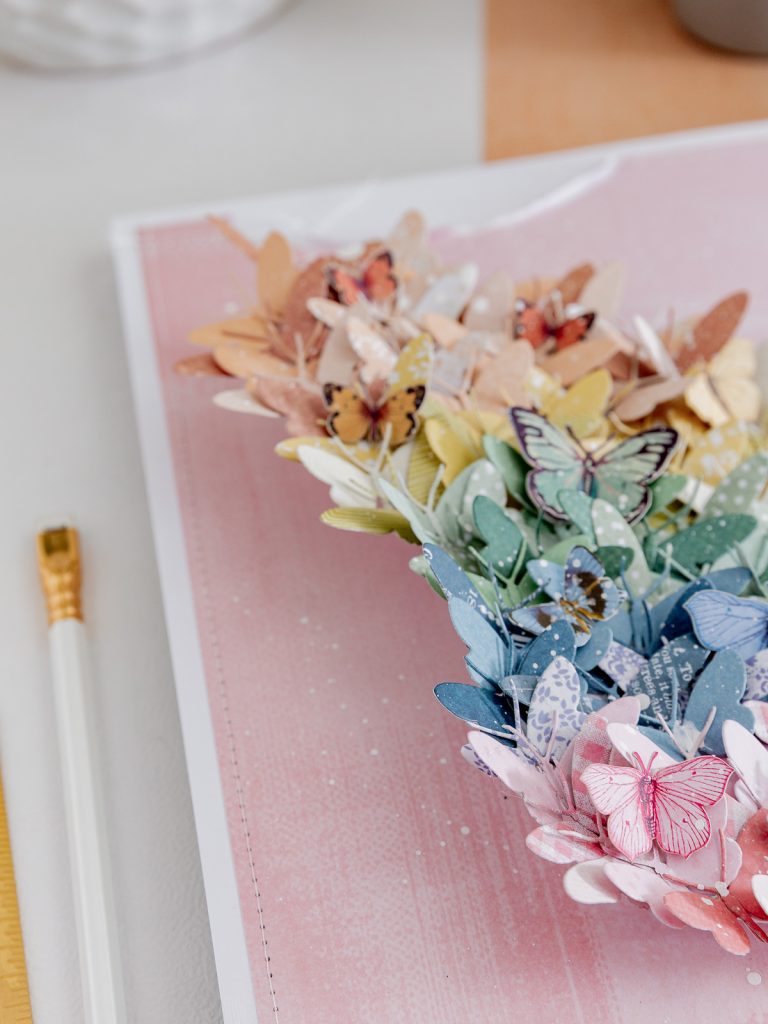
Some memories do not need a big speech to feel enormous—and this one with my mom is exactly that. For Forever Sweet Memories, I wanted the page to feel like a soft hug: light, delicate, and full of color without being loud. I cut a large white butterfly base with my Cricut Explore 4, then filled it with a flutter of tiny rainbow die-cut butterflies to bring that “everything is brighter when you are loved” feeling. To build the background and layers, I mixed Field Notes, Laurel Grove, and Page Starters from Arden Creative Studio, keeping the patterns calm and intentional so the photo stays front and center—because the real masterpiece here is the memory.

For today’s layout, I used:

*** Complete Product list – HERE ***

Let’s create together this Forever Sweet Memories Layout…

Base of the layout:

  • As the base of the layout, I used a sheet of white cardstock from the 12″ × 12″ Bright White pack.
  • I added the pink paper from the Field Notes Solids 12″ × 12″ Paper Pad. From this pink paper, we will trim 1/2″ total from the sides.
  • Adhere the colored cardstock flat onto the white cardstock (leave the top left corner unglued).
  • You can cut the butterfly base with an electronic cutting machine, like I did here, or you can also cut it by hand. My piece measures 10″ wide × 7″ tall. I cut it from the same white cardstock mentioned above. You can find the design in my Cricut Design Space profile: HERE.
  • Gently tear the top left corner of the pink cardstock, just a little. Then stitch around the torn edges to add a beautiful textured detail. You can do this with a sewing machine or by hand.
  • Prepare a white cardstock mat for the photo. I am using a photo that measures 2 3/4″ wide × 3 3/4″ tall, so my mat will be 1/8″ larger on each side.
  • Make a small white cardstock tube that we will place under the wing that will hold the colorful butterflies. You can use a pencil to shape it.
  • Take the butterfly and a scoring board. We need to score the folds along the butterfly’s body.
  • Next, add 3D foam tape to the side where the photo will go, meaning the front/right side. Also add foam tape under the butterfly’s body.
  • Place the cardstock tube under the left wing.
  • Adhere the butterfly in the center of the layout.

Decorative details:

  • Choose the papers to build a beautiful color palette for the butterflies.
  • Die cut the butterflies and their bodies in the same colors, then assemble them.
  • The color order (from bottom to top) is: pink, light blue/blue, green, yellow, and orange.
  • Start by adhering the pink butterflies. Always attach them with dimension and follow the color order mentioned above. This way, you will create a rainbow with all of them.
  • Keep in mind that shaping the butterfly wings and adhering them with dimension makes a big difference. In my case, I used hot glue to make the process faster.
  • Continue color by color until all the butterflies are adhered.
  • Once you are done, add the main word or phrase. Then use sticker alphabet letters to place small phrases around the butterfly wing.
  • Add a secondary phrase and word, finishing it off with a few enamel dots.
  • Another detail I love adding is a few colorful butterflies from laser-cut packs from different collections. Do not forget to adhere them with dimension.
  • Final touch: white watercolor. Cover the photo and let the watercolor droplets fall into place…

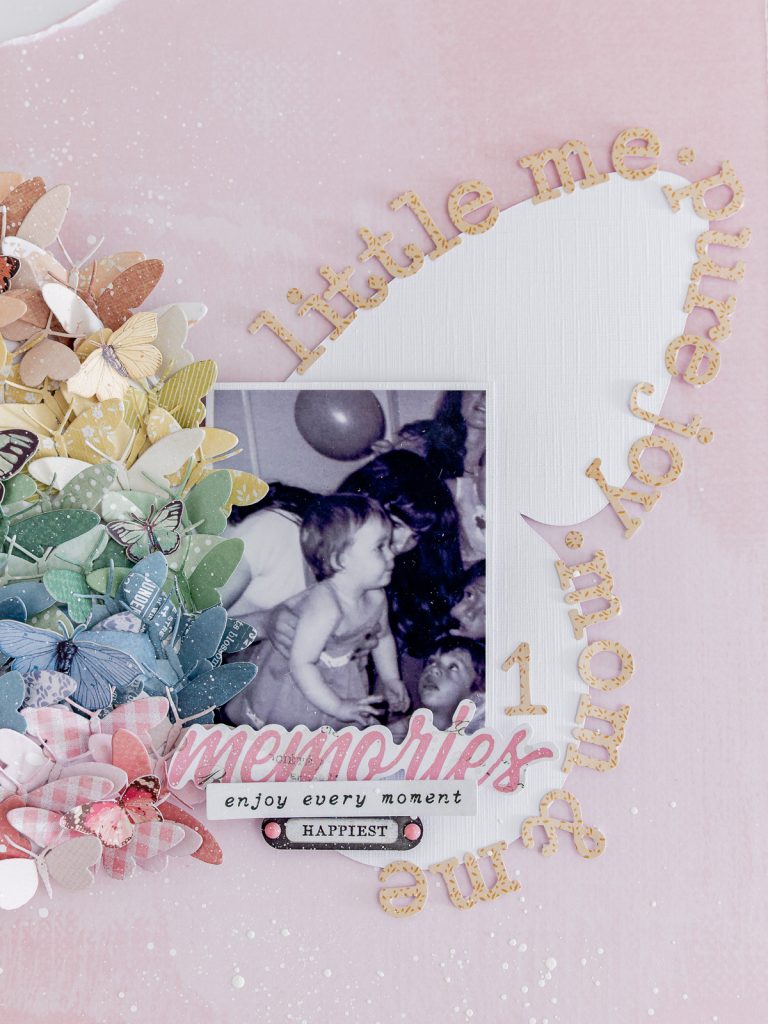
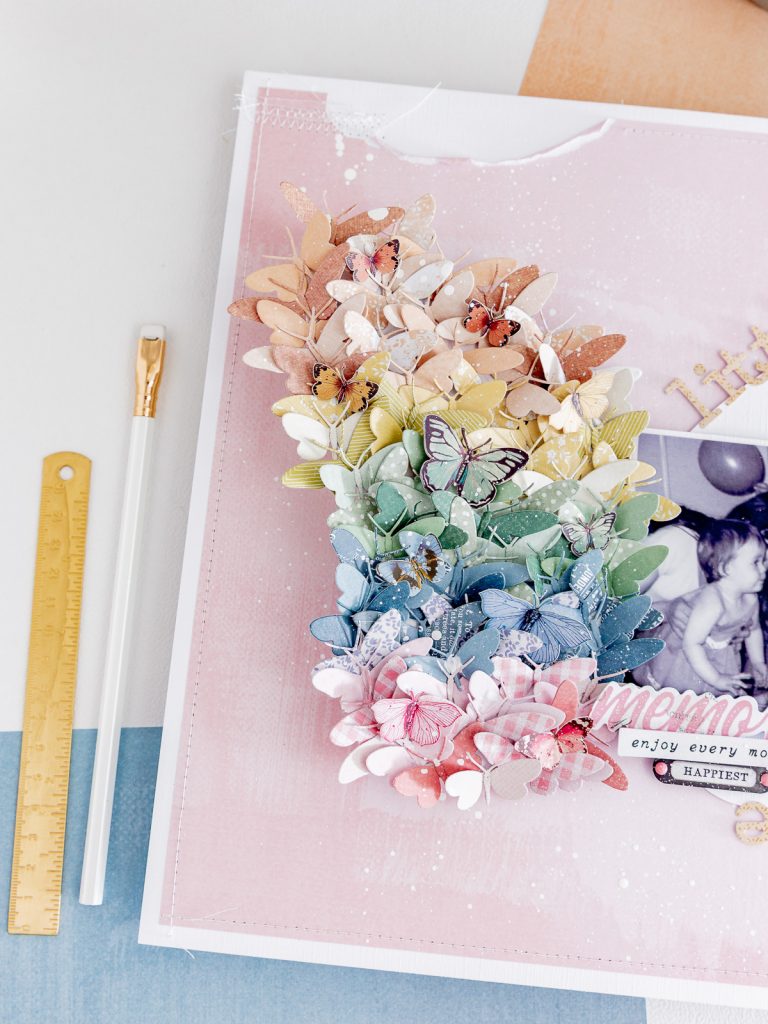
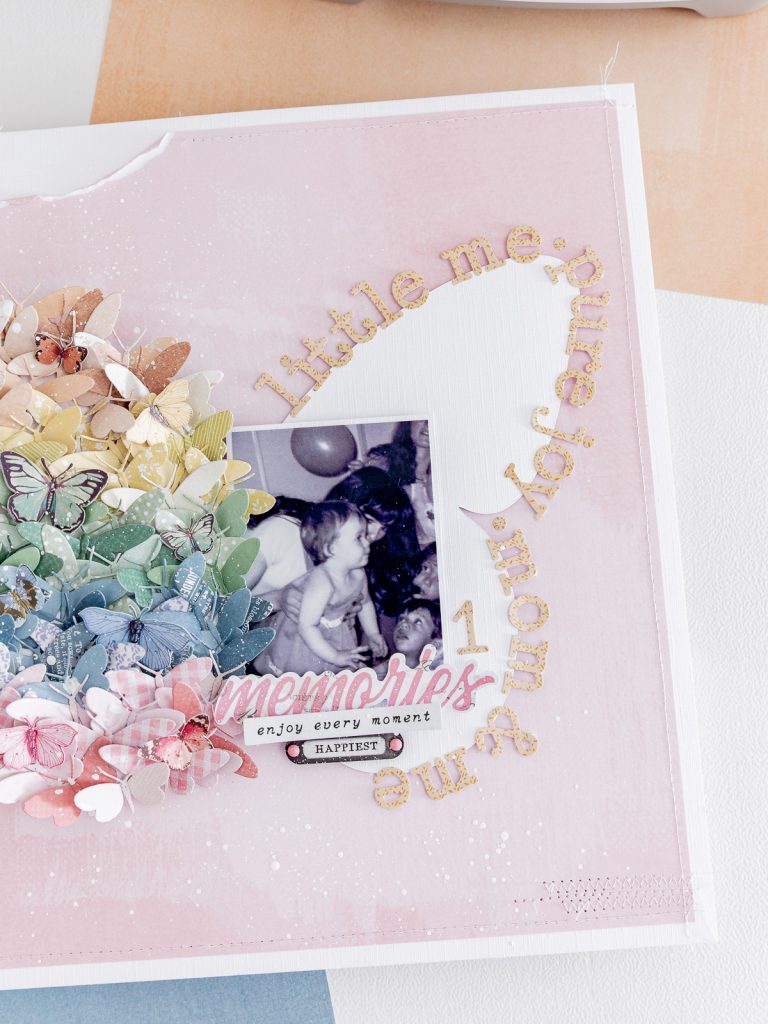
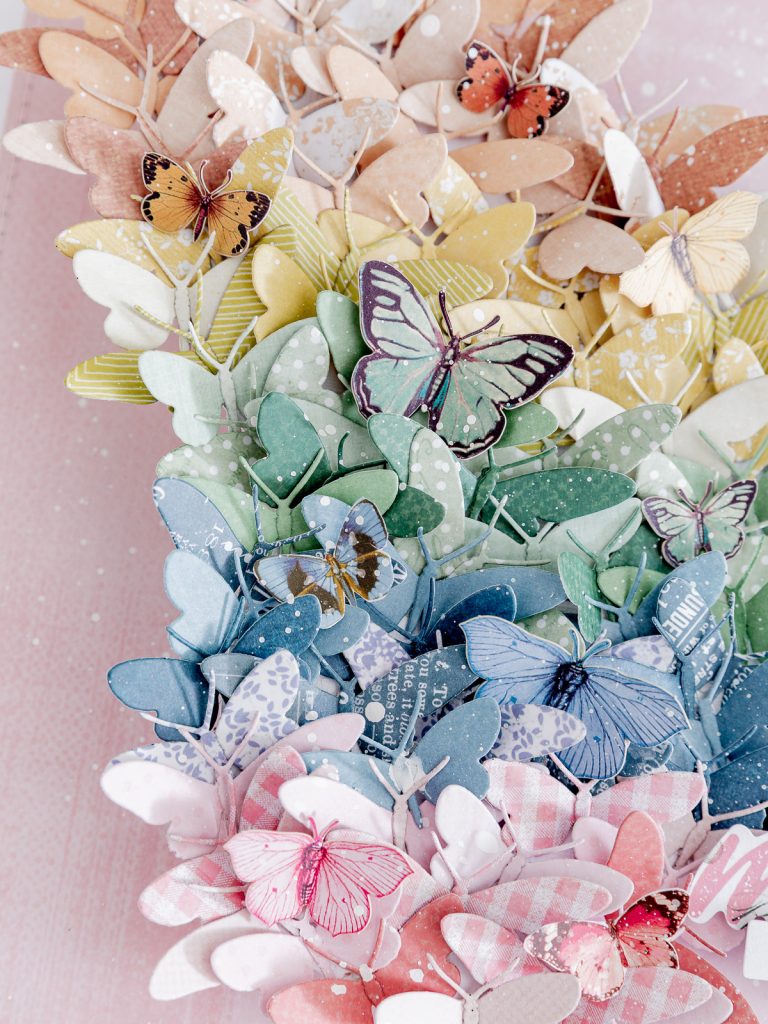
And we are finished! I absolutely love how this butterfly-shaped layout turned out—soft, delicate, and full of rainbow movement, with the photo and the memory taking center stage. If you want to recreate it, you can watch the full step-by-step process in my YouTube video, where I share all the details, measurements, and little tips that make the layers and butterflies come to life. Thank you so much for being here and for sharing this sweet project with me—now it is your turn to create your own version and document a memory that deserves to be kept forever.

Step-by-step Tutorial: YouTube Video

Thanks so much for stopping by—see you in the next project!

Affiliate links apply at no extra cost to you. Thanks for your support!

Visual Supplies List

Do you want to see more?

Dejar un comentario

Tu dirección de correo electrónico no será publicada. Los campos obligatorios están marcados con *

guiademanualidades-celes-26

Sobre mí

¡Hola! Soy Celes, el alma creativa tras “Guía de Manualidades”, un mundo de color, arcoíris y confeti. Gracias por estar por aquí y por permitirme compartir contigo todo aquello que me gusta y me apasiona hacer. Te invito a descubrir un mundo de creatividad infinita y darle vida a aquello que sueñas…

Categorías

Últimos Posts

Favorite Stores

642194553_1348344117326978_2421841545972176486_n
SIMON SAYS STAMP - NEW RELEASE
Simon Logo
SIMON SAYS STAMP STORE
SBCLogo_500x500_3
SBC STORE
I'm and Affiliate
AC - WE R MAKERS STORE
Spell1-1
SPELLBINDERS STORE
logosshareasale1
ACOT STORE
EMDBanner
EMILY MOORE DESIGNS STORE
xr:d:DAFcCnxOnG8:10,j:47979962386,t:23030215
SIZZIX STORE
Captura de Pantalla 2025-01-14 a la(s) 17.11.36
CATHERINE POOLER STORE

Sígueme

Compartir:

Newsletter

SUMATE A NUESTRA COMUNIDAD