
Hello, crafty friends! I’m so happy to be back with a brand-new project that’s full of color, joy, and creative possibilities!
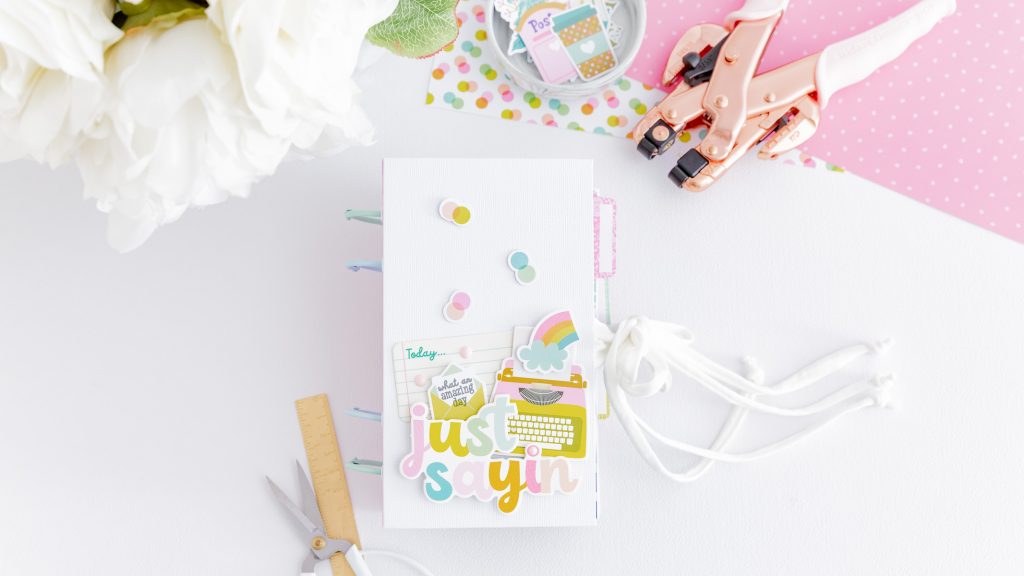
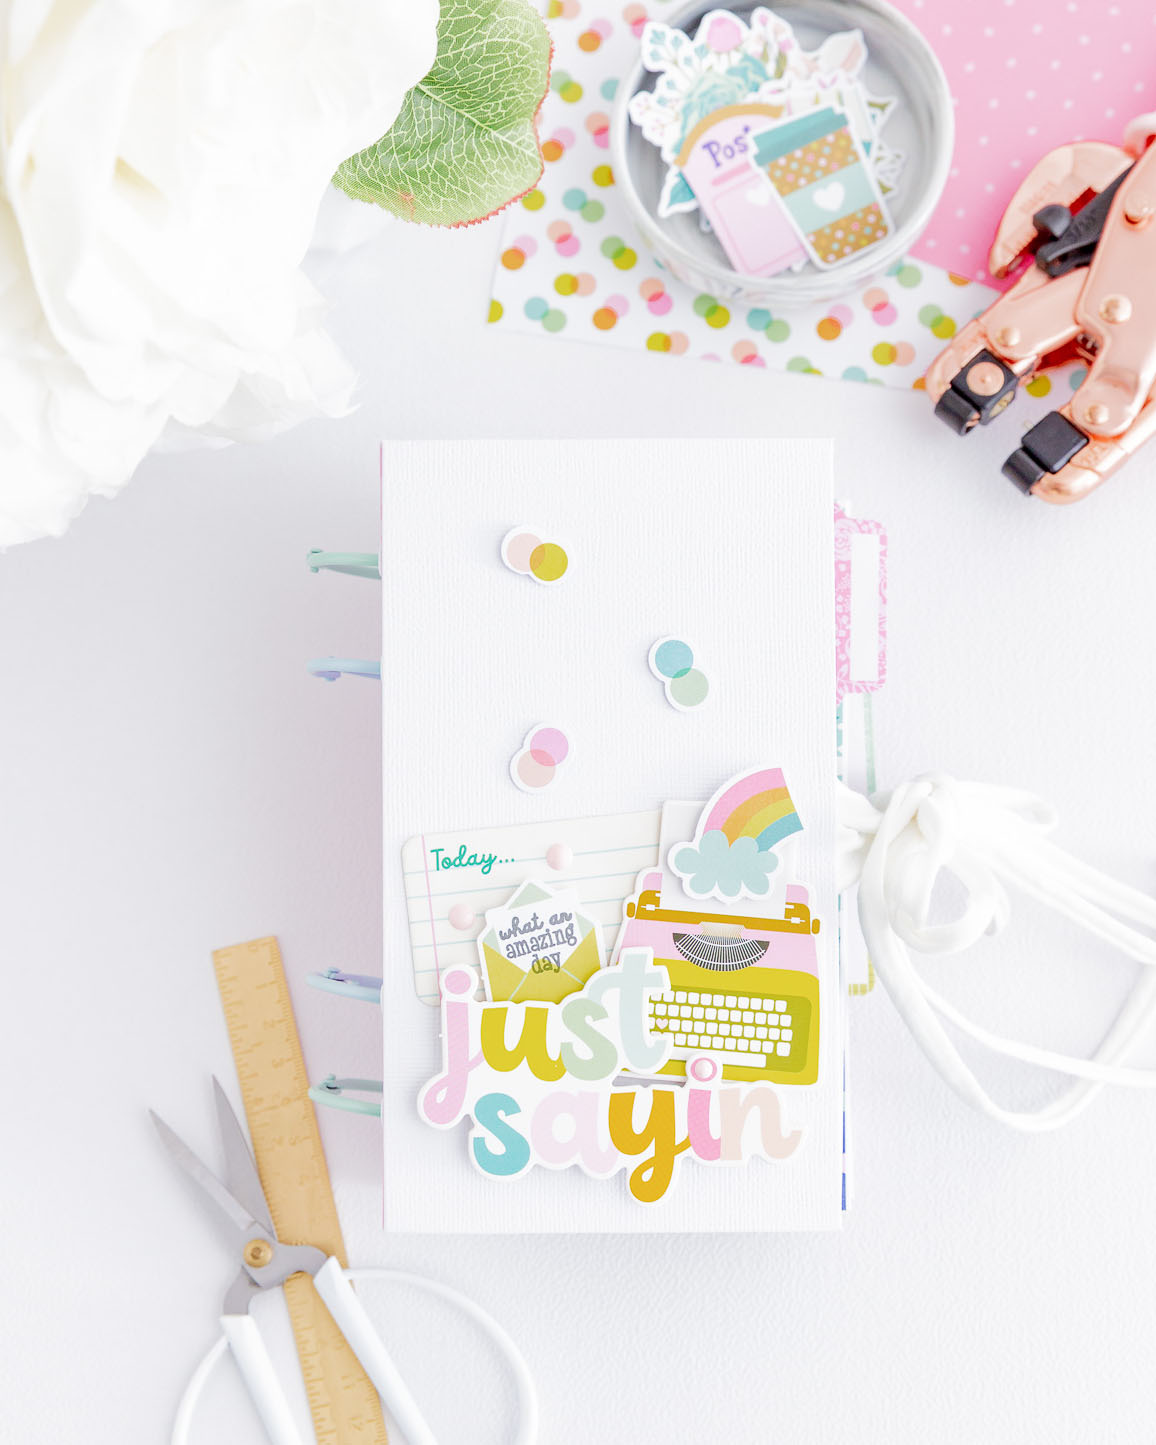
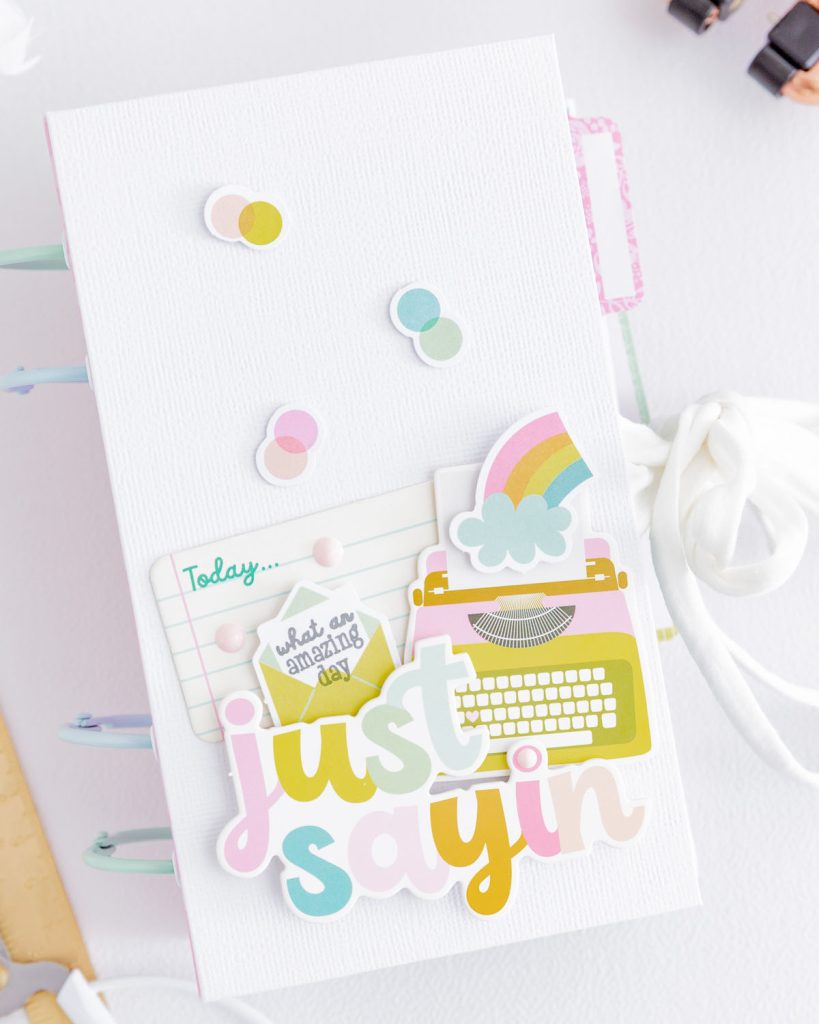
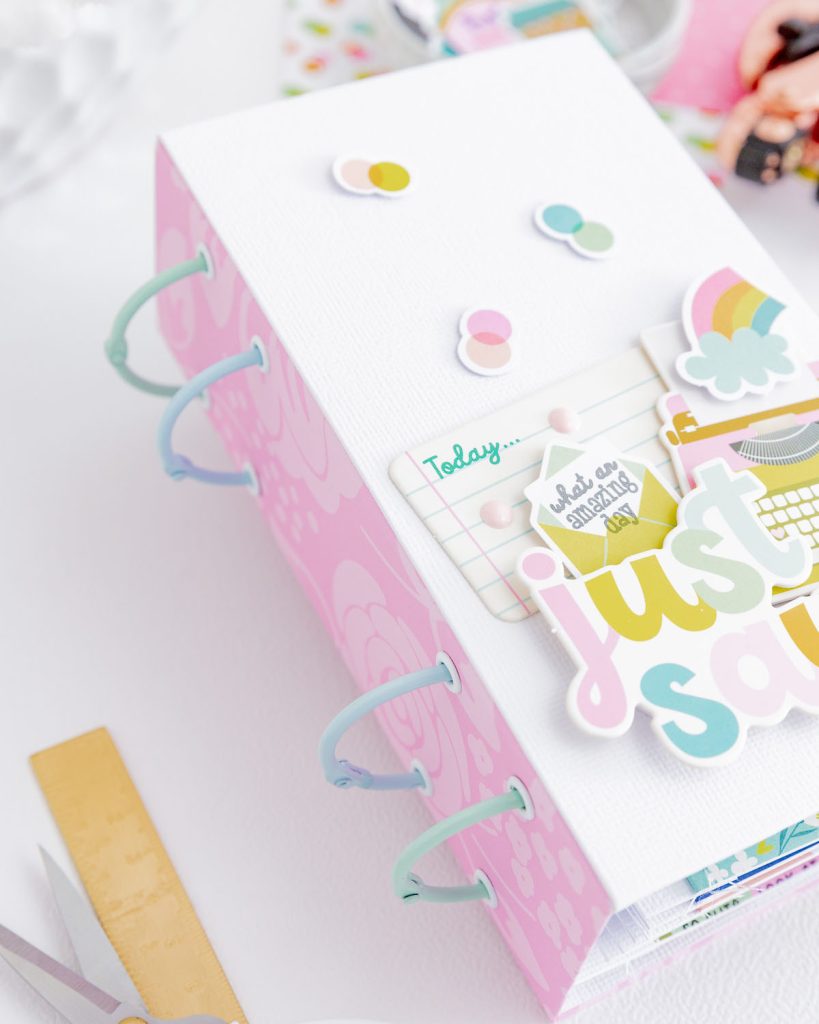
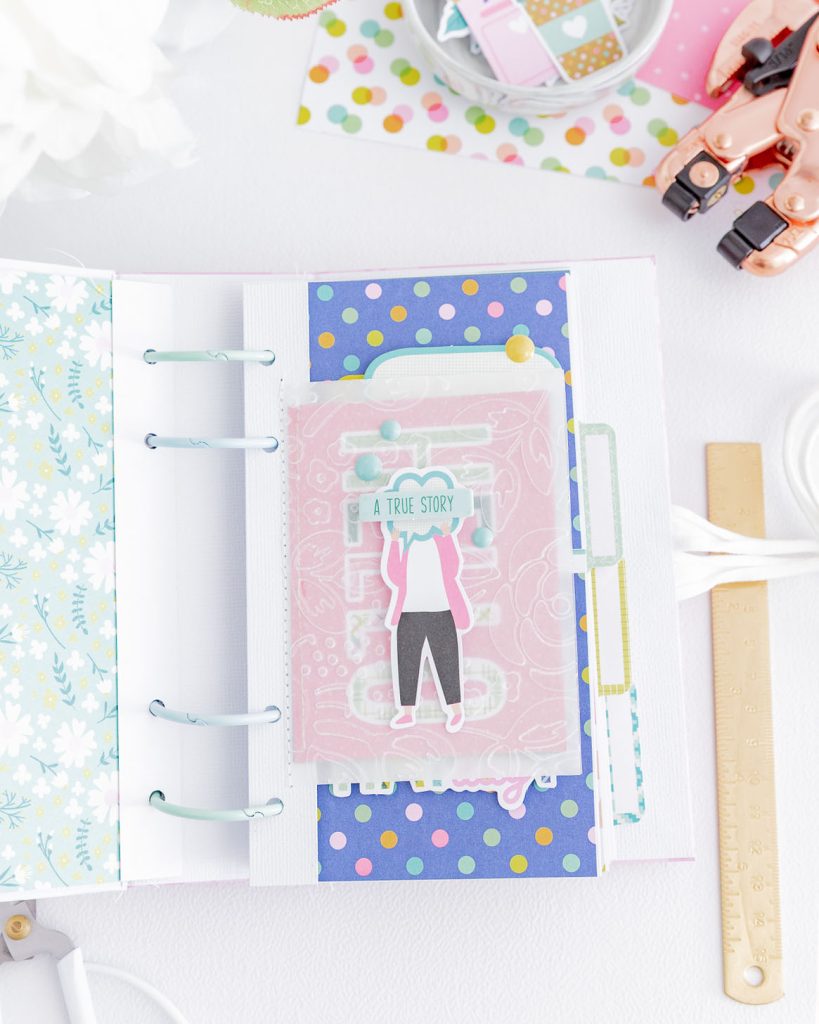
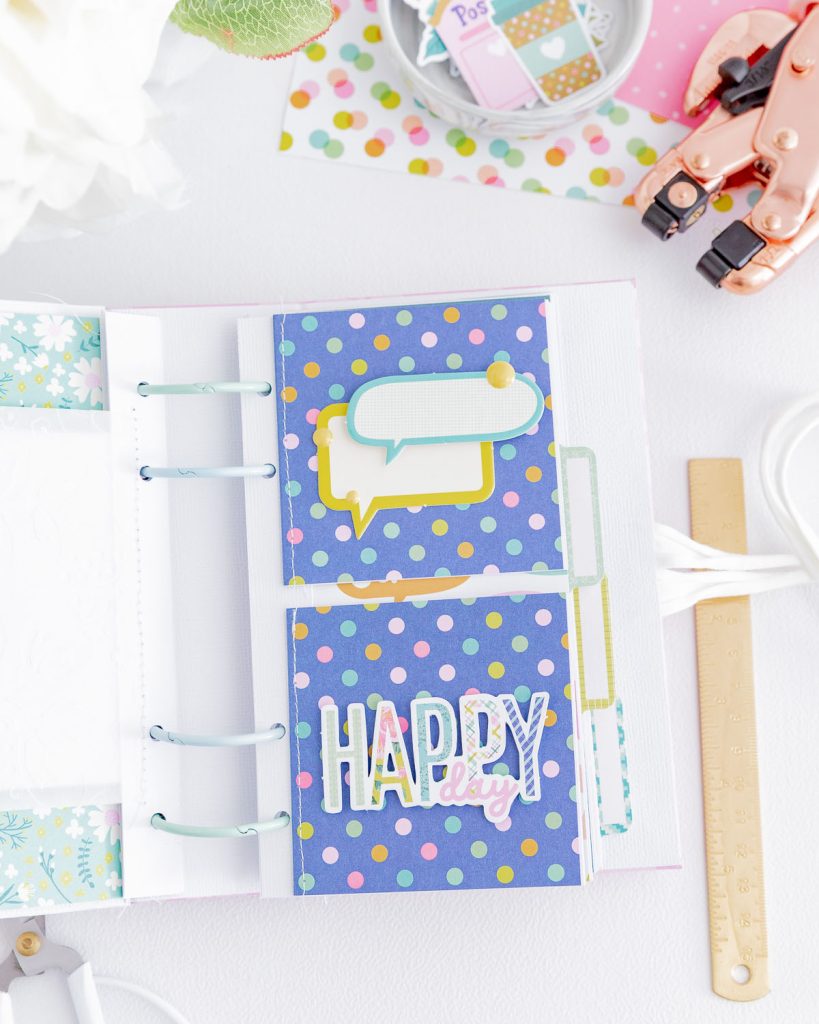
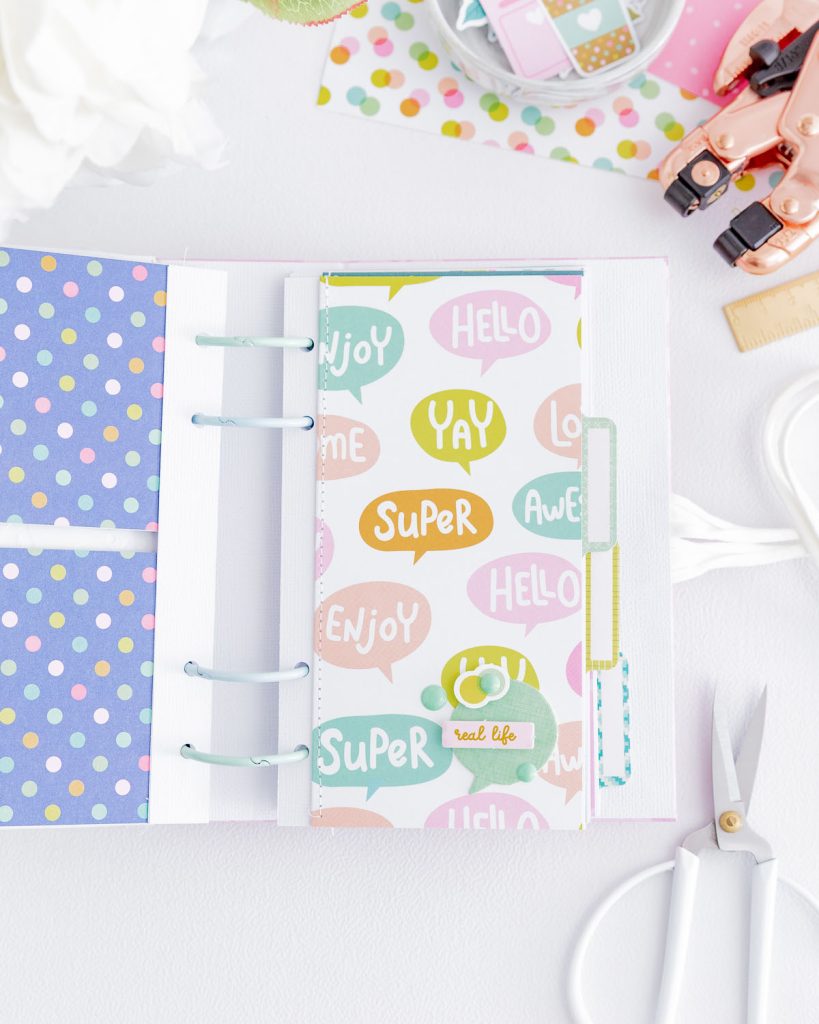
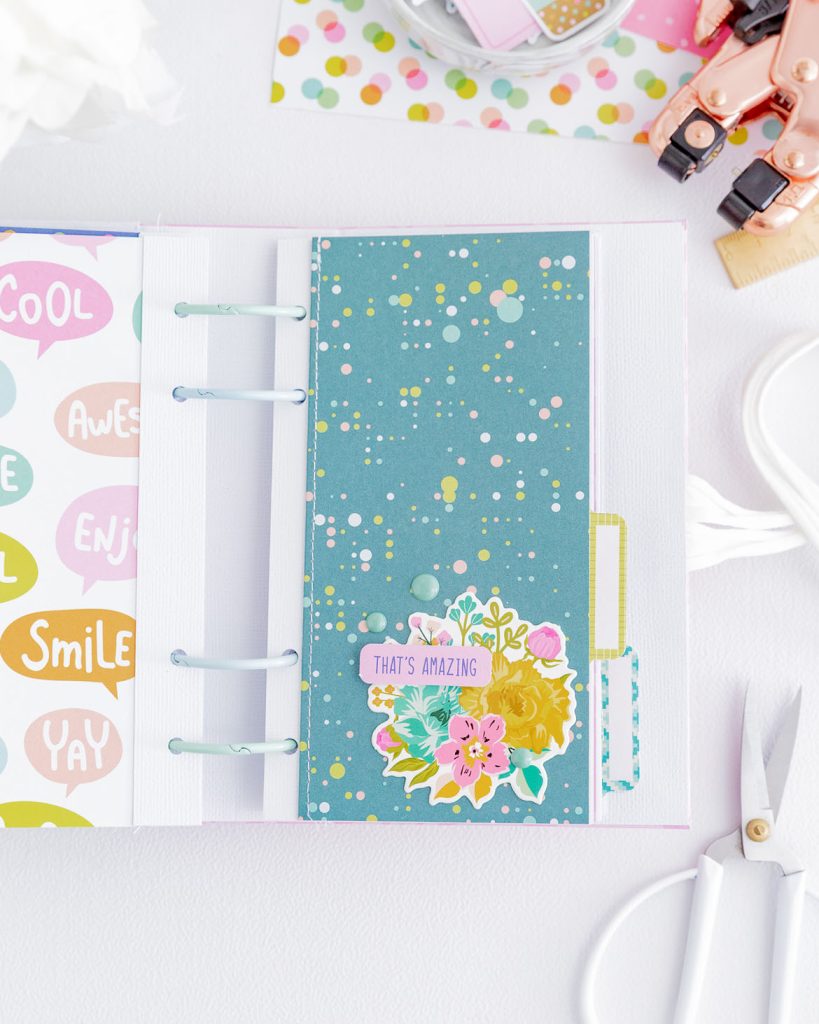
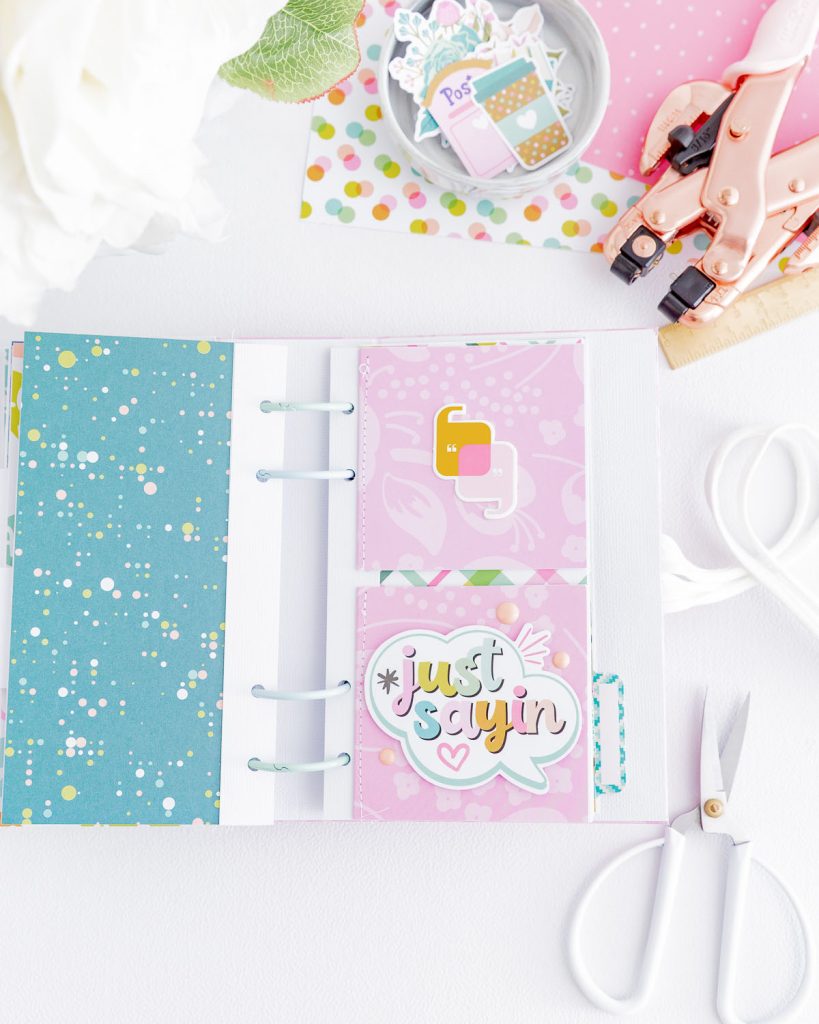
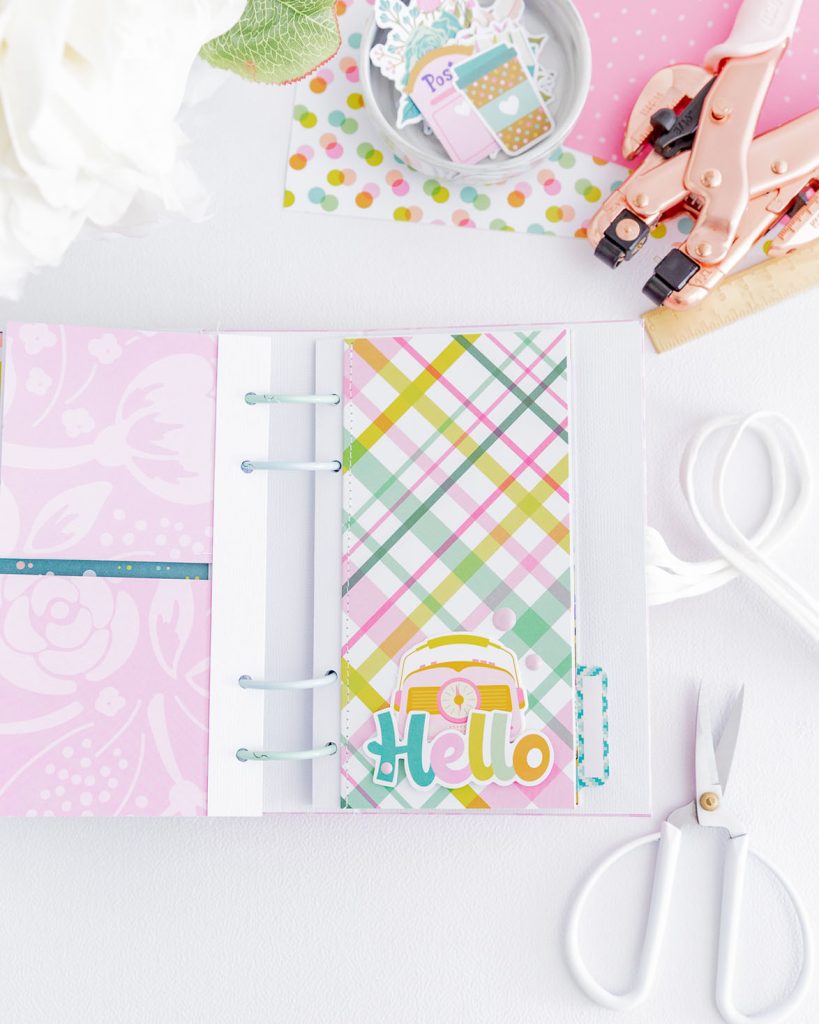
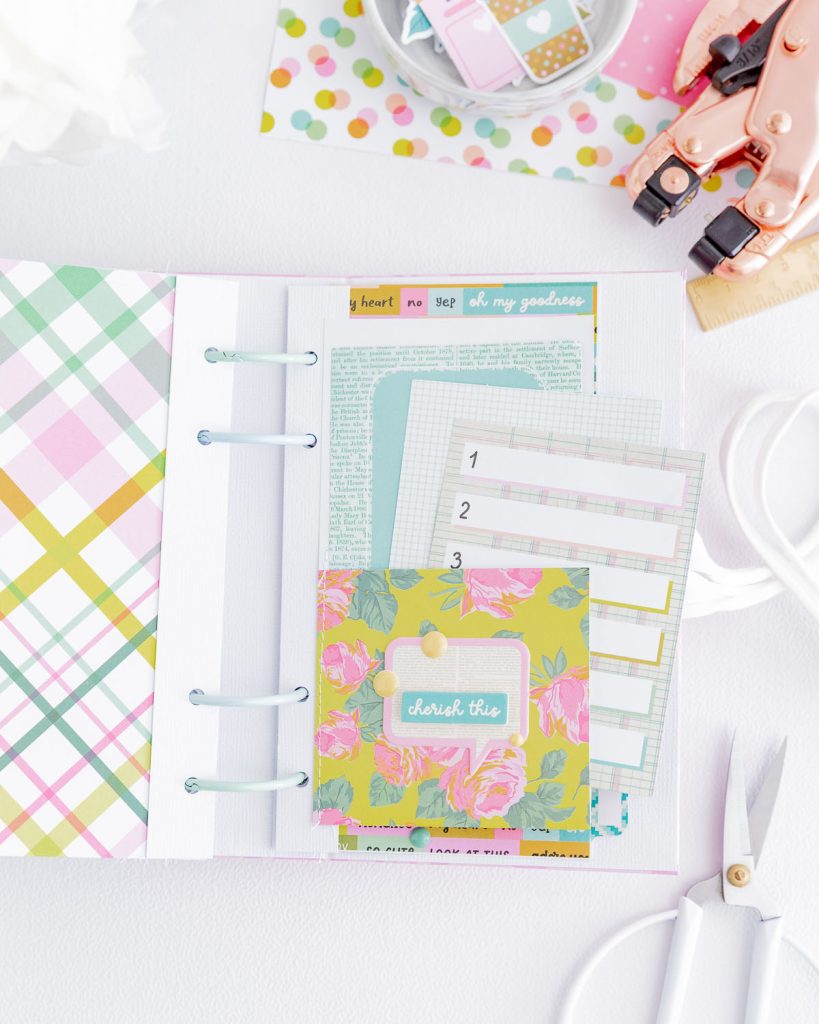
Today I’m sharing a fun and playful mini album made with the gorgeous Just Sayin’ collection by Kelly Bangs for Spellbinders. As soon as I saw this collection, I knew I wanted to create something that would reflect its cheerful vibe and storytelling elements. And what better way to do that than with a mini album bound with metal book rings?

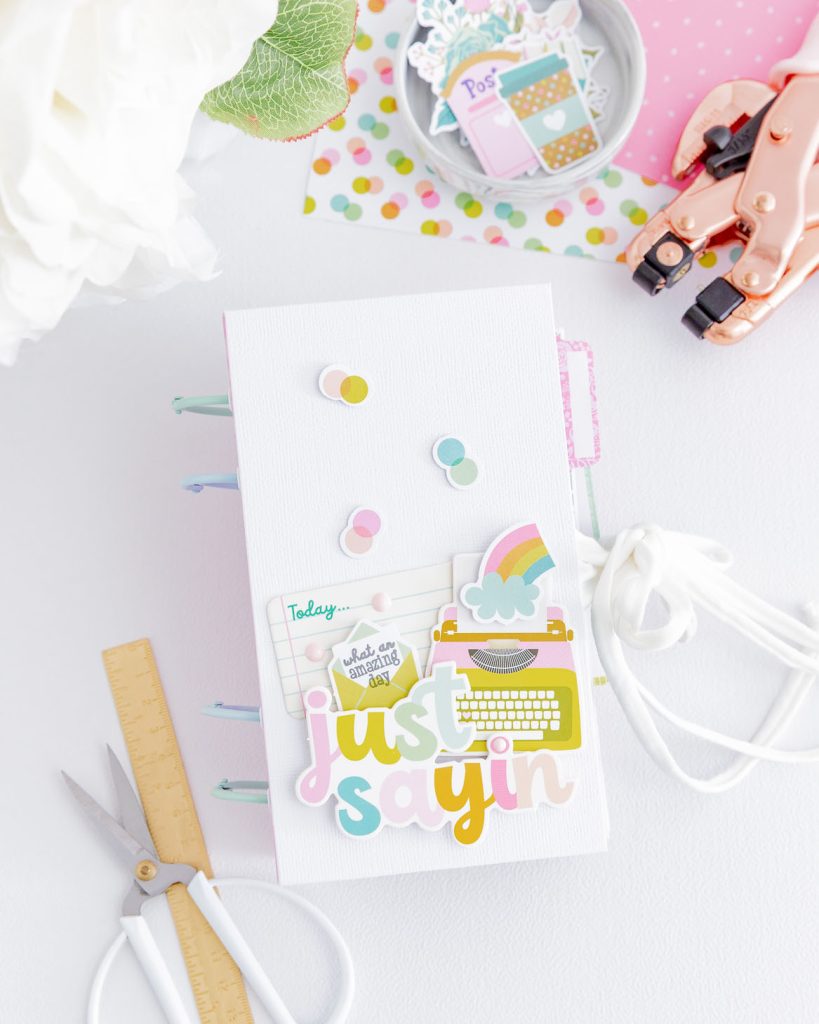
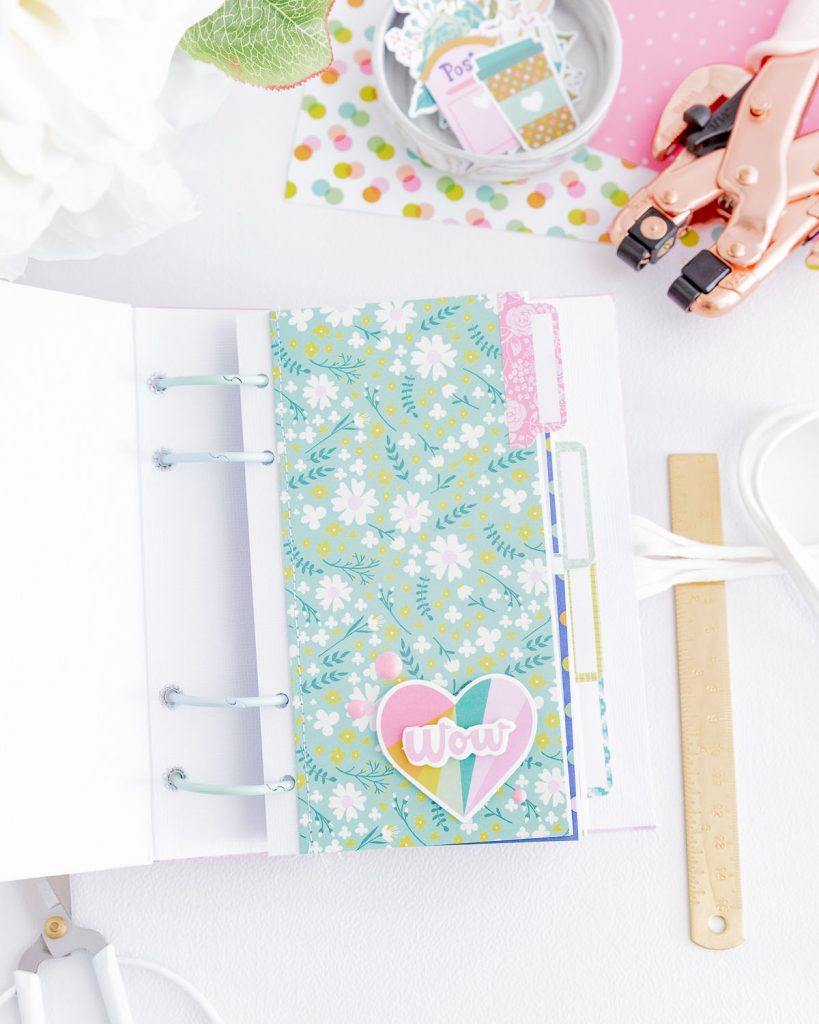
This project is a celebration of everyday moments, bright colors, and meaningful little details — perfect for documenting your favorite photos, journaling, and adding your personal touch. Let’s take a closer look at the structure and all the fun embellishments I used to bring it to life!
For today’s mini album, I used:
- JUST SAYIN’ 12″” X 12″” PRINTED PAPER PACK
- JUST SAYIN’ WRITABLE DIE CUTS
- JUST SAYIN’ CHIPBOARD DIE CUTS
- JUST SAYIN’ DIE CUTS
- JUST SAYIN’ STICKER PACK
- SPEECH BUBBLES SENTIMENTS CLEAR STAMP
- 12″ Paper Trimmer & Scorer
- Pro Shears – 9 Inch
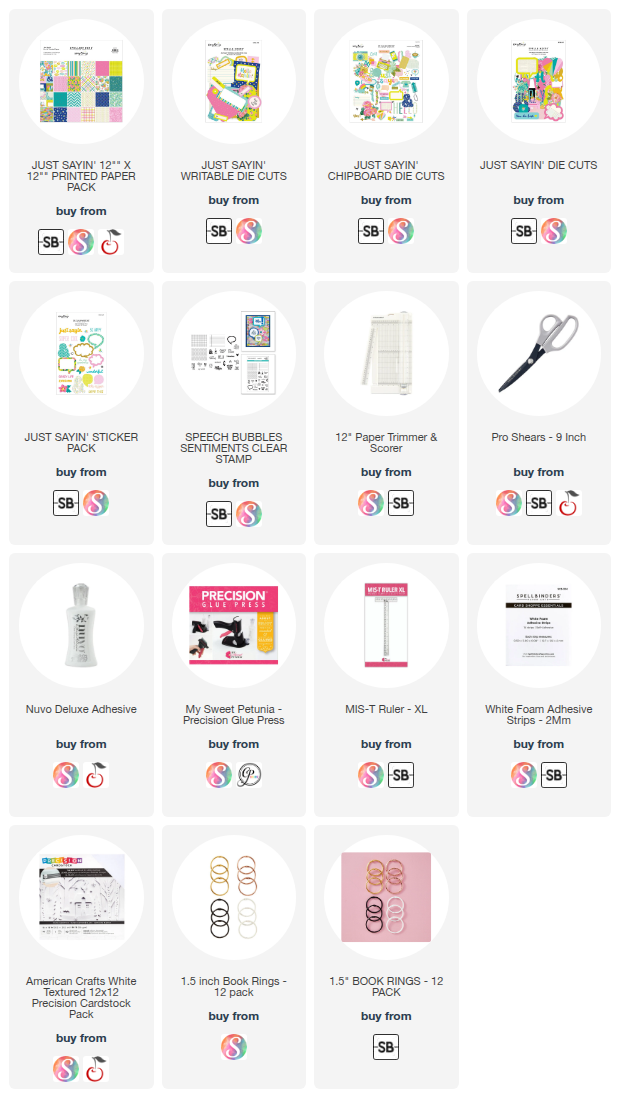
*** Complete Product list – HERE ***

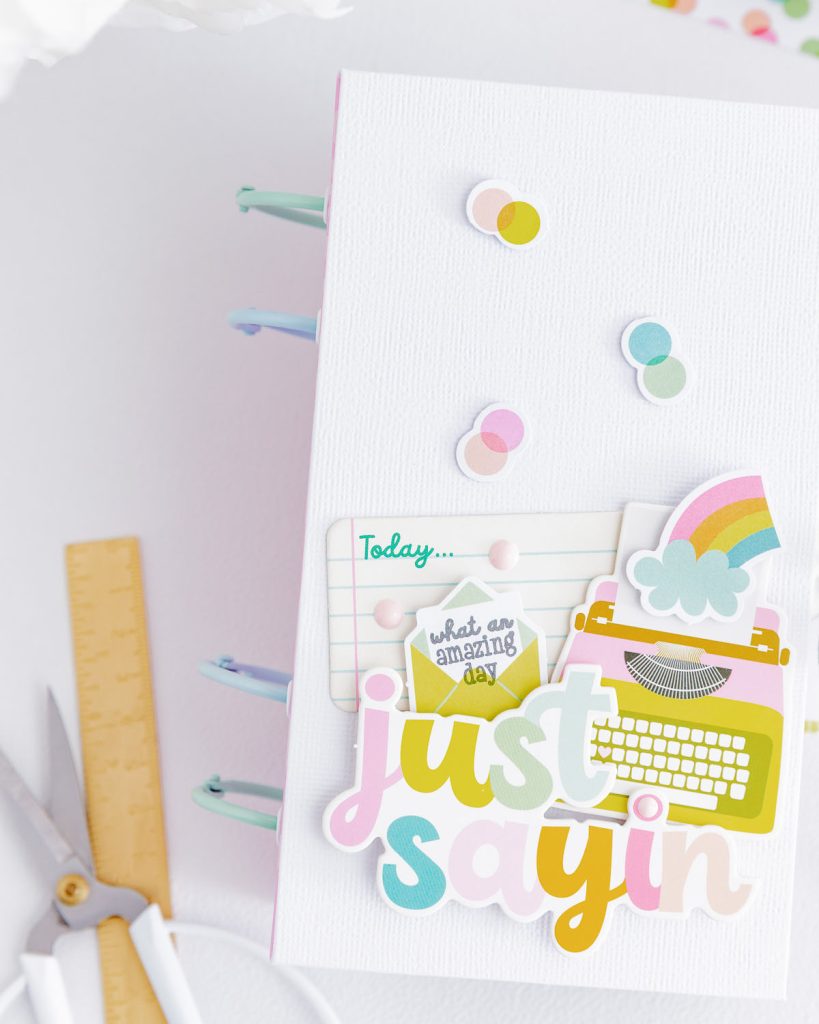
Mini Album Structure and Cover:
- Cut three pieces of chipboard. You can use grey chipboard or the white chipboard. In my case, I used the white chipboard from Spellbinders. The pieces to cut are: a) 2 pieces measuring 4” wide x 7” tall, b) 1 piece measuring 2 1/4” wide x 7” tall
- Cover the back cover along with the spine using a patterned or colored paper. You should leave a 1” flap to attach the resulting piece to the front cover.
- Make the holes for the rings in the spine before covering the inside. Here’s how you should do them:
– Bottom holes: Punch at 1” and 2” from the bottom edge (this means they are spaced 1” apart in height). Horizontally, they should be 3/8” from each edge. Do not insert the eyelets yet.
– Top holes: Repeat the same steps as the bottom ones (mirroring the placement). Do not insert the eyelets yet. - Cover the front cover individually with white textured cardstock. Fold and secure all four sides.
- Attach the front cover to the rest of the structure.
- Add a closure ribbon, centered vertically on your mini album.
- Now you can add the paper to cover the inside.
- Once the paper is in place, you can re-punch the holes and insert the eyelets!
- Insert the rings. You’ll notice they can be a bit tricky to handle-this is normal due to the type of binding.


Interior:
- To build the structure of the inner pages, start by cutting 18 paper strips measuring 3/4”wide x 6 3/4” tall. Cut an extra strip to make a hole-punching template. Place this strip centered inside the spine and mark the height of the 4 holes. Then, measure inward (width) and mark the center point to punch at 1/4”. These strips will serve as supports for the pages/- booklets. Glue them in pairs and then punch the holes.
- The interior consists of small booklets made of 1 piece of patterned paper + 2–3 sheets of thinner white paper (intended for journaling and adding photos).
- All pieces should measure 6 1/2” wide x 6 3/4” tall, folded in half at 3 1/4” wide.
- You can create full-sized booklets with the measurements above or cut them in half vertically, ending up with 3 1/4” tall by the same width.
- You can also create pockets, fold-outs, or any interactive elements as long as you respect the maximum width (3 1/4”) and height (6 3/4”).
- Each booklet, pocket, etc. can be glued to the edge of the support strips we created, and you can even add a stitched detail—it looks amazing!
- After that, all that’s left is to decorate and insert your pages.


Flip-Through Reel and YouTube Short
Watch the flip-through video in the IG Reel here!

Thank you so much for being here today. I hope you liked the idea! See you!
Affiliate links apply at no extra cost to you. Thanks for your support!
Visual Supplies List
