Hello Pinkfresh Studio’s fans! Happy Monday! Today is a special day! It’s release day! Thank you for joining me for the new Pinkfresh Studio February 2023 Release Blog Hop! I’m so happy to have the chance to be part of it again and to show you the new products because they are LOVELY! And… there is something new that you are going to LOVE! Yes! To celebrate Pinkfresh Studio’s release, there is a blog hop today. You are about to fall completely in love with it as me! Let’s get started!
¡Hola fans de Pinkfresh Studio! ¡Muy feliz lunes a todos! ¡Hoy es día especial! ¡Es día de lanzamiento ¡Gracias por acompañarme en el nuevo Blog Hop lanzamiento de los «Productos de Febrero 2023» de Pinkfresh Studio! ¡Estoy tan feliz de tener la oportunidad de ser parte de este lanzamiento nuevamente y de mostrarles los nuevos productos porque son ADORABLES! Y… ¡Hay algo nuevo que van a AMAR! ¡Sí! Para celebrar el lanzamiento de Pinkfresh Studio, hoy hay un blog hop. ¡Están a punto de enamorarse como yo! ¡Empecemos!
First of all! If you ended up here from Cathy Zielske’s blog then you are on track. Your next stop is Channin Pelletier’s blog. To start the blog hop from the beginning you can go to Pinkfresh Studio blog. Have fun and discover the beauties that my teammates have made for you for this release!
¡Primero que nada! Si estás aquí desde el blog de Cathy Zielske, entonces estás en el camino correcto. Tu próxima parada es el blog de Channin Pelletier. Si quieres ver el Blog Hop desde el principio, puede ir directamente al blog de Pinkfresh Studio. ¡Diviértete y descubre las bellezas que mis compañeras de equipo han hecho para tí para este lanzamiento!
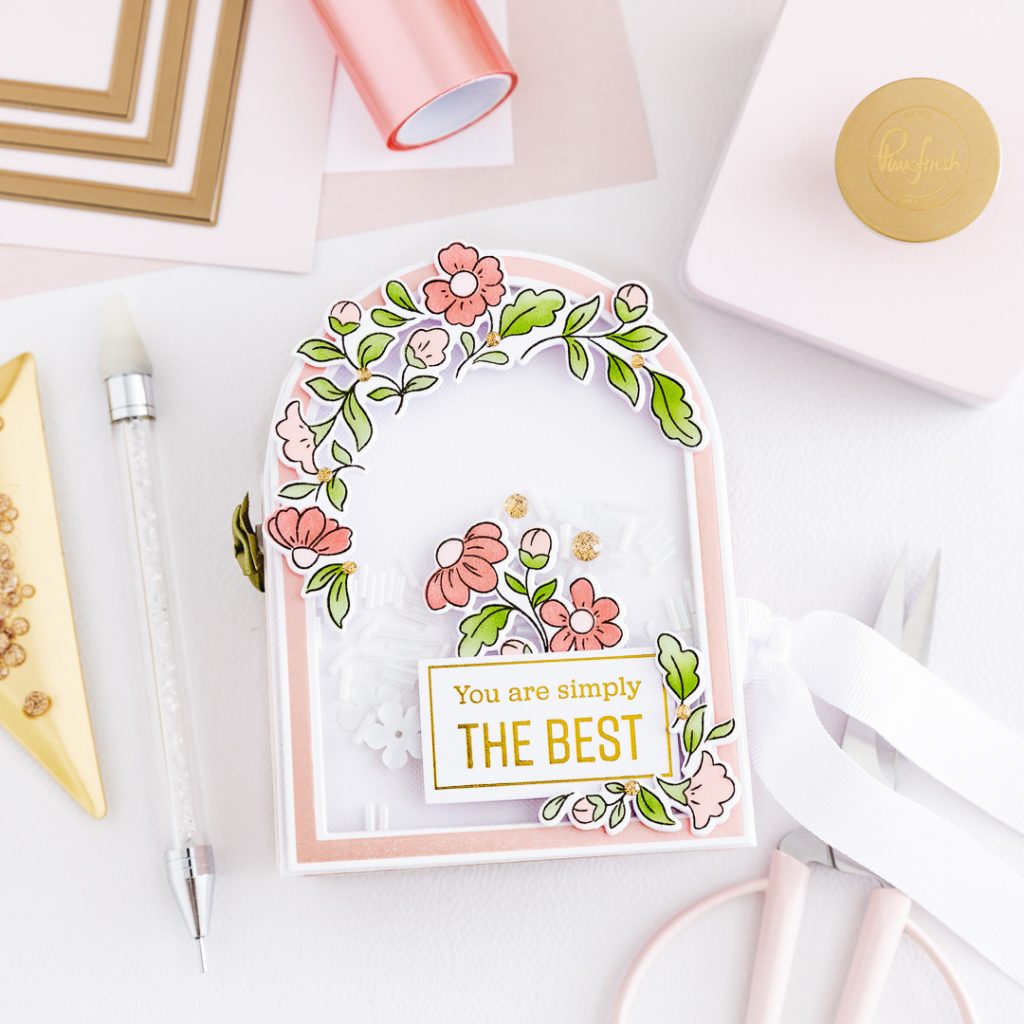
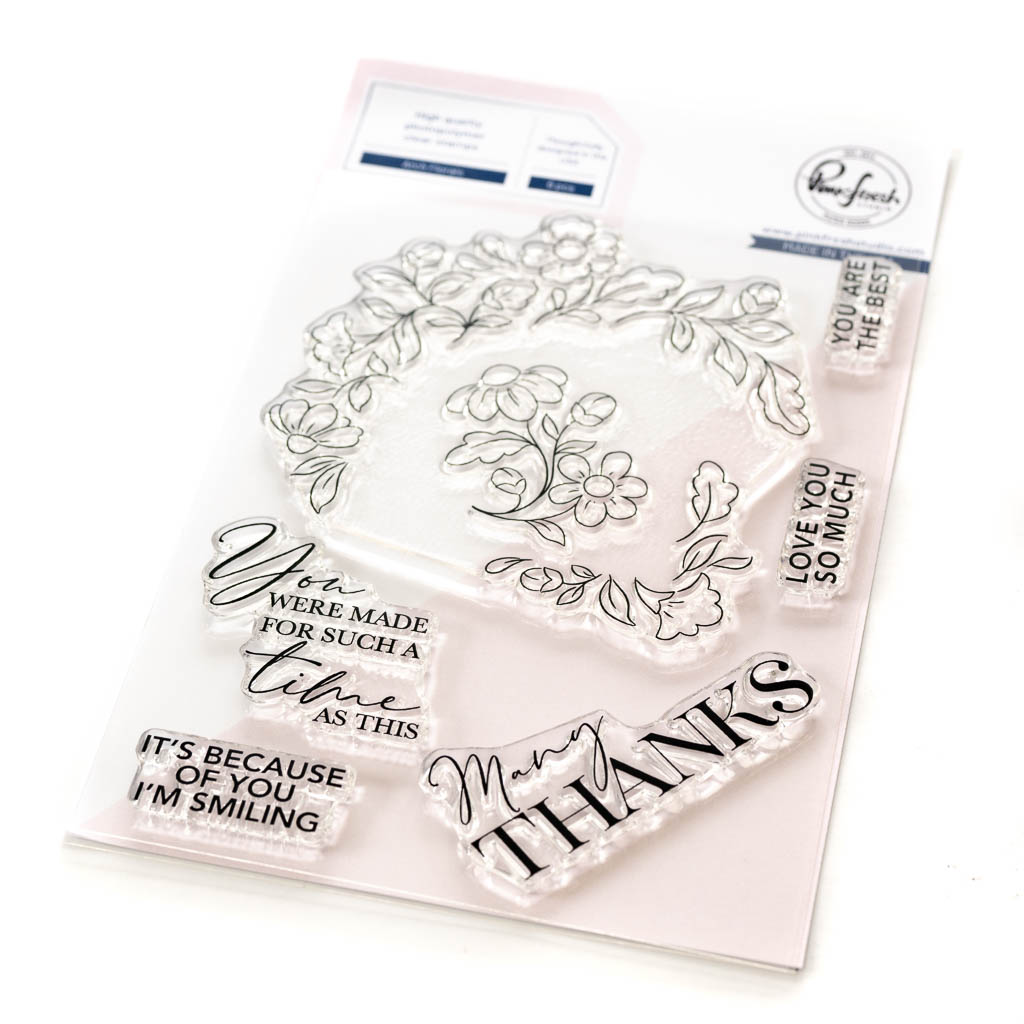
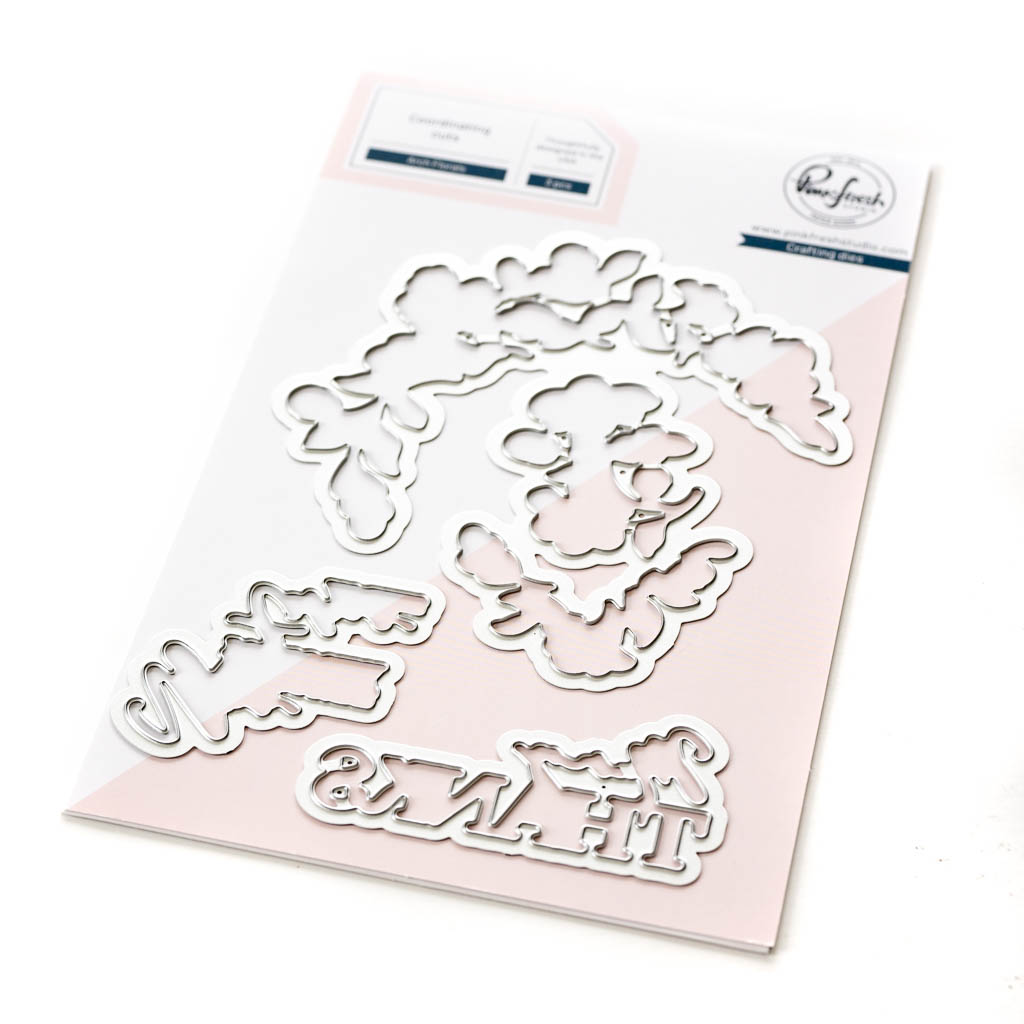
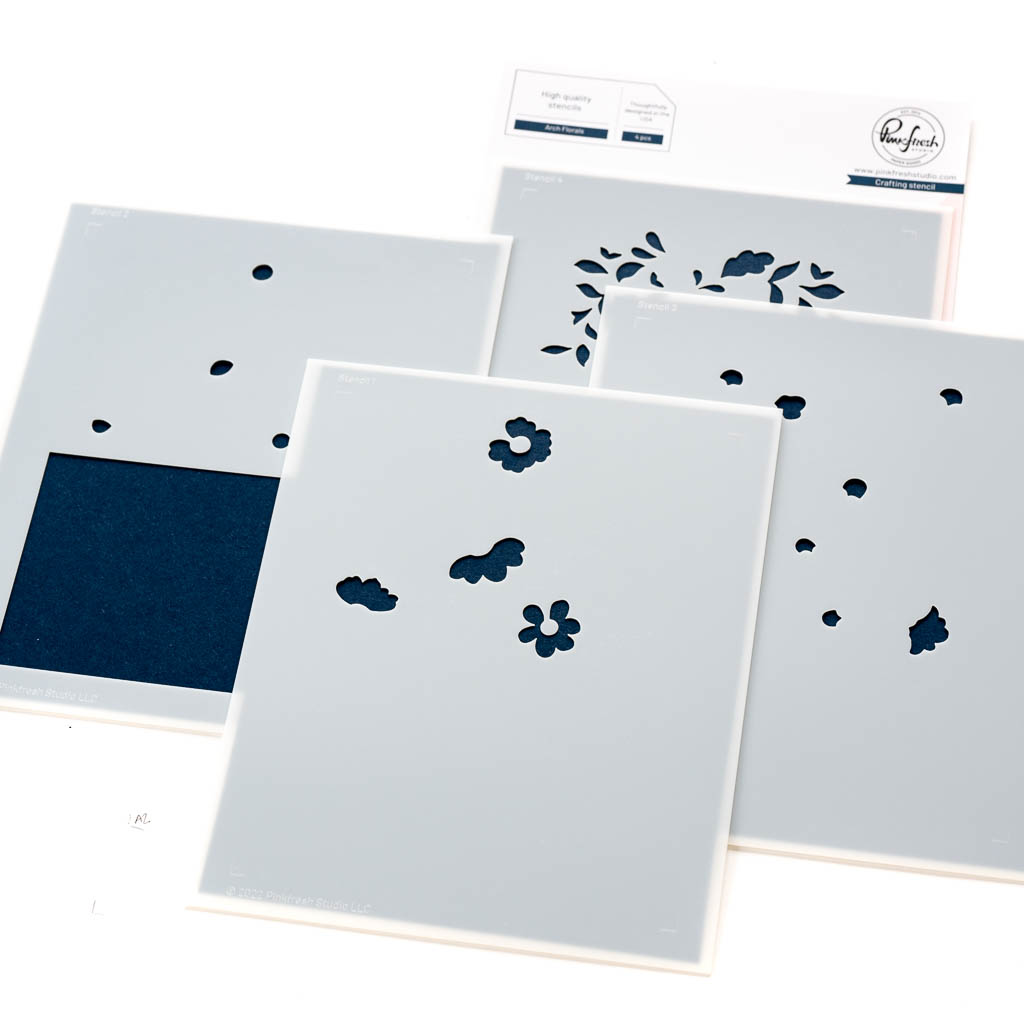
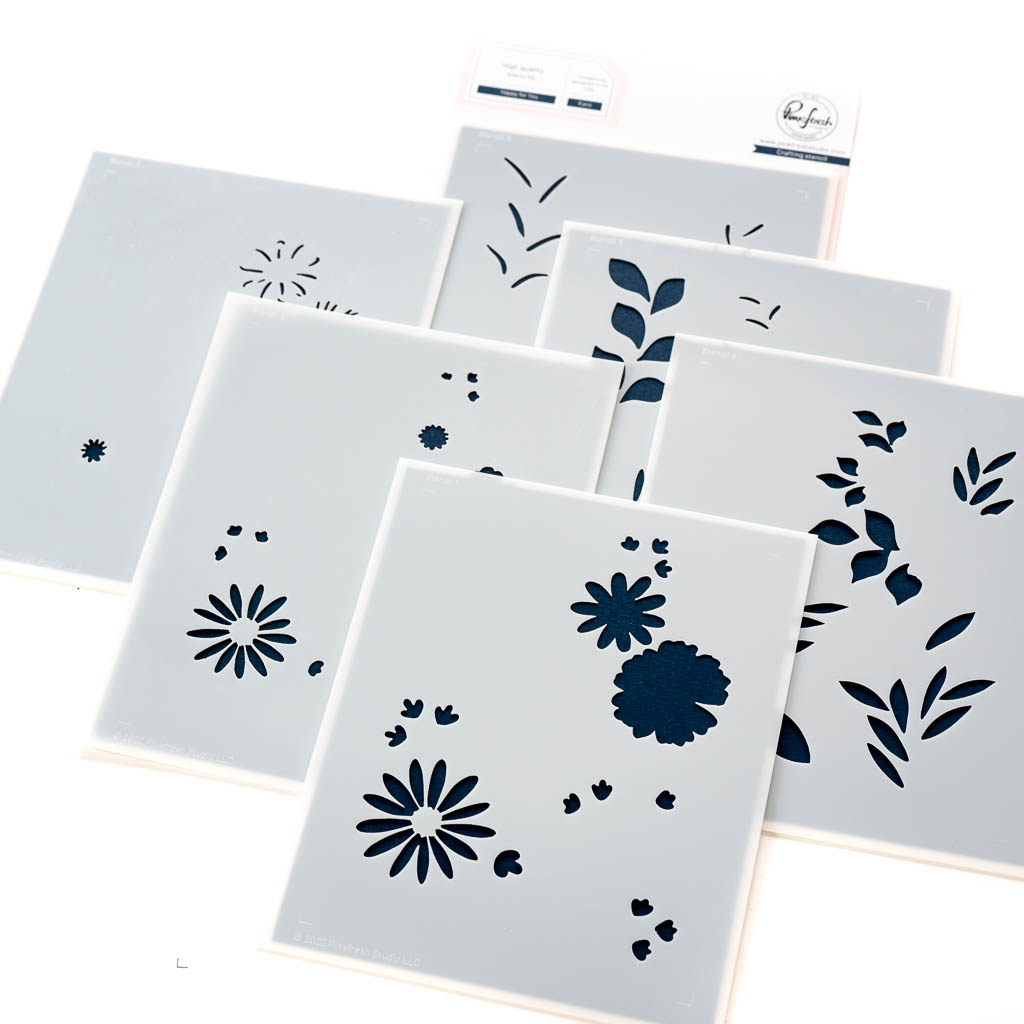
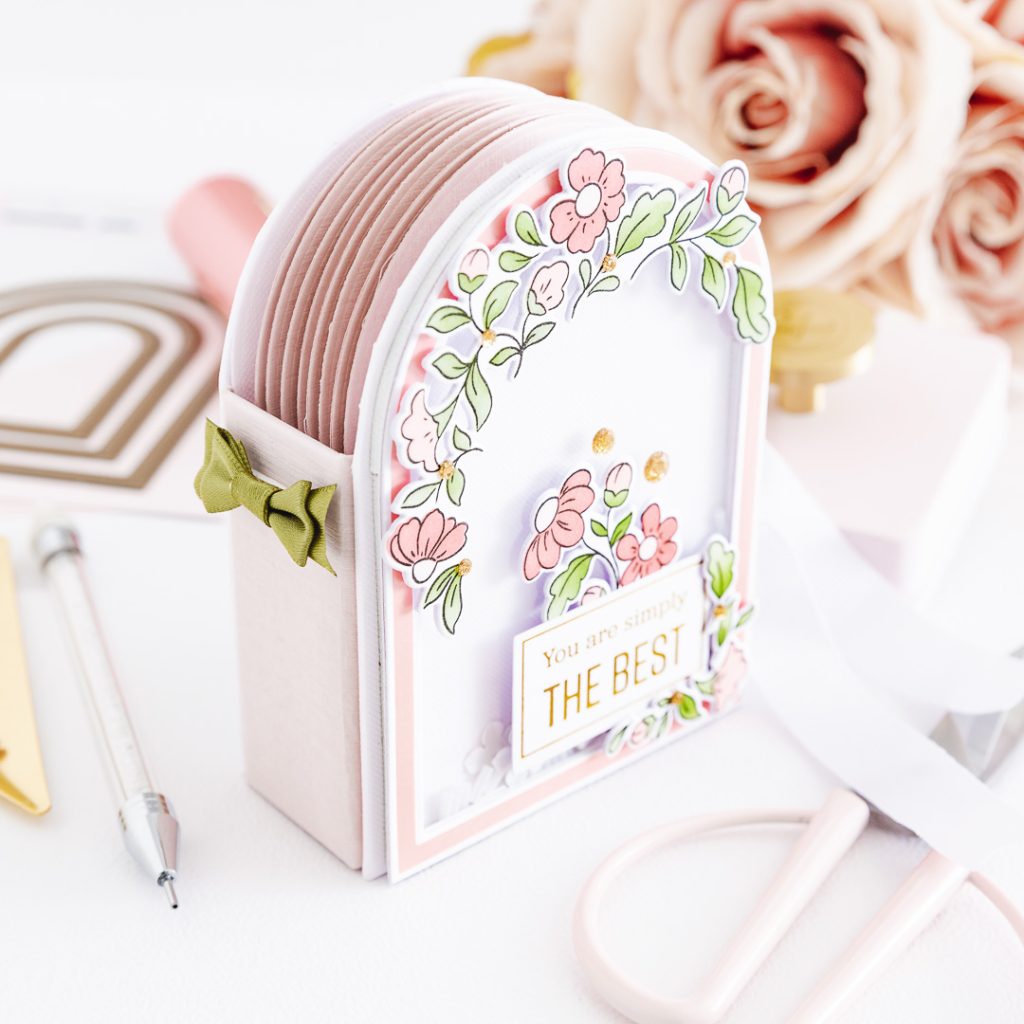
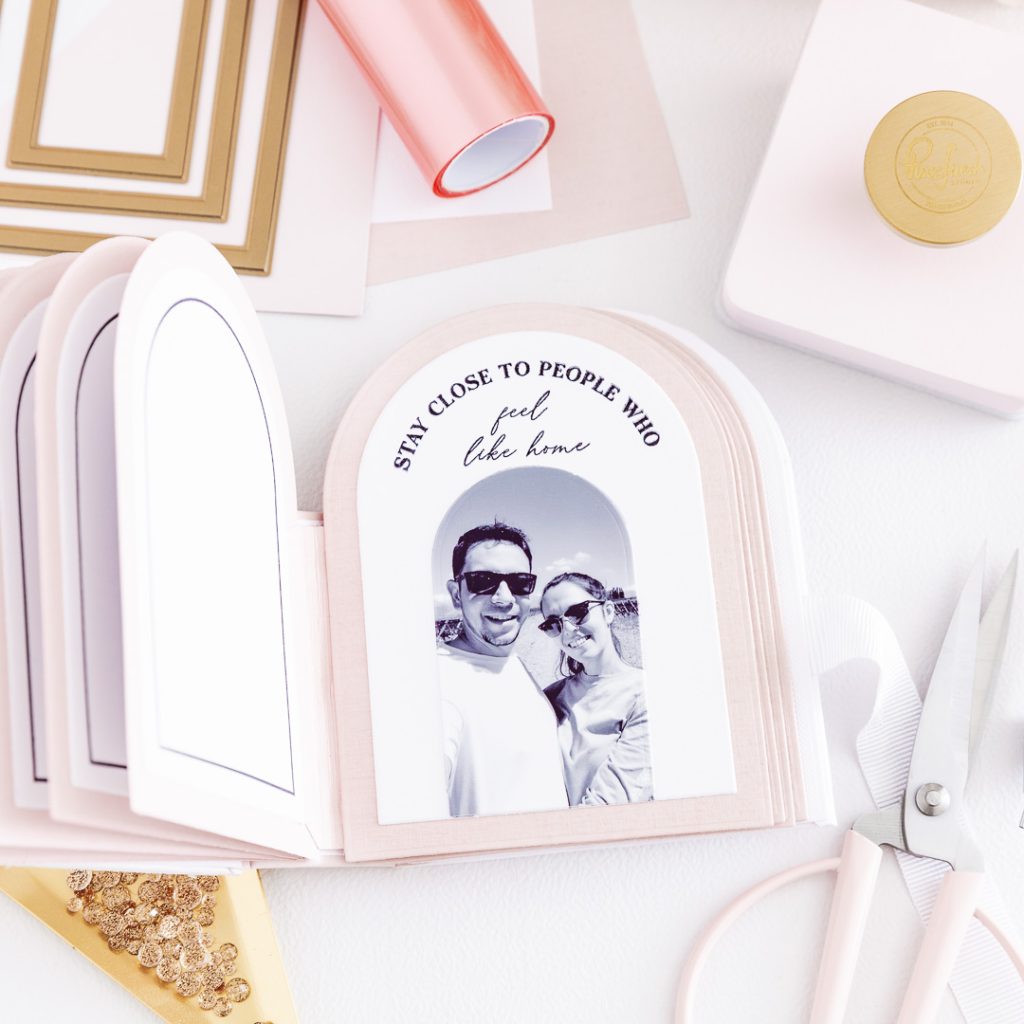
Let’s get started with this blog hop! For this release I prepared a special mini album (shaped). I wanted to prepare something lovely and delicated for some of the most special memories with Sebas (my love). I used the Nested Arches Set (Nested Arches Die and Nested Arches Hot Foil Plates), the Arch Floral Set (Arch Floral Stamp, Arch Floral Die and Arch Floral Stencil) and the Around the Shape: Arches Stamp.
¡Comencemos con este blog hop! Para este lanzamiento preparé un mini álbum especial (de forma). Quería hacer algo adorable y delicado para algunos de los recuerdos más especial con Sebas (mi amor). Utilicé el Nested Arches Set (Nested Arches Die y Nested Arches Hot Foil Plates), el Arch Floral Set (Arch Floral Stamp, Arch Floral Die y Arch Floral Stencil) y el Around the Shape: Arches Stamp.
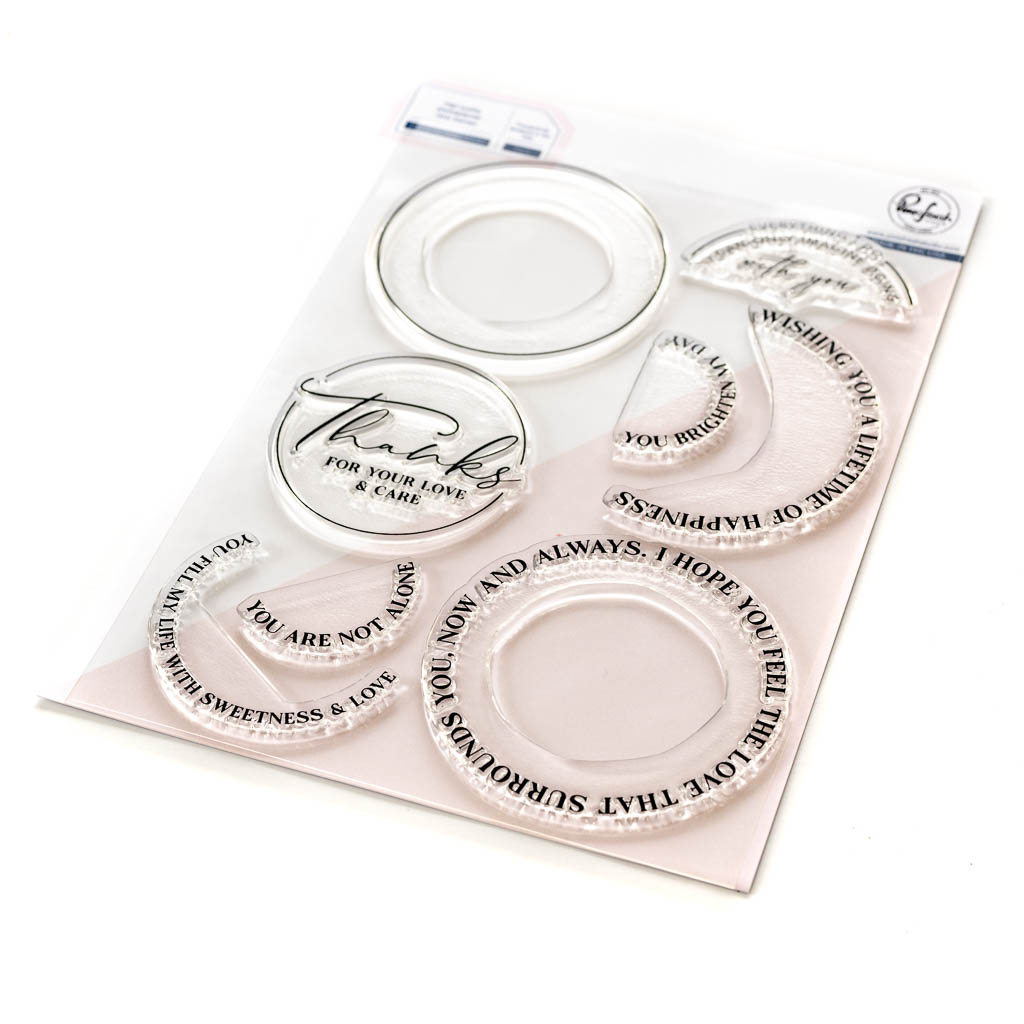
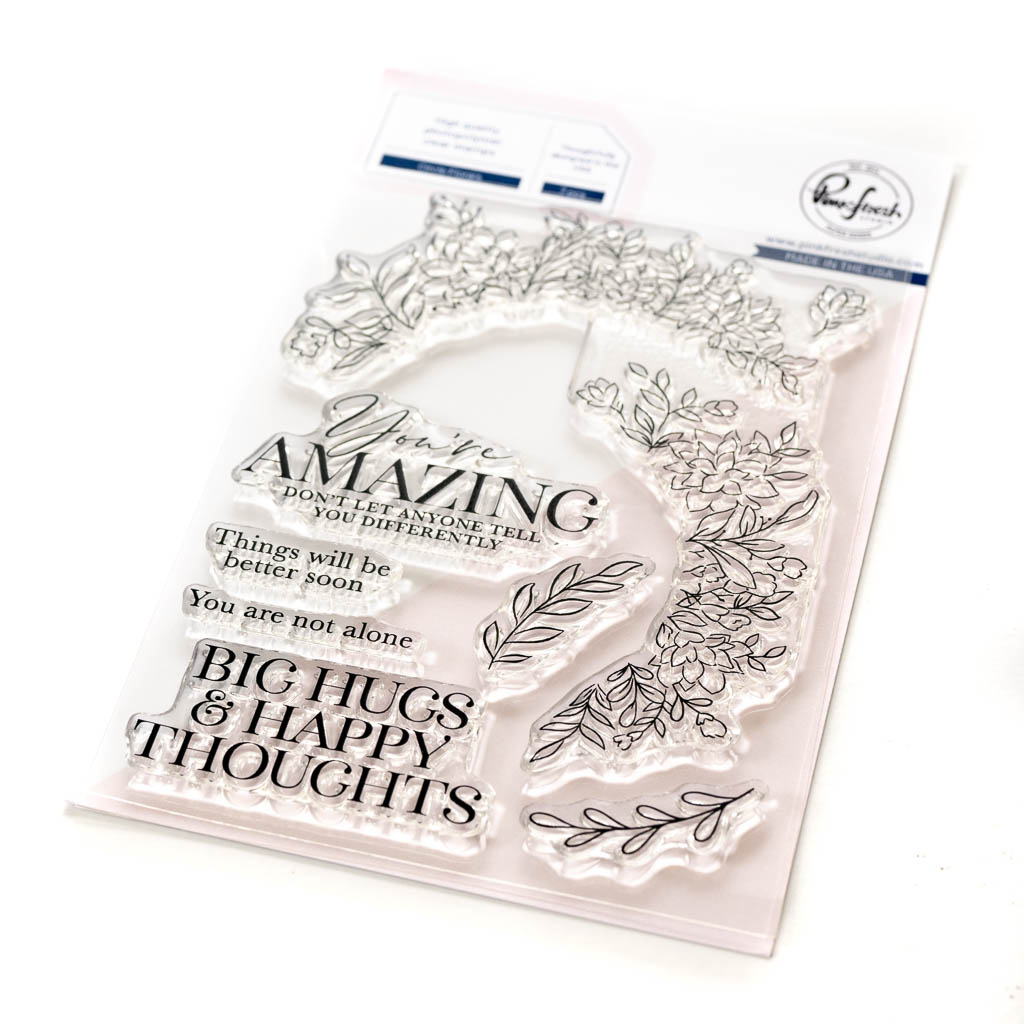
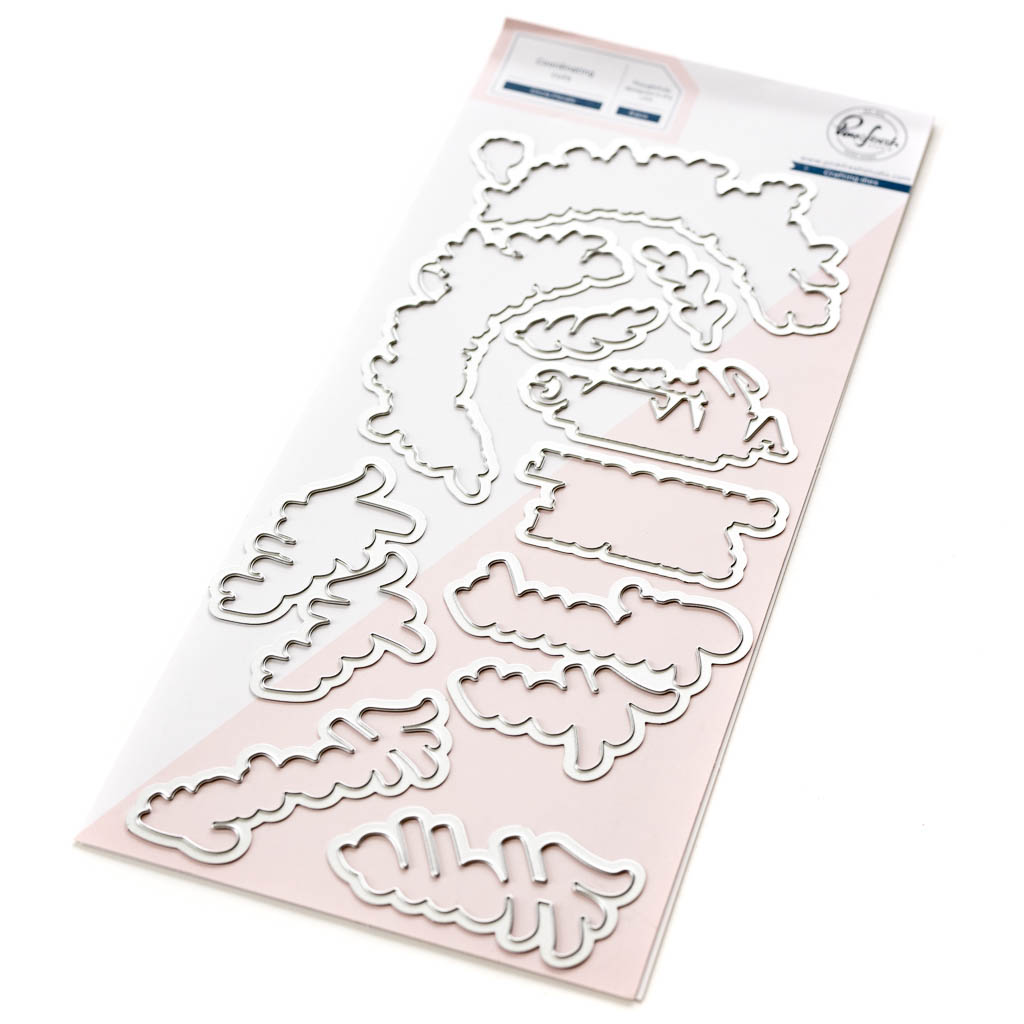
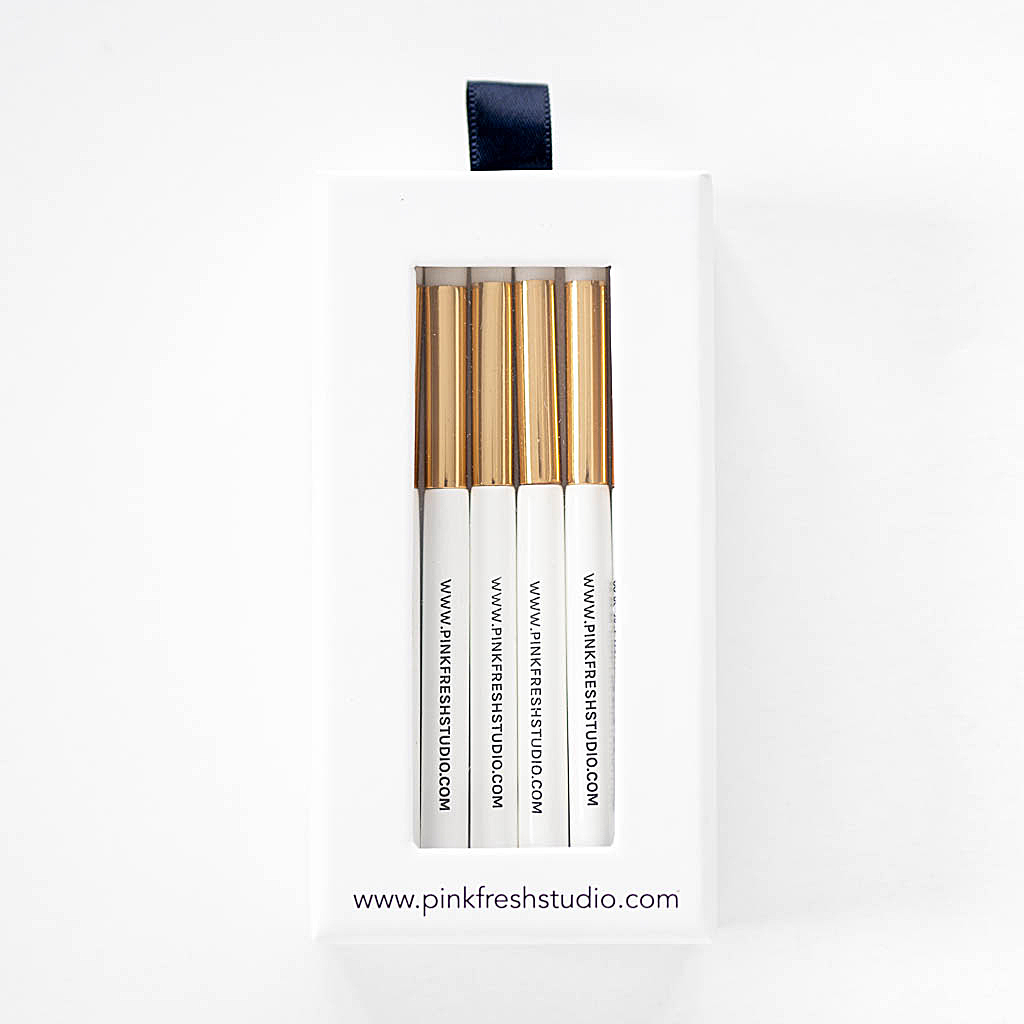
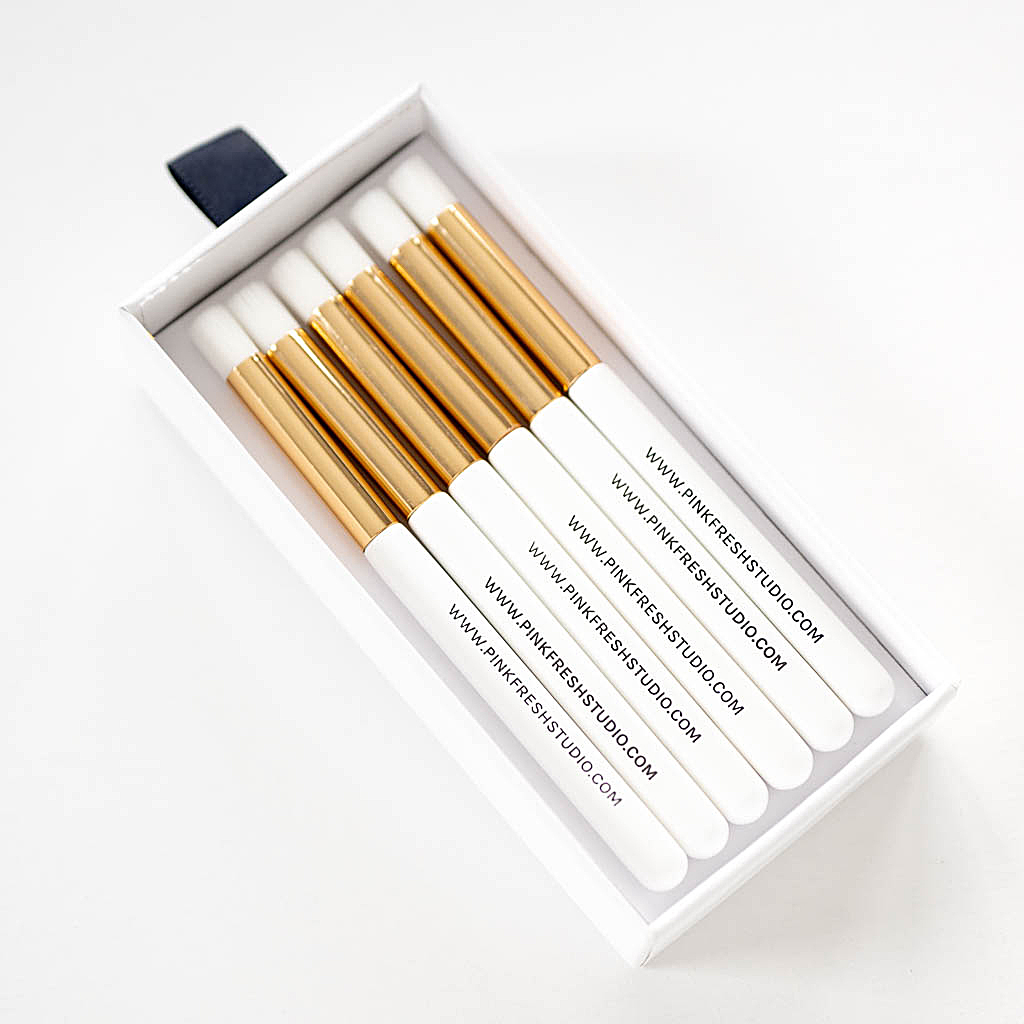
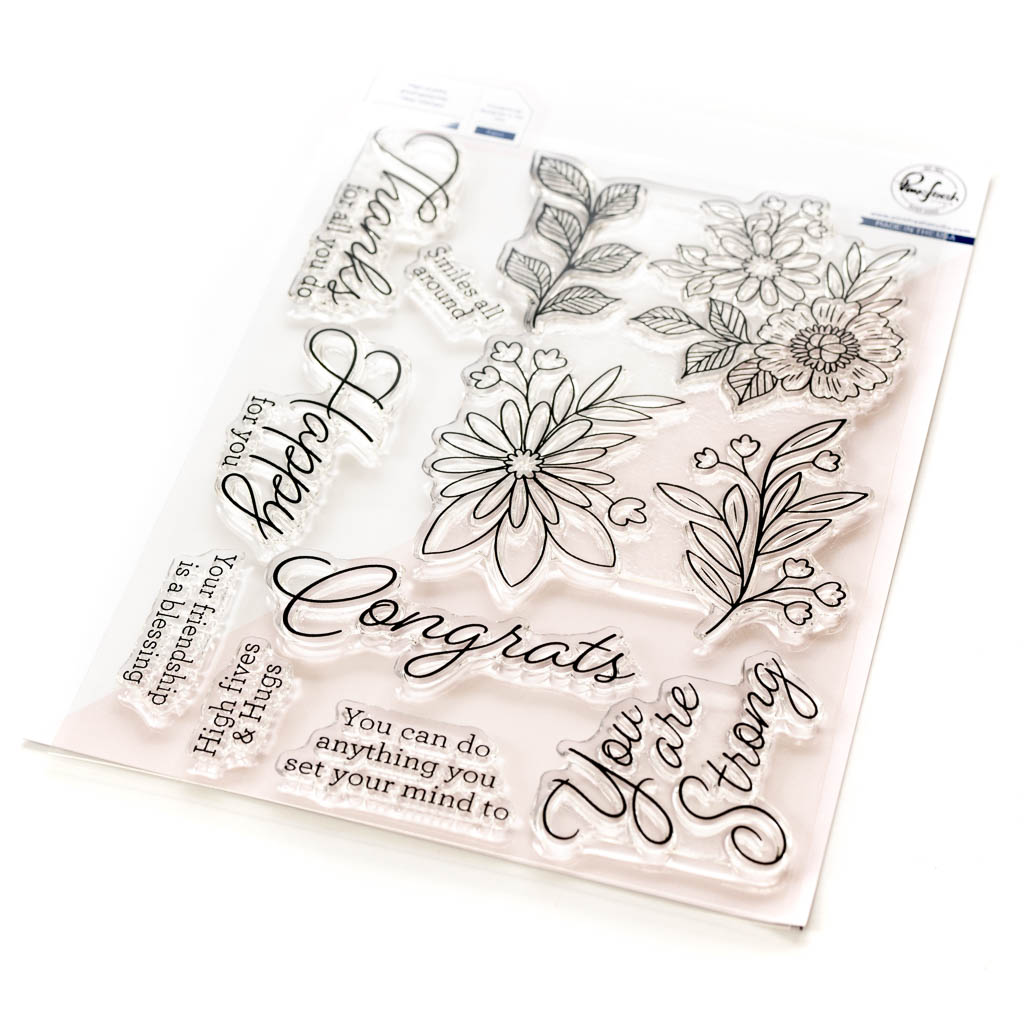
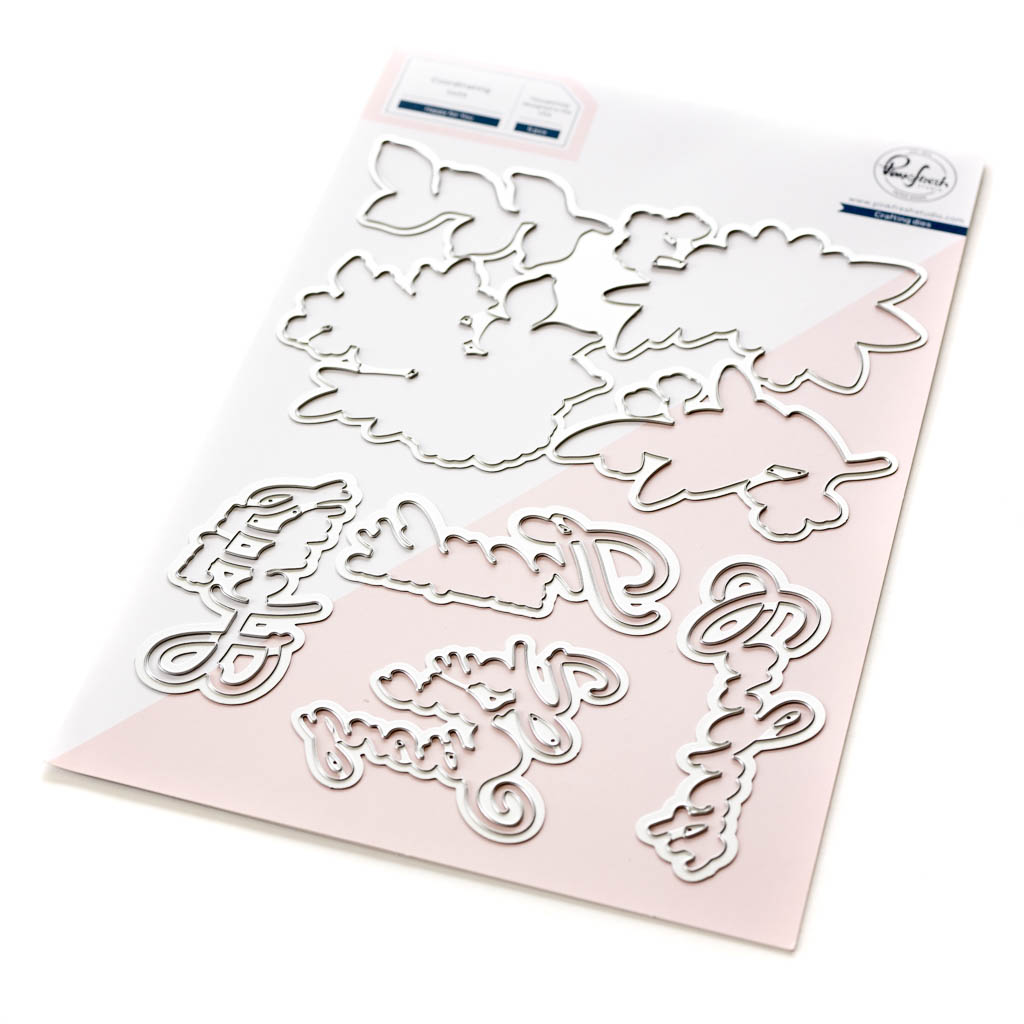
I also added to my project the Foiled Sentiments 3 Set. And I attach below all the photos of this release so you can see them and choose all your favorite ones.
También agregué a mi proyecto el set de Foiled Sentiments 3. Y les adjunto a continuación todas las fotos de los nuevos productos de este lanzamiento para que puedan verlos y elegir todos sus favoritos.

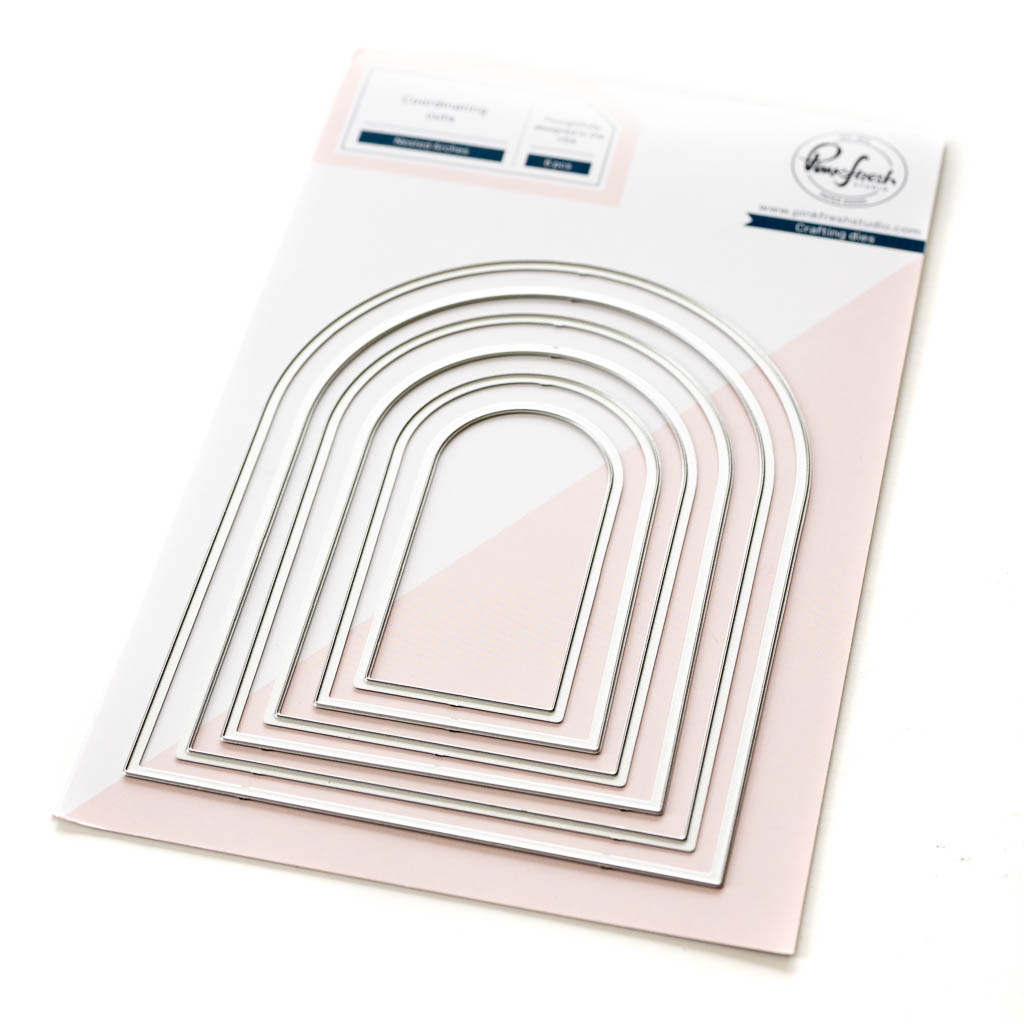
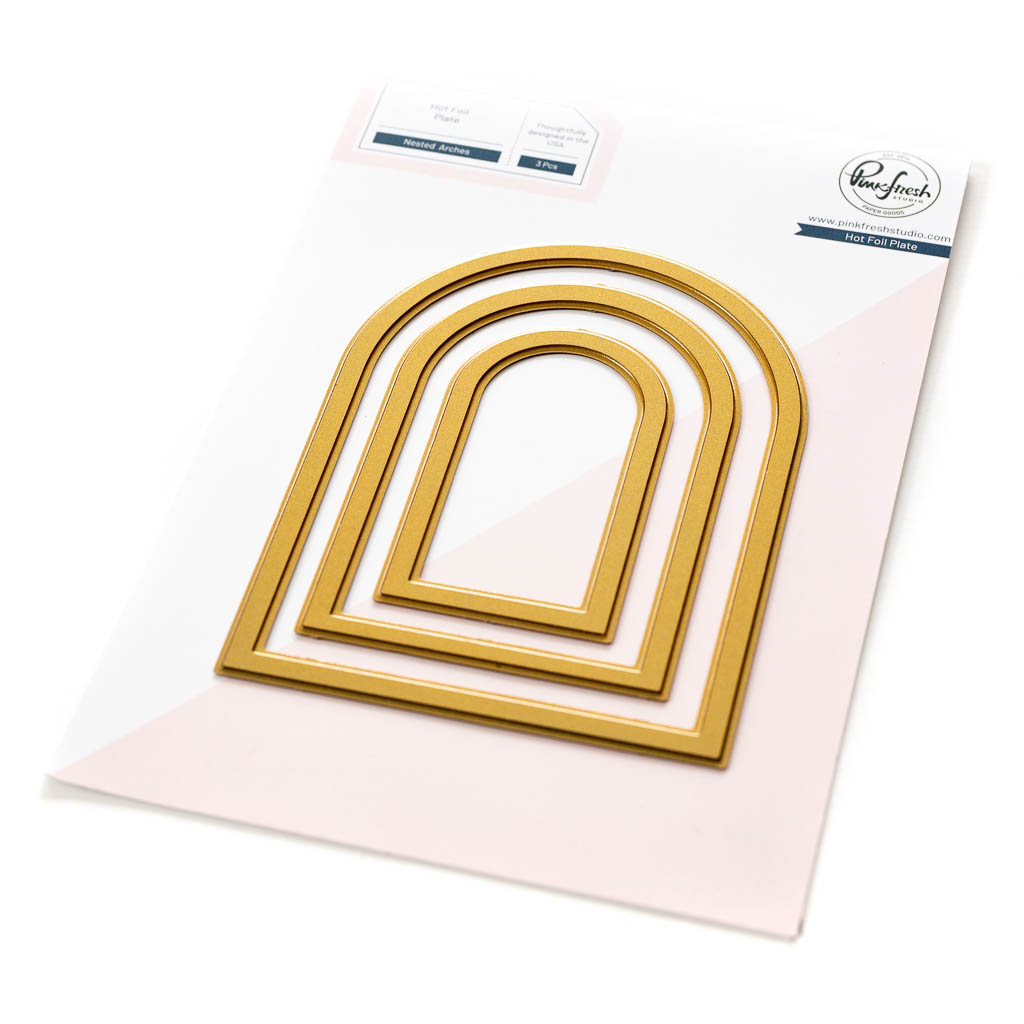


To make this project first thing to do is to prepare the mini album structure. We need to cut 2 Arch shapes out of cardboard using the bigger die from the Nested Arches Die Set. We will use this same pattern to cut the inner pages. To cut the arches: mark the outer contour of the die with a pencil and cut. Also we need to cut an extra pieces of cardboard of 1 1/4″ w x 3″ h for the spine. Then, you have to cover the cardboard pieces with textured white paper (for the arches) and textured pink paper (for the spine). You will use the spine piece to join the two covers together.
Para hacer este proyecto lo que primero que tenemos que hacer es preparar la estructura del mini álbum. Necesitamos cortar dos piezas de cartón con forma de arcos usando el troquel más grande del set Nested Arches Die. Usaremos el mismo troquel para cortar las páginas interiores. Para cortar los arcos de cartón: marca el cortorno del troquel con un lápiz y córtalo. También necesitamos cortar una pieza extra de cartón de 1 1/4″ ancho x 3″ alto para la espina. Luego, debemos forrar las piezas de cartón con papel texturado blanco (los arcos) y con papel texturado rosa (la espina). Usarás la pieza del lomo para unir las dos portadas.
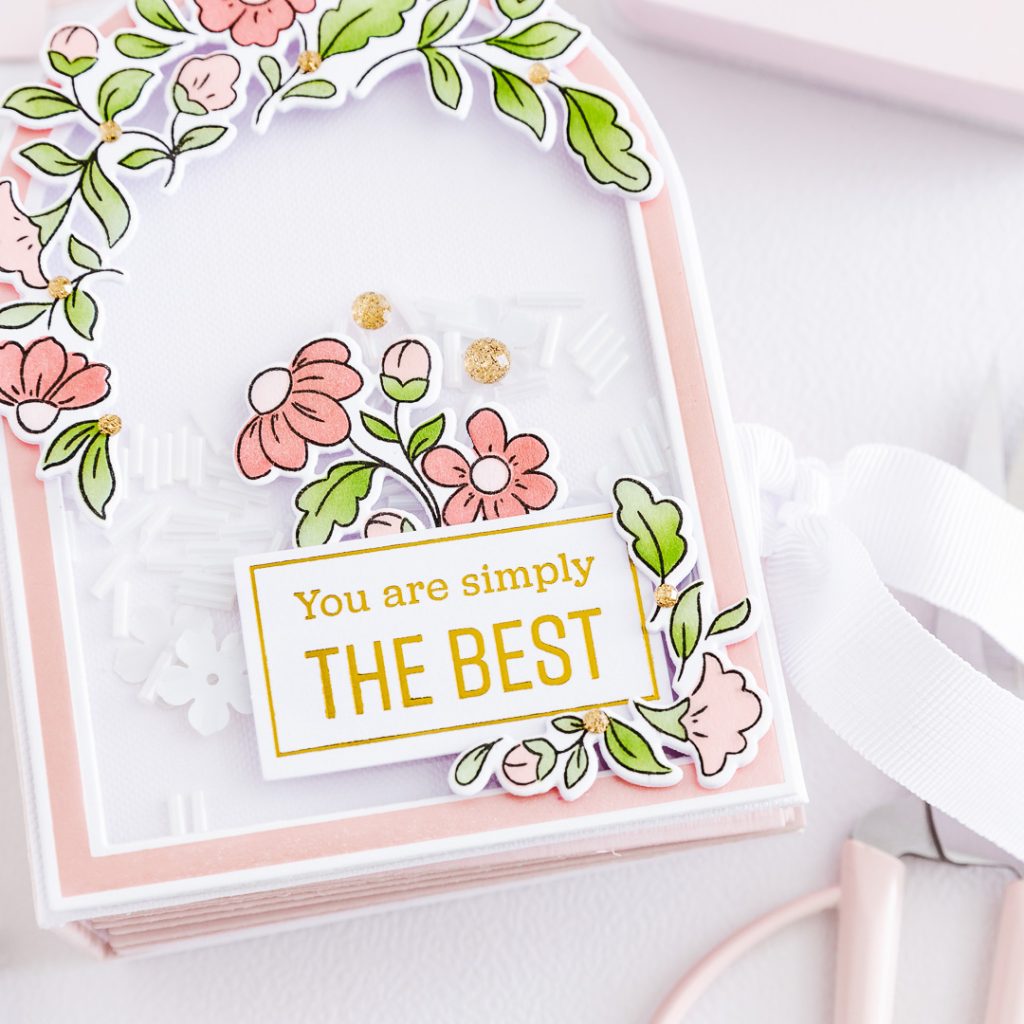
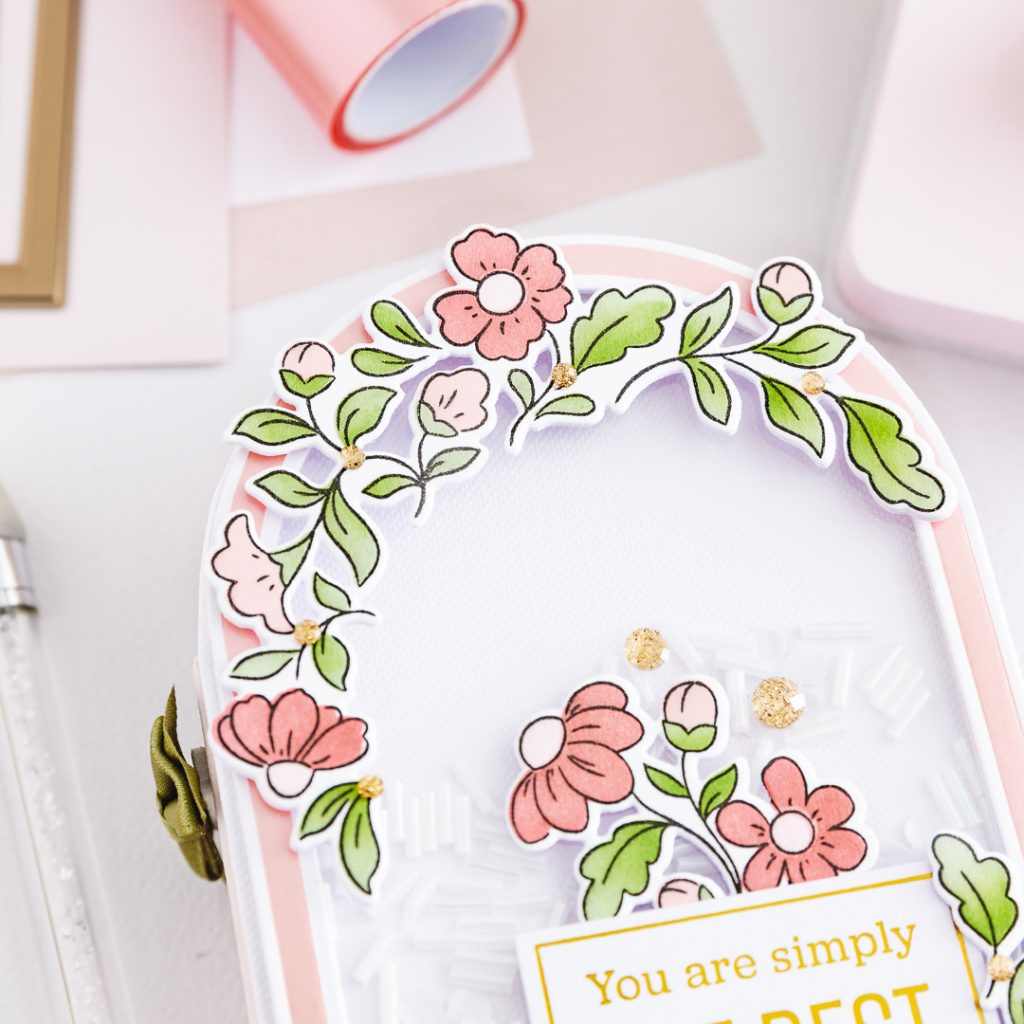
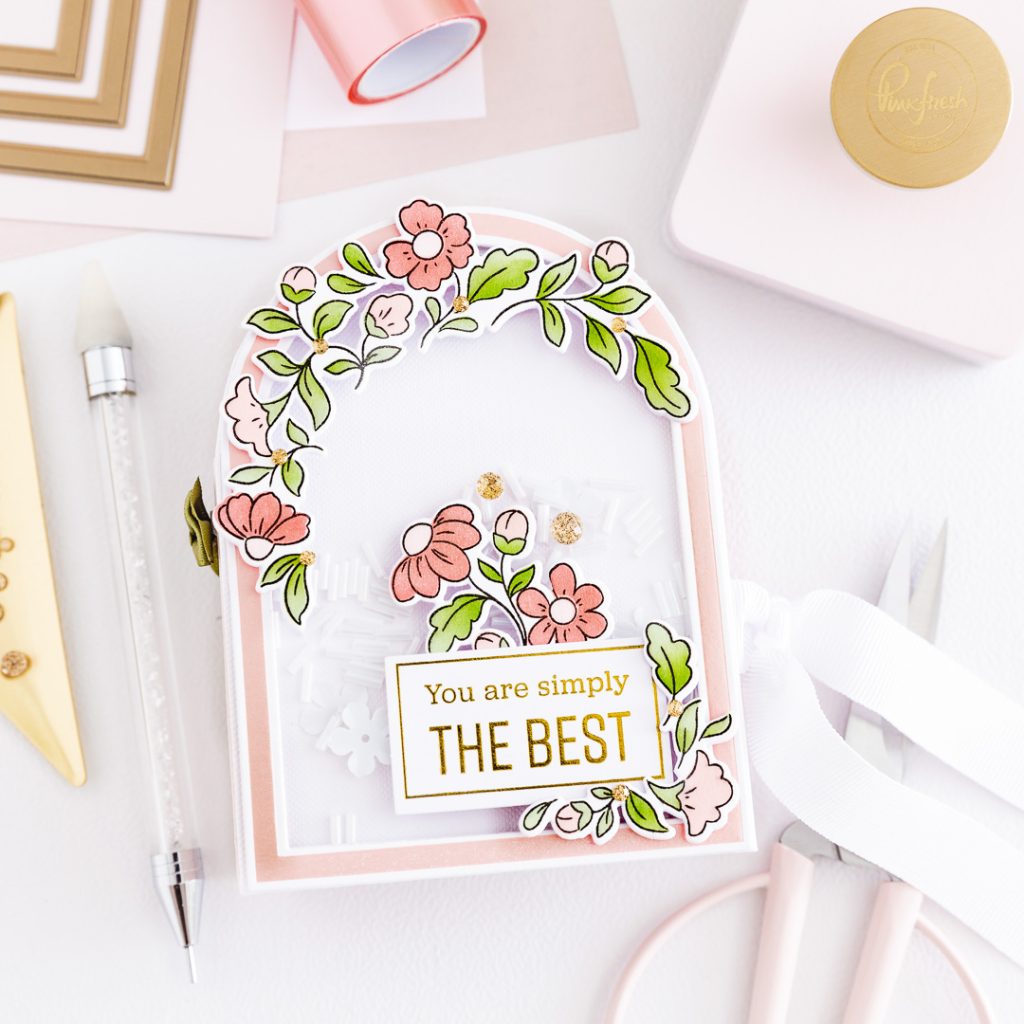
For the cover I prepared a shaker using the Nested Arches Set (Nested Arches Die and Nested Arches Hot Foil Plate) I prepared the bigger arch using my Glimmer Hot Foil System, the Pink roll from the Glimmer Hot Foil 4 Rolls – Satin Pastel Variety Pack and the bigger Plate from the Nested Arches Hot Foil Plate set. It look gorgeous! The detail of the satin pastel color is amazing!
Para la portada preparé un shaker usando el Nested Arches Set (Nested Arches Die y Nested Arches Hot Foil Plate) Preparé el arco más grande usando mi Glimmer Hot Foil System, el rollo de foil rosa del set Glimmer Hot Foil 4 Rolls – Satin Pastel Variety Pack y el plate más grande del set Nested Arches Hot Foil Plate. ¡Se ve hermoso! ¡El detalle del color pastel satinado es increíble!
Next, we need to assemble shaker. I cut 3 extra pieces of the arch and had some acetate. I glued all pieces and added 3D foam tape. As content of the shaker I added some sequins and some beads. To complete the decoration of the cover I prepared some flowers using the Arch Floral Set (Arch Floral Stamp, Arch Floral Die and Arch Floral Stencil) and some Premium Dye Ink Pads: Detail Black, Olive, Fresh Pear, Ballet Slipper, Passion Fruit and Coral Reef. The Stamp Press Tool is perfect to obtain a perfect stamping.
A continuación, necesitamos ensamblar el shaker. Corté 3 piezas extras del arco y tenía acetato. Pegué todas las piezas y añadí cinta de foam 3d. Para el contenido del shaker usé lentejuelas y canutillos. Para completar la decoración de la portada usé el Arch Floral Set (Arch Floral Stamp, Arch Floral Die y Arch Floral Stencil) y algunos Pads de Tintas Premium Dye: Detail Black, Olive, Fresh Pear, Ballet Slipper, Passion Fruit y Coral Reef. La Stamp Press Tool es ideal para obtener un estampado perfecto.
As final details I added one piece from the Foiled Sentiments 3 Set and some lovely glitter drops from the Glitter Drops: Glod set. Using the Triangle Brass Tray to place all the glitter drops is wonderful! It makes the job super easy.
Como detalle final añadí una pieza del set Foiled Sentiments 3 y unas glitter drops del set Glitter Drops: Glod. Usar la Triangle Brass Tray para colocar todas las glitter drops es ¡maravilloso! Hace que el trabajo sea súper sencillo.
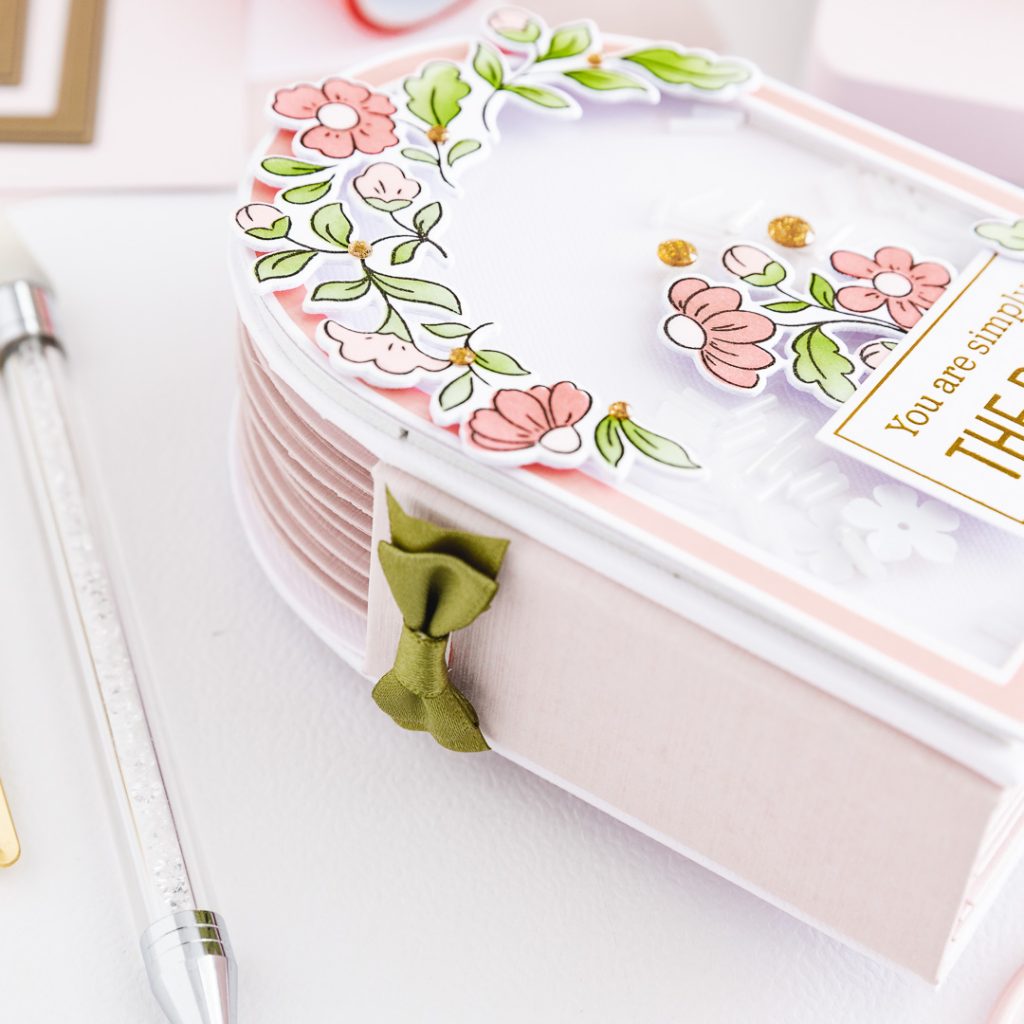
To make the spine you need to cut 4 pieces of pink cardstock: 1- 2 3/4″ w x 1 1/8″ h (score at 1/2″, twist and score back in 1/2″ high), 2- 2 3/4″ w x 1 3/8″ h (score at 1/2″, twist and score back in 1/2″ high), 3- 2 3/4″ w x 1 5/8″ h (score at 1/2″, twist and score back in 1/2″ high) and 4- 2 3/4″ w x 1 7/8″ h (score at 1/2″, twist and score back in 1/2″ high). You will get 4 pieces to form a «U» shaped spine. Glue them one inside the other to form the spine.
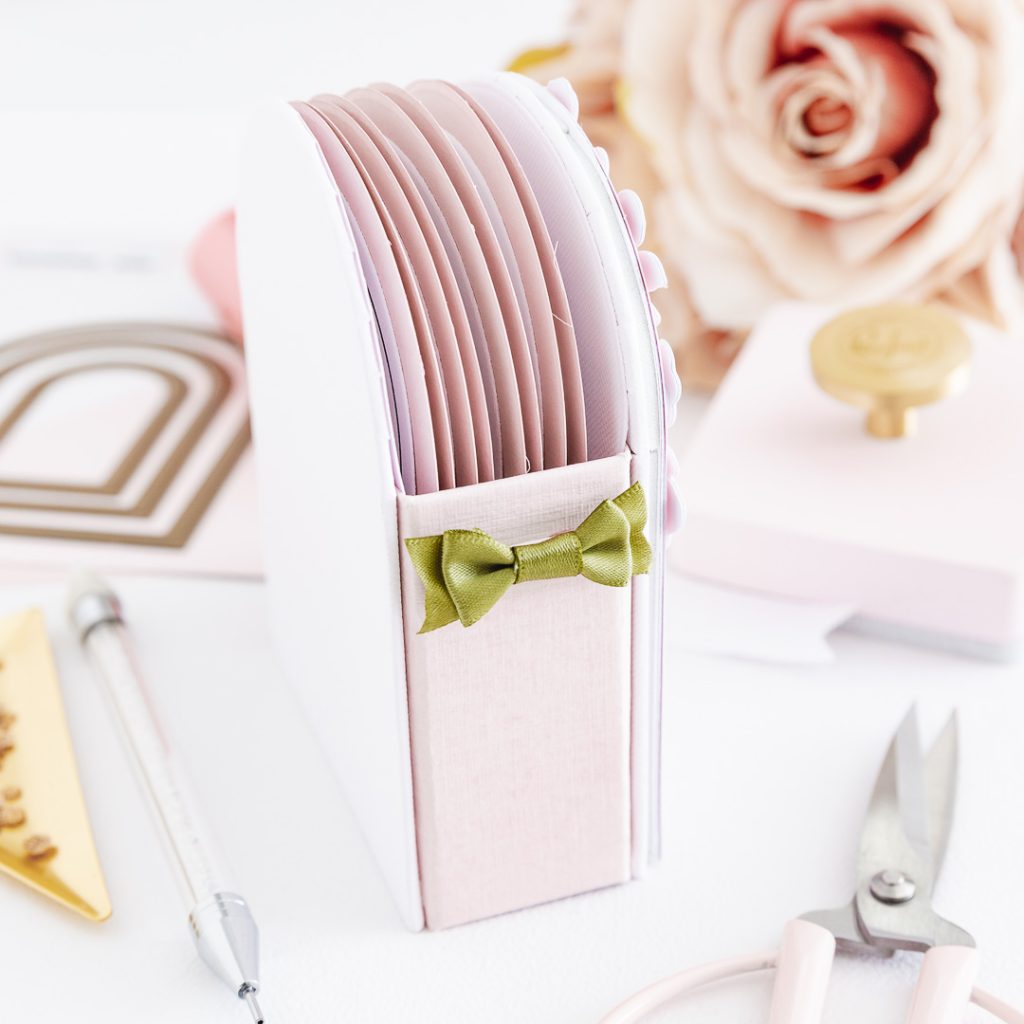
Para hacer la espina necesitamos cortar 4 piezas: 1- 2 3/4″ ancho x 1 1/8″ alto (plegar en 1/2″, girar y plegar de nuevo en 1/2″ – alto), 2- 2 3/4″ ancho x 1 3/8″ alto (plegar en 1/2″, girar y plegar de nuevo en 1/2″ – alto), 3- 2 3/4″ ancho x 1 5/8″ alto (plegar en 1/2″, girar y plegar de nuevo en 1/2″ – alto) y 4- 2 3/4″ ancho x 1 7/8″ alto (plegar en 1/2″, girar y plegar de nuevo en 1/2″ – alto). Obtendrá 4 piezas para formar una espina en forma de «U». Pégalos uno dentro del otro para formarla.
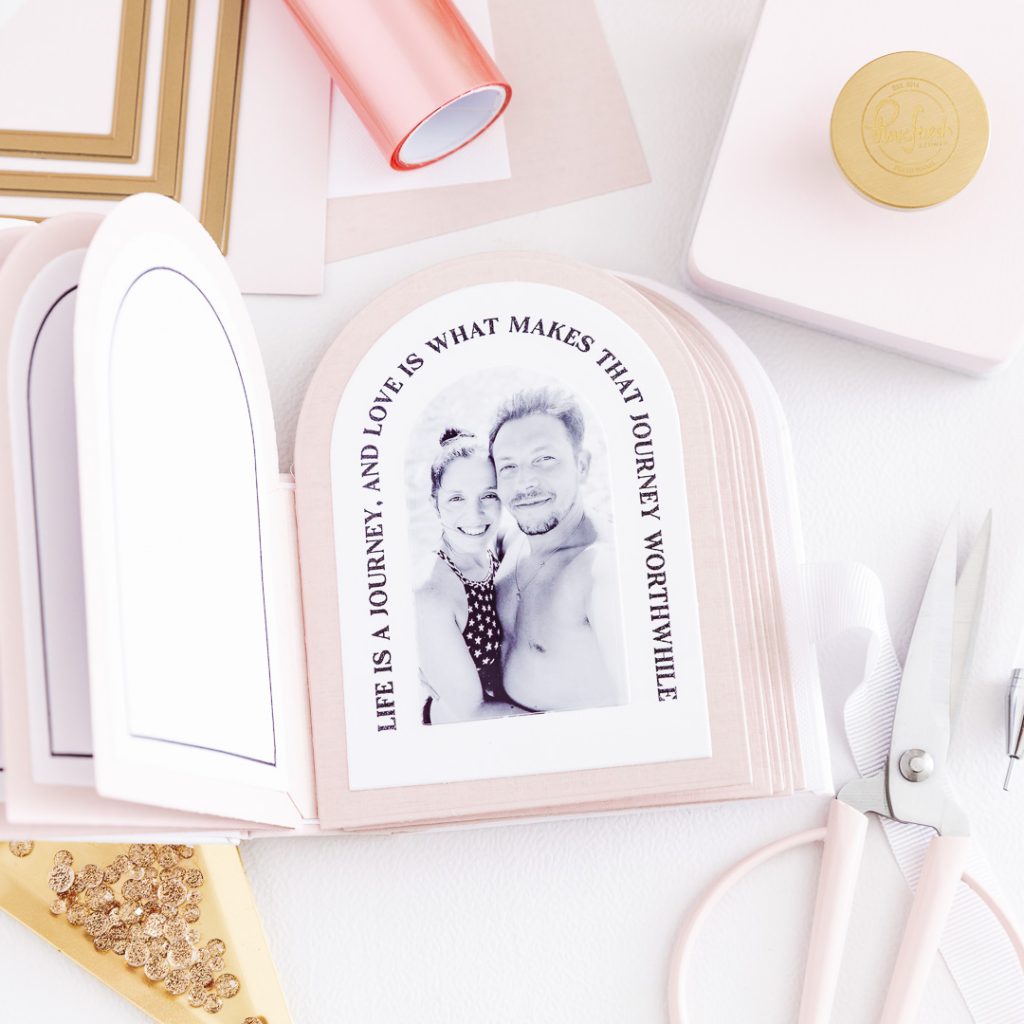
For the interior, we need to cut 2 more arches of white cardstock and an extra piece of white cardstock to line the spine on the inside. Remember to add the closing ribbon before gluing the pieces. Once everything is glued down, you can add the spine. Also, we need to cut 8 pages using the bigger die from the set and pink cardstock.
Para el interior, cortaremos dos piezas más de los arcos en papel blanco y una pieza extra de papel blanco para forrar el lomo por el interior. Recuerda añadir el lazo de cierre antes de pegar las piezas. Una vez que todo esté pegado, puedes añadir la espina. También necesitamos cortar 8 páginas usando el troquel más grande del set y cardstock rosa.
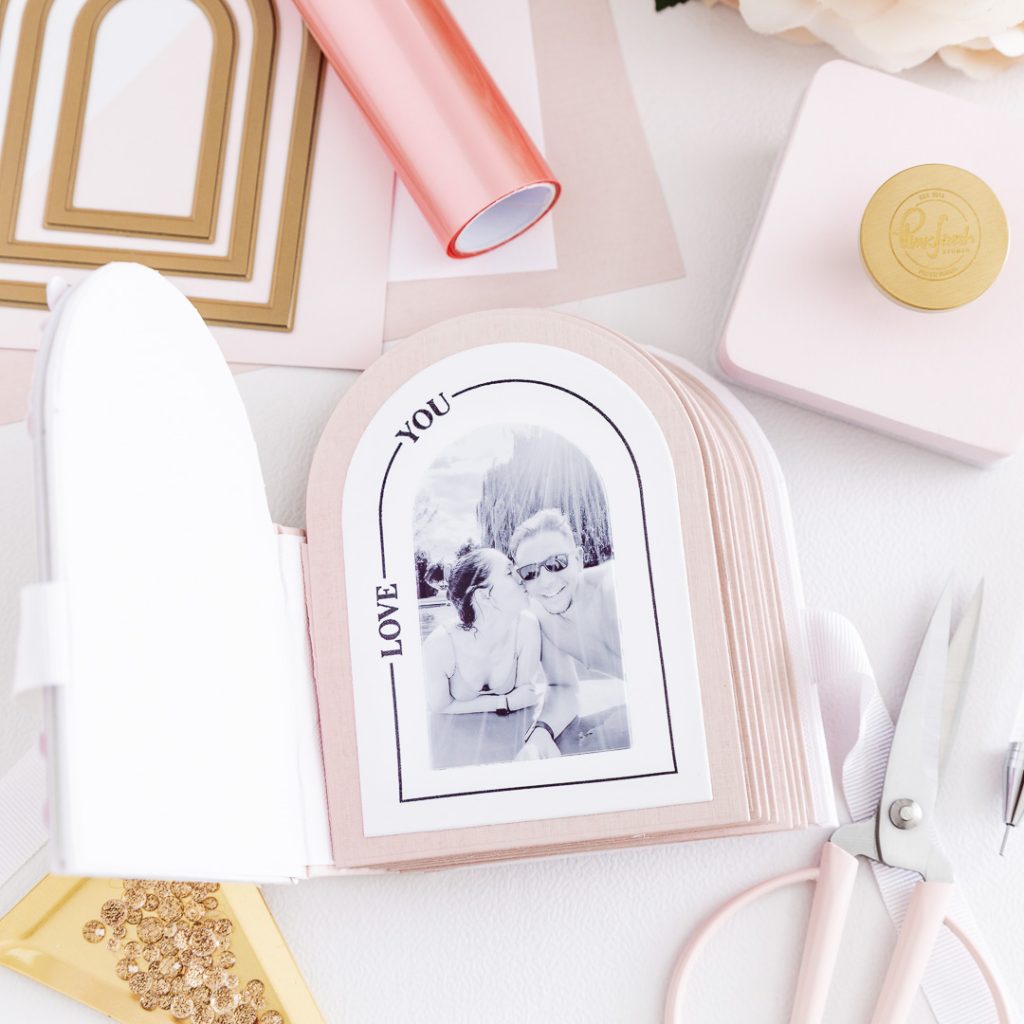

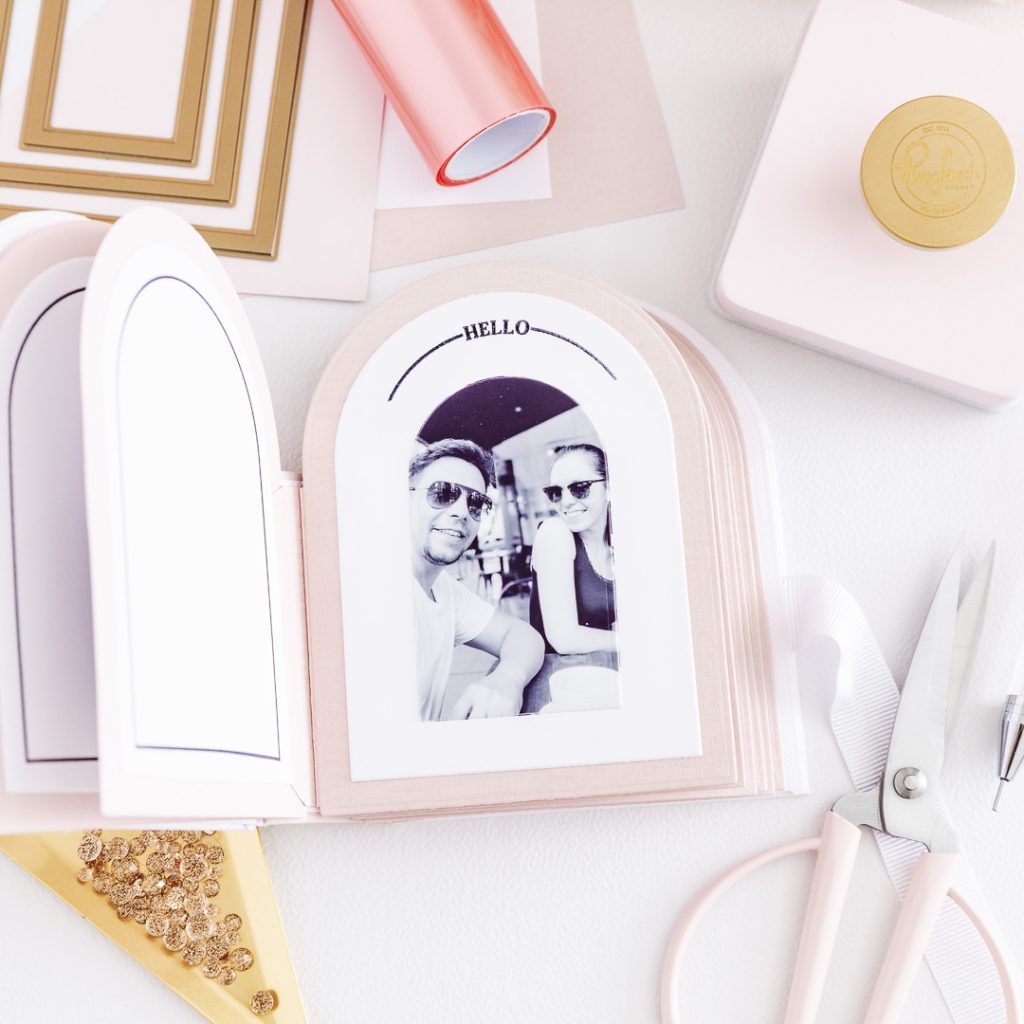
Finally, we are going to decorate all the pages. To do it I cut smaller arch pieces in white cardstock and use the Around the Shape: Arches Stamp to stamp all the phrases on them. We will need 16 pieces. We will stamp 8 of them with the outline design and use them to add the journaling. And we will stamp the rest with all the set phrases. To finish, we will add our photos previously cut with a smaller arch set die.
Finalmente, decoraremos todas las páginas. Para hacerlo cortaremos arcos más pequeños en cardstock blanco y usaremos el set Around the Shape: Arches Stamp para estampar las frases en ellos. Necesitaremos 16 piezas. 8 las estaparemos con el diseño del contorno y las utilizaremos para añadir el journaling. Y a las restantes las estamparemos con todas las frases de set. Para terminar, añadiremos nuestras fotos previamente cortadas con un troquel de set de arcos más pequeño.
Pinkfresh Studio will be giving away the full release on the Pinkfresh blog & YouTube channel. Also Pinkfresh Studio is giving away a total of Ten $25 gift cards winners chosen from the blog hop. The winners will be chosen from the comments.
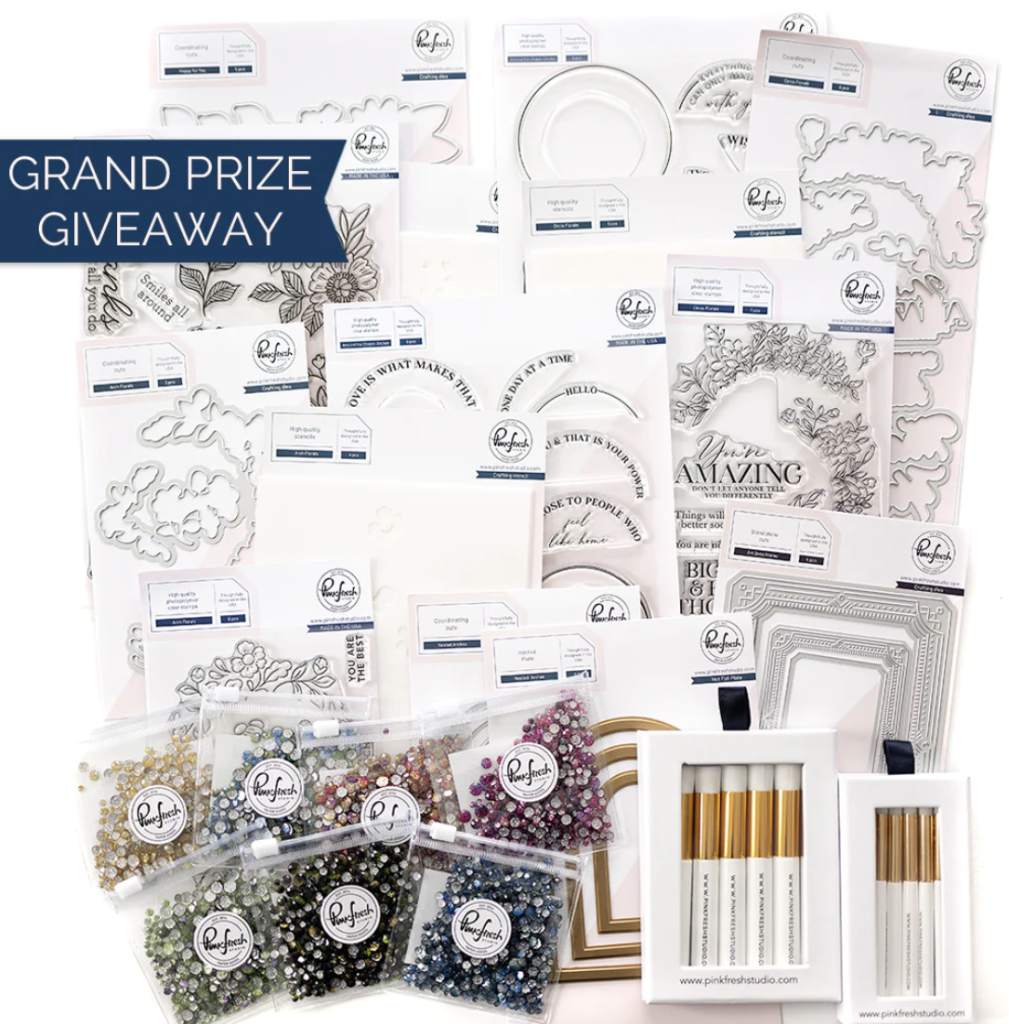
Pinkfresh Studio regalará el lanzamiento completo en su blog y canal de YouTube. Además, Pinkfresh Studio está regalando un total de diez tarjetas de regalo de $ 25 a los elegidos del blog hop. Los ganadores se elegirán a partir de los comentarios.
The winners will be announced on MARCH 8, 2023 on the Pinkfresh Studio Giveaway Page.
* Please check Giveaway Page within 2 weeks to claim the prize.
Los ganadores se anunciarán el 8 de MARZO de 2023 en la Giveaways Page de Pinkfresh Studio.
* Consulta la Giveaways Page en un plazo de 2 semanas para reclamar el premio.
Thank you for joining me for this blog hop. See you next time! Good luck!
Muchas gracias por acompañarme en este blog hop ¡Hasta la próxima! ¡Mucha suerte!
BLOG HOP LINK LIST / LISTA DE LINKS DEL BLOG HOP


 17.11.36")
126 comentarios
THIS IS AMAZING! An arch photo album! Just gorgeous!!!
What a unique and creative use of these products. Beautiful album!
Very creative and beautiful
Very unique & beautiful album. Well done! Love the Arches collection in this release.
This release is so fun! I love the new brushes and the glimmer dots. But–the Nested Arches are my favorite–anything with hot foil is a plus!!!! Love your card using that suite!
Wow! This is amazing and beautiful! What a lovely little album. This release is lovely!
I love how you used the dies for scrapbooking. So adorable.
This is fantastic!! Such a clever idea to make an album. So beautiful!
Celes, this couldn’t be more delightful! Gorgeous mini album using the arches dies – and that tiny little olive-green bow just finishes it off beautifully!
Thanks so much for sharing all the steps!
=]
OMGoodness! What a beautiful album you created. I love it!
What a sweet album! Love it
This album is fabulous! What a wonderful use of the arched dies and new products! I love everything about it.
I’m in awe of the way that you made this into a little album. So cute.
Love your post, thank you for posting directions for the little album. The use of the nested arches is beautiful and your color combo on the flowers is so delicate and soft.
This is amazing! I love it!
OMG- your arch mini album is gorgeous!!
Wow! What a wonderful mini album, your love will love it!!!
That is a great shaker/photo card……
What great ideas. Thank you.
Beautiful mini album! Love the shaker cover!
This is so sweet! Amazing creation!
Amazing!
Beautiful examples
Love that mini album! What a wonderful and unique idea and the
arches set is perfect for it!
This is fabulous, I need to try this now. I have never made an album, but you have inspired me.
Your photo album creation is so beautiful and creative.
This is so beautiful, elegant and creative! How clever to make a beautiful mini album! LOVE THIS!!! Those arches are fantastic–every item!
what a lovely mini album… beautiful
As soon as I saw that you were next on the blog-hop, I wondered if you would be doing a mini-album. I’m currently doing your mini from the Create event from last September. But girl, this one is out of this world beautiful. Look at what you made! Those stamps look like they were made to order for you! One of your best ever! Boy, did you make those arches shine!!!
I love, love, love the album you created! The subtle, soft colors are perfect and the shaker feature adds a touch of fun!!!
I bet he absolutely loved it! So creative and so different from all the other entries – gorgeous!
So gorgeous!!!
Wow! Fabulous album!
Love that your project is a mini album! It’s so feminine yet the b+w photos give it a grounded feel.
WHAT! This is amazing! So much in a little album, very impactful!
Beautiful card!! Pinkfresh Studios has amazing products and your Album is perfect!!
This album is gorgeous! Such a lovely keepsake.
Wow, I am blown away by your stunning project!!
Stunningly beautiful project ❤️
This is so beautiful, lovely delicate colours. X
How creative your Arch mini album is. So beautifully done with the floral cover and the black and white inside pics. Love it all.
What a beautiful idea for making an album. It is lovely and I love how you used the different curved sentiments with your pictures.
Love your style!
Very unique and always love shakers.
Thanks for sharing.
I never would have thought to use the dies to make a photo album. That is a great idea. Thank you for sharing.
OMG that is a sensational work of art, I love it
This is a stunning piece of work!!
Oh my! What a stunning project! Love the shaker, love the mini album. Beautiful
What a great project! Just gorgeous!
This card is so sweet!!
Wow, love the photo book. Your colors and the dainty flowers make it look so sweet and springlike. 😀
Absolutely gorgeous!
So creative and cute idea. I love the shaker cover and the arches is perfect for the mini album. Thanks for sharing.
What a creative way to use the arches! Sebas is going to love it!
Great projects, esp love the arched photo album you’ve created
That mini album is so beautiful, the perfect gift for keeping memories. I especially love the delicate touches and that bow on the side of the holder. Fabulous.
I am blown away…such pretty colors and design
Oh my goodness! What an amazing little project! Beautiful!
Your little book is amazing! Down to the tiniest detail, like the little green bow on the side! Love it!
I adore the book you made….absolutely lovely 🥰This release is amazing!!! Thank you for the inspiration 😉
your creation is AMAZING!!! So simple but complex. Just beautiful.
Your album is so creative and very beautiful!
The mini album is so creative. It is beautiful and I love the colors. They are soft.
What fun! Love your album!
Wow! You did a wonderful job with those arches. Love the album.
What a wonderful project. The album would make a terrific Wedding gift. Love the soft colors
Such a pretty little album, & so clever!
Wowzers!! What a beautiful album. I would never thought to make an album out of these dies.
I love the arch book! Wonderful idea. Thank you for sharing.
I absolutely Love your Arches Mini Album, what a wonderful project!
Oh my goodness – what an amazing mini album. I love how the pages use the arched sentiments. The colors and overall design are wonderful. Thanks for the inspiration!
Love your foil color choice, so springy!
Your mini album is so sweet. I love those fresh colors. Thank you for sharing.
Wow! Gorgeous mini album. That arch is perfect for an album!
So pretty and creative. I like the arch shape.
This is amazing and so creative! Thank you for the step by step instructions!
Lovely! The time and work you put into this is amazing! It is a treasured gift!
Love your gorgeous mini album! That is so creative and lovely!
This is so beautiful. I love how you made a mini album with the arches. So pretty. Thanks for sharing..
A wonderful display of your pictures. Love this idea
Stunning album! Your shaker addition on the cover is clever and pretty! Thank you
Making a mini album is a great idea.
What an amazing memento you have created with the arches die and floral stamps! So creative!
Fabulous, Celes! Stunning design. Elegant and special gift! Love open front with the sweet shaker window. Just lovely!–Kathy Witt
such a pretty mini album, interesting way to use the products and love how you made the book using the arches!
Amazing and beautiful album! So very creative
I love the color combo on this beautiful card!!!!! Sunny mini album
How amazing…to do a mini album such as this. It is perfect, right down to how you put the pictures in it and used the stamping as journaling. Love this idea.
oh my word.. what an absolutely amazing project – gorgeous color and detail… wow!! thank you for the inspiration, I love every bit of this release!!
The mini album is so beautiful and delicate! And the Pinkfresh release is fantastic!
What an awesome idea. I love these little albums and yours is gorgeous!!
What an awesome idea! I’m totally going to have to try this! I love this release and that hot foil is gorgeous, have to get that too! Thanks for sharing!
Your mini album is beautiful. It would be perfect in those colors for a wedding gift. You make it look so simple!
Wow, wow, wow, Celes!! This is a GORGEOUS album! I love that «rosado satinado» — so knockout pretty!!! I adore the beautiful color palette you chose and the album is a superb end product. You get a score of 20 out of 10 for this one! Como decimos aquí, ¡sacas una A+ por este proyecto!
Lori S in PA (EEUU)
What a beautiful little album. Thanks for sharing all the details on how you made this.
A very delicate project
I was inspired by your album idea! It is beautiful!
What a lovely album and beautifully executed. The arched shape makes it so unique. I love that you used white shaker «bits» in the shaker cover. Makes it very elegant.
this is fantastic. A wonderful piece
to use as a decoration, as well as
a keepsake of memories. thanks
for sharing.
What a unique and beautiful mini album. I never would have thought to to that with this collection. I love it and ordered the set.
Such a gorgeous album. So creative… Thanks for sharing.
This is such a beautiful album! I love that the circles and arches can work together. Thanks for sharing.
This mini album is beyond amazing! Thank you for sharing this project. I love these new products from Pinkfresh.
wow – love how you ahve used these new products on your album – very creative
Very creative to use the arches for a mini album!
This is so pretty! Love the flowers!
Oh wow! I love the album and the shaker cards! I love the colors and the idea! What creativity!
At first I thought, what a lovely shaped card, perfect blush color (just painted my bathroom a similar color)…then it’s actually a mini album!!!! Amazing job!
How clever to create an arch memory book! Love the soft color pallette.
Awesome and clever idea to create a mini album from the Arches Die Set.
Wow! Wow! Wow! Amazing way to use the arch dies! Love the album!
Fabulous album! Love the shape florals. 💕
Gorgeous arch-shaped album! I love the pretty details and the shaker front! Wonderful details!
The colors you chose are soft! I love it!
Goodness, this project is amazing! Beautiful,
Your mini album is beautiful! What a great use of the stamps and dies. I love, love, love the cover !
Oh wow I love the use of the soft pink with the aches! Simply stunning.
I was awestruck when I first saw your project. Very creative and such a beautiful and practical way to showcase the arch products. Thank you for the short tutorial and your amazing talent! 💖
I simply love mini albums and this one is gorgeous! It’s so fun to see products used in a different way.
Such a sweet and beautiful mini album!!! Wonderful idea! I love it!
What a labor of love! Your album is so lovely
This would make such a wonderful engagement gift. I may have to make some myself (three weddings to attend this year).
I love this mini-album take on these amazing products. Beautiful colors. Great job!
Such a creative mini book!
Wow! This was such a creative use of the arches. The album cover is so beautiful.
What a loving gift you made for your love💗. A mini album is a beautiful idea for a gift, and yours will be treasured forever, I am sure. Thank you so much for sharing your love.💜💜💜
Wow! Beautiful project!
Los comentarios están cerrados.