Hi Pinkfresh Studio’s fans! Happy Monday! Today we are celebrating a special day! It’s release day! Thank you for joining me for the new Pinkfresh Studio March 2023 Release Blog Hop! I’m so happy to have the chance to show you the new products because they are AMAZING! And… as usual… there is something new that you are going to LOVE! Yes! To celebrate Pinkfresh Studio’s release, there is a blog hop today. You are about to fall completely in love with it! Let’s get started!
¡Hola fans de Pinkfresh Studio! ¡Feliz lunes! ¡Hoy estamos celebrando un día especial! ¡Es día de lanzamiento ¡Gracias por acompañarme en el nuevo Blog Hop lanzamiento de los «Productos de Marzo 2023» de Pinkfresh Studio! ¡Estoy tan feliz de tener la oportunidad de mostrarles los nuevos productos porque son INCREÍBLES! Y…como siempre… ¡Hay algo nuevo que van a AMAR! ¡Sí! Para celebrar el lanzamiento de Pinkfresh Studio, hoy hay un blog hop. ¡Están a punto de enamorarse! ¡Empecemos!
First of all! If you ended up here from Clarissa Wiley’s blog then you are on track. Your next stop is Channin Pelletier’s blog. To start the blog hop from the beginning you can go to Pinkfresh Studio blog. Have fun and discover the beauties that my teammates have made for you for this release!
¡Primero que nada! Si estás aquí desde el blog de Clarissa Wiley, entonces estás en el camino correcto. Tu próxima parada es el blog de Channin Pelletier. Si quieres ver el Blog Hop desde el principio, puede ir directamente al blog de Pinkfresh Studio. ¡Diviértete y descubre las bellezas que mis compañeras de equipo han hecho para ti para este lanzamiento!
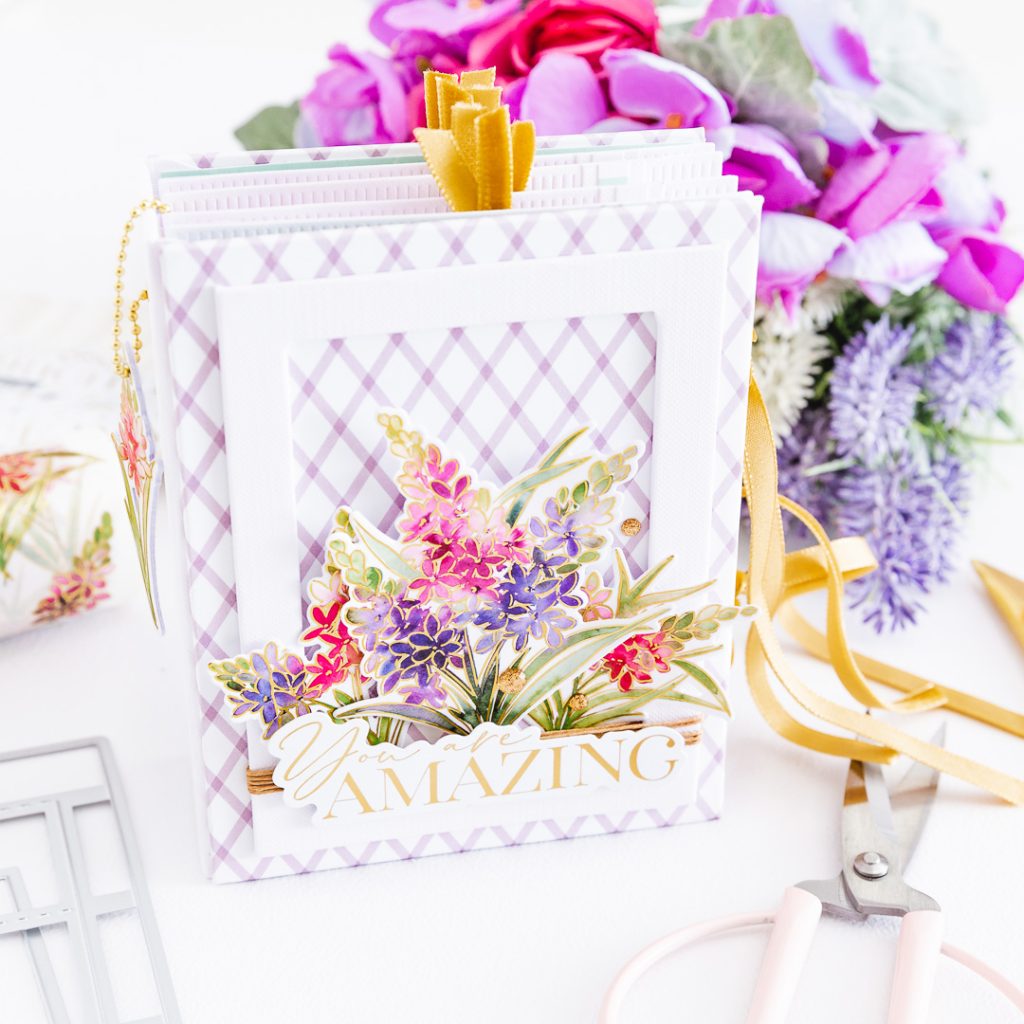
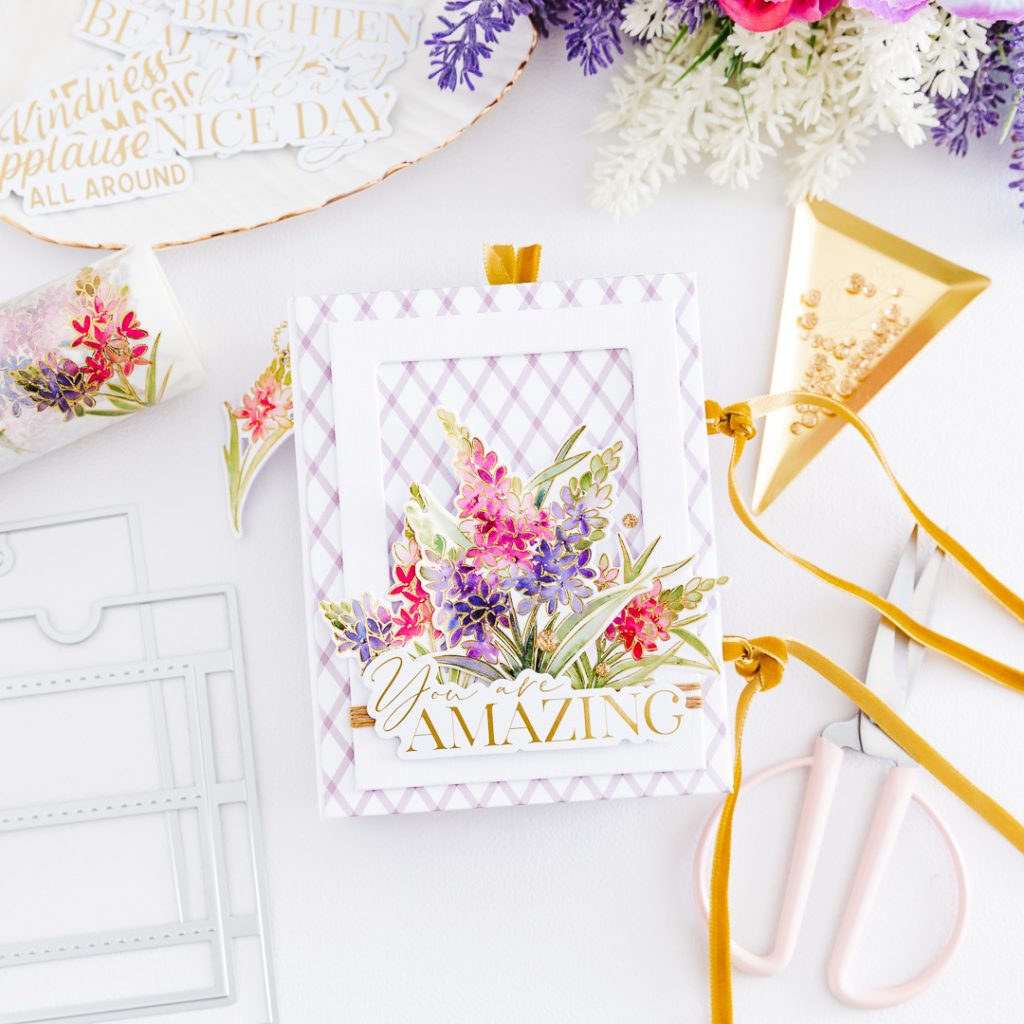
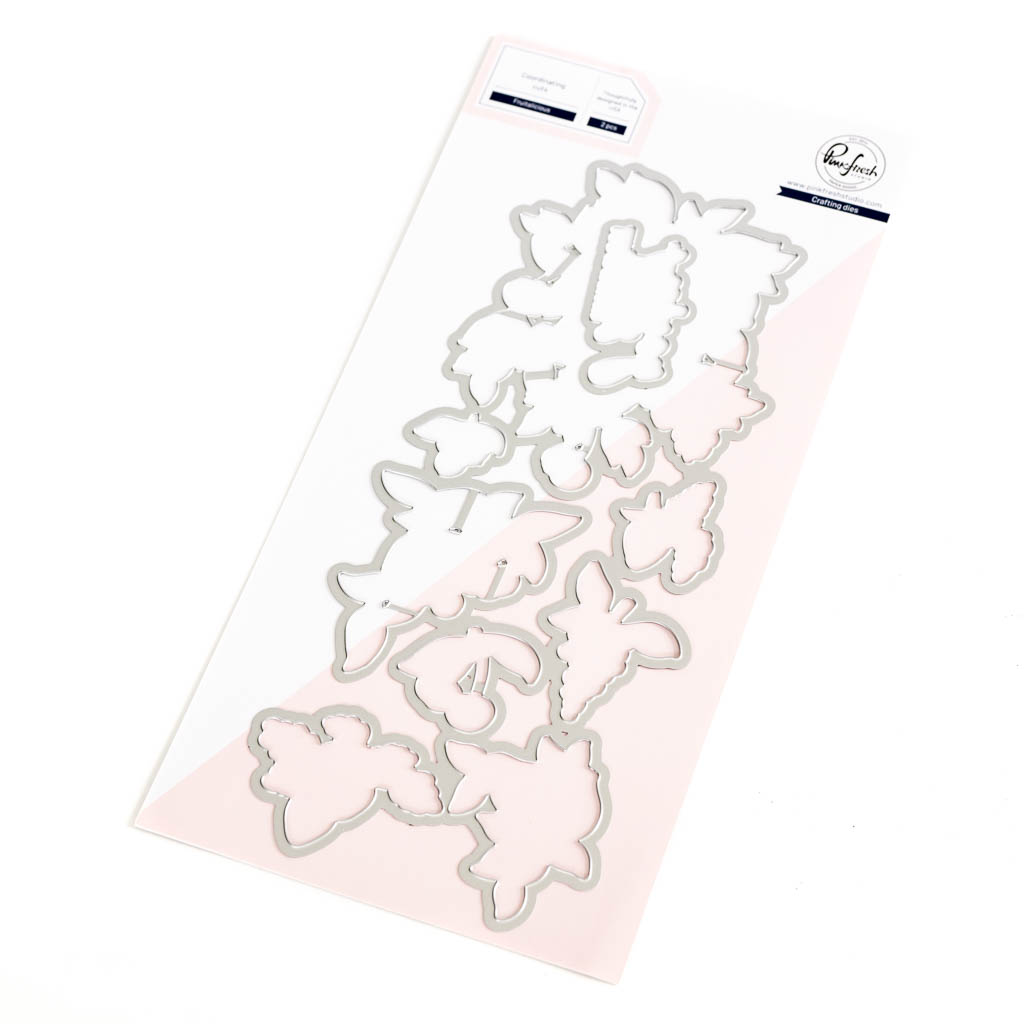
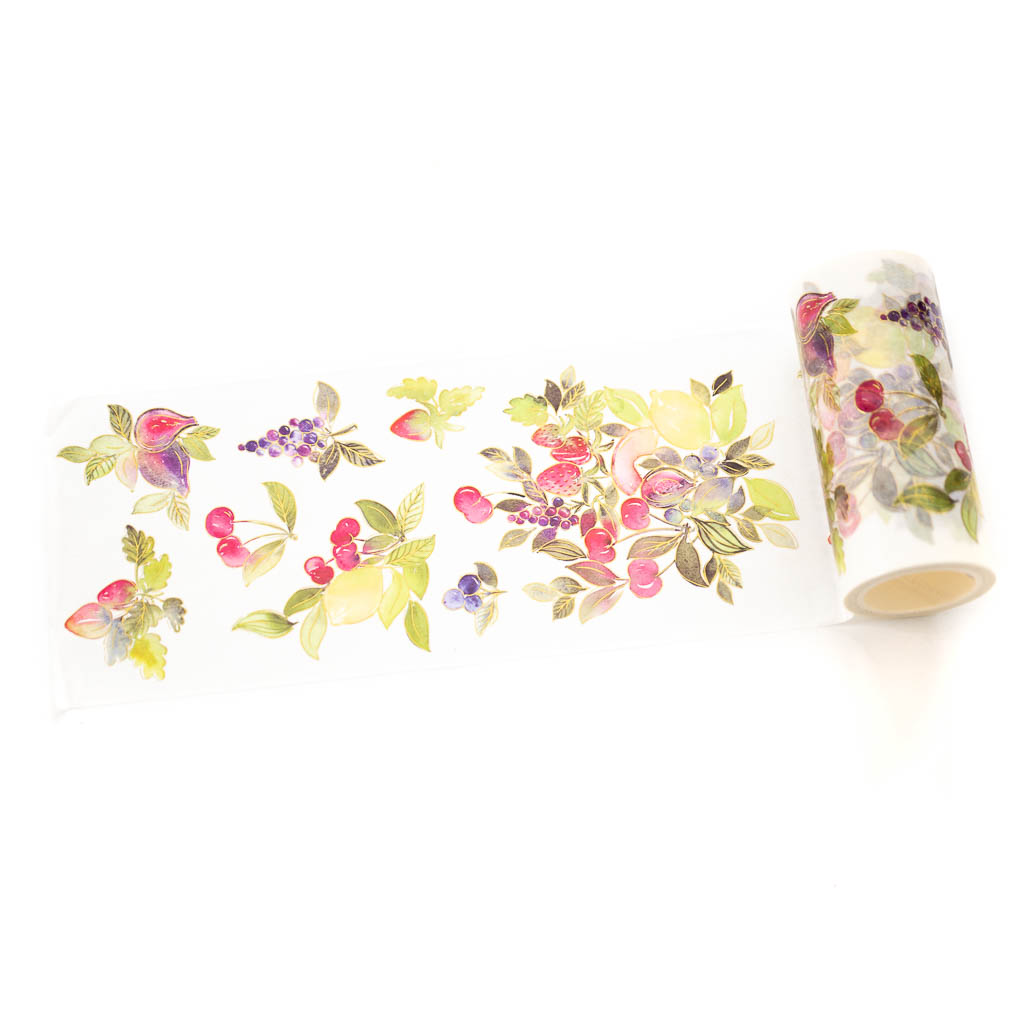
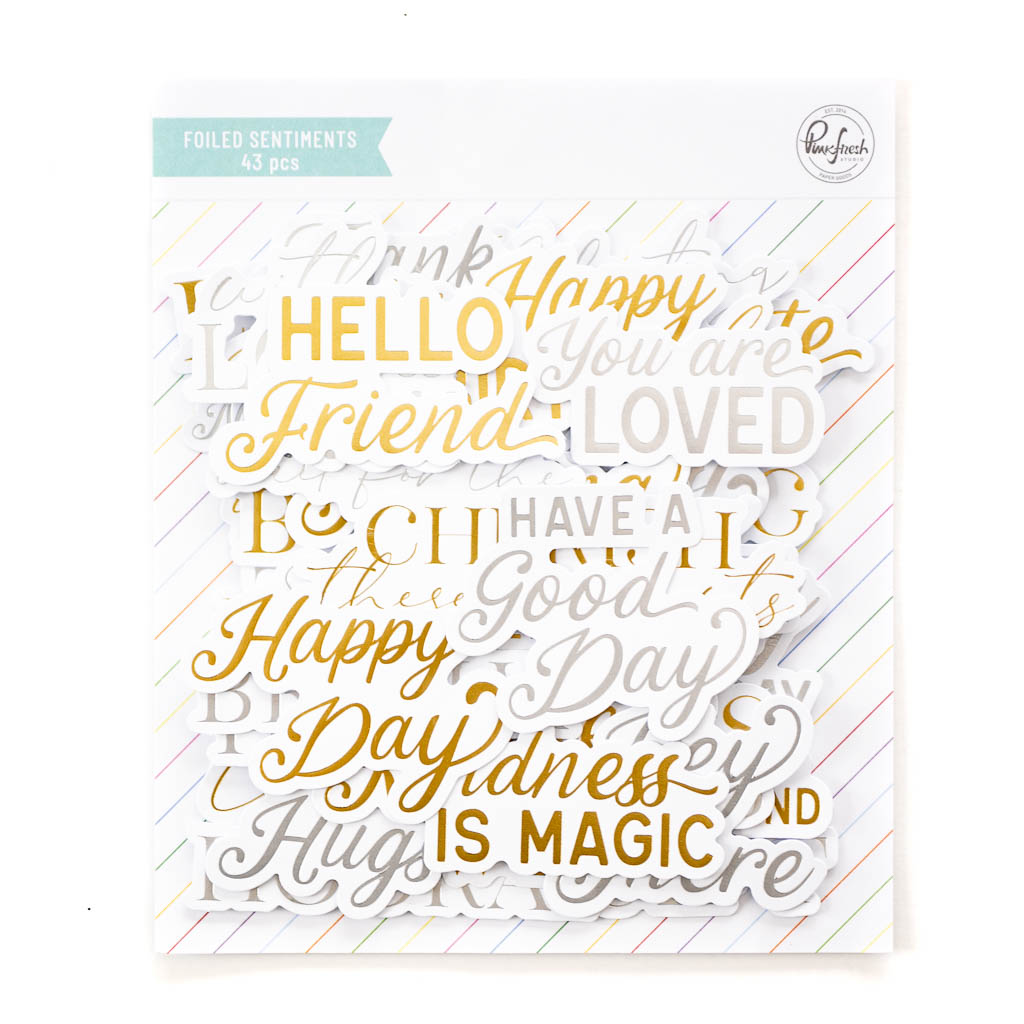
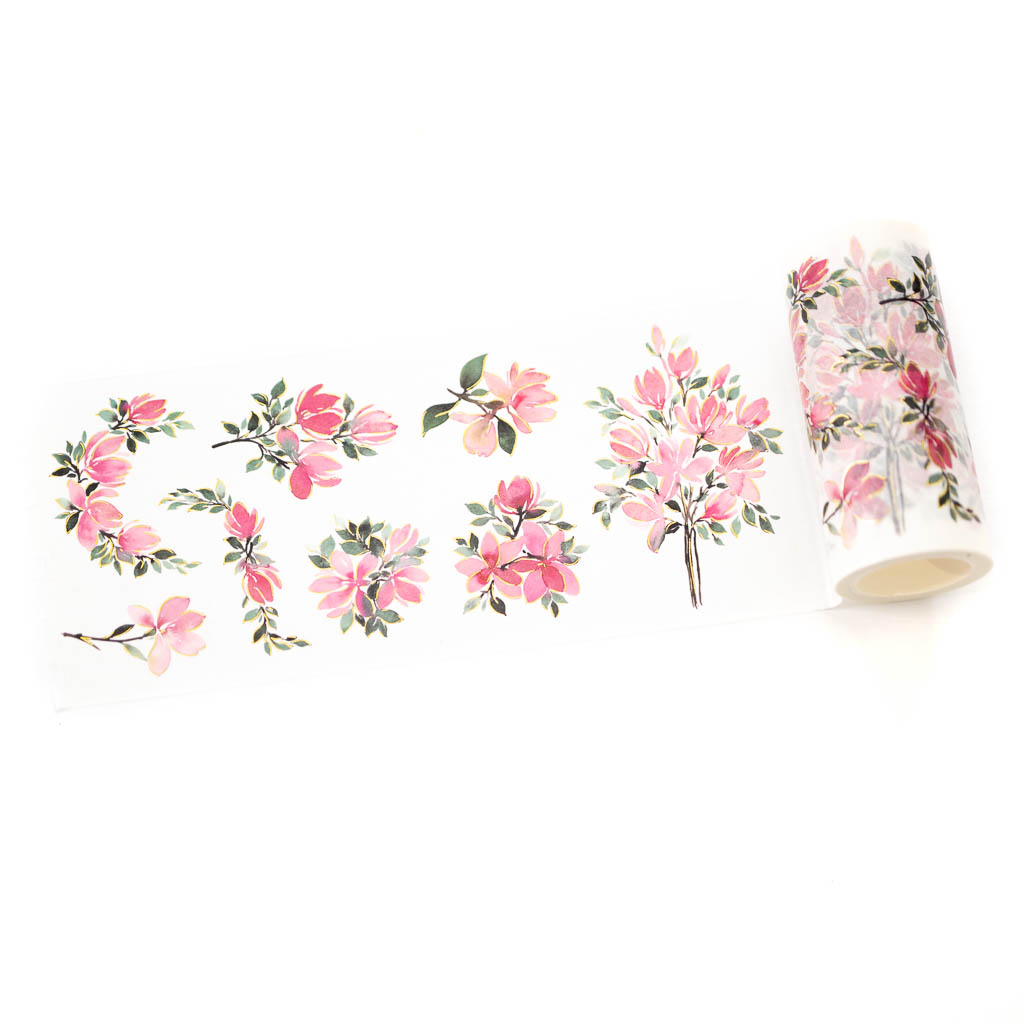
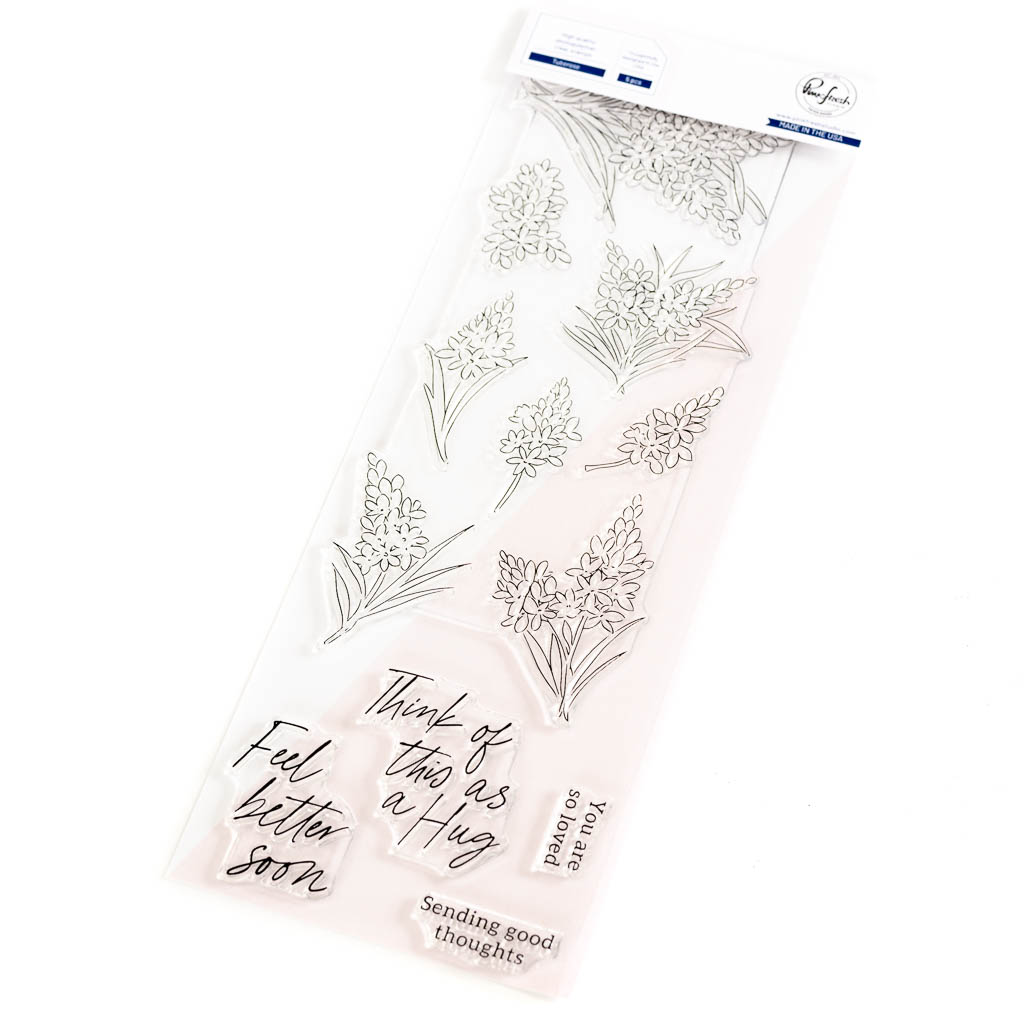
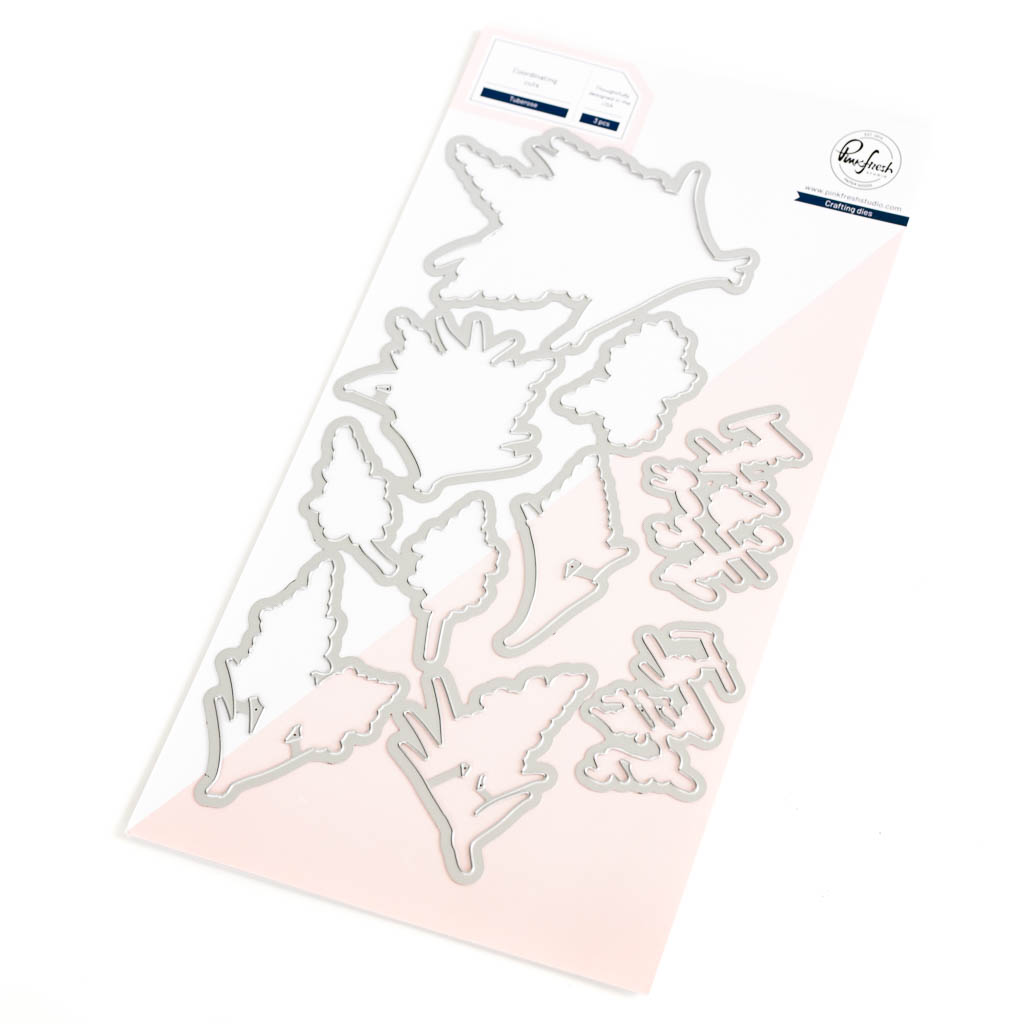
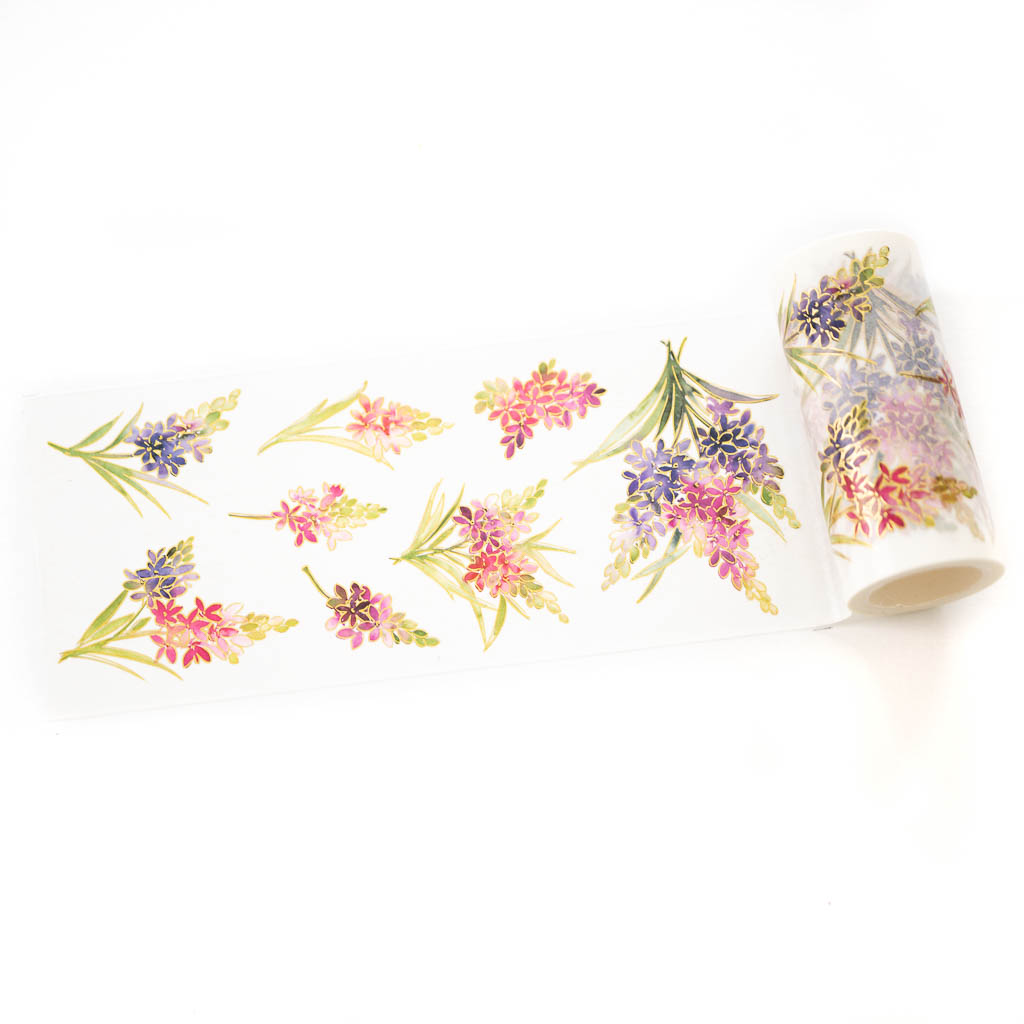
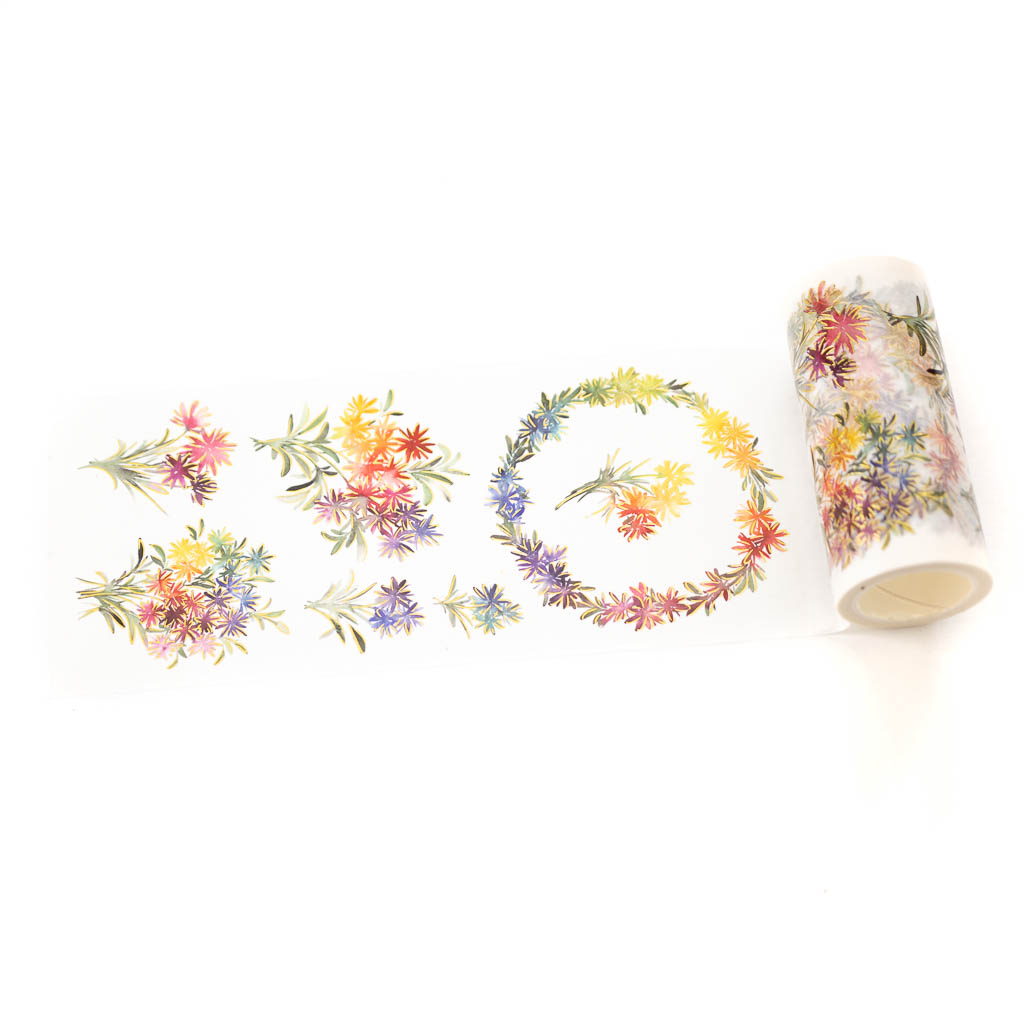
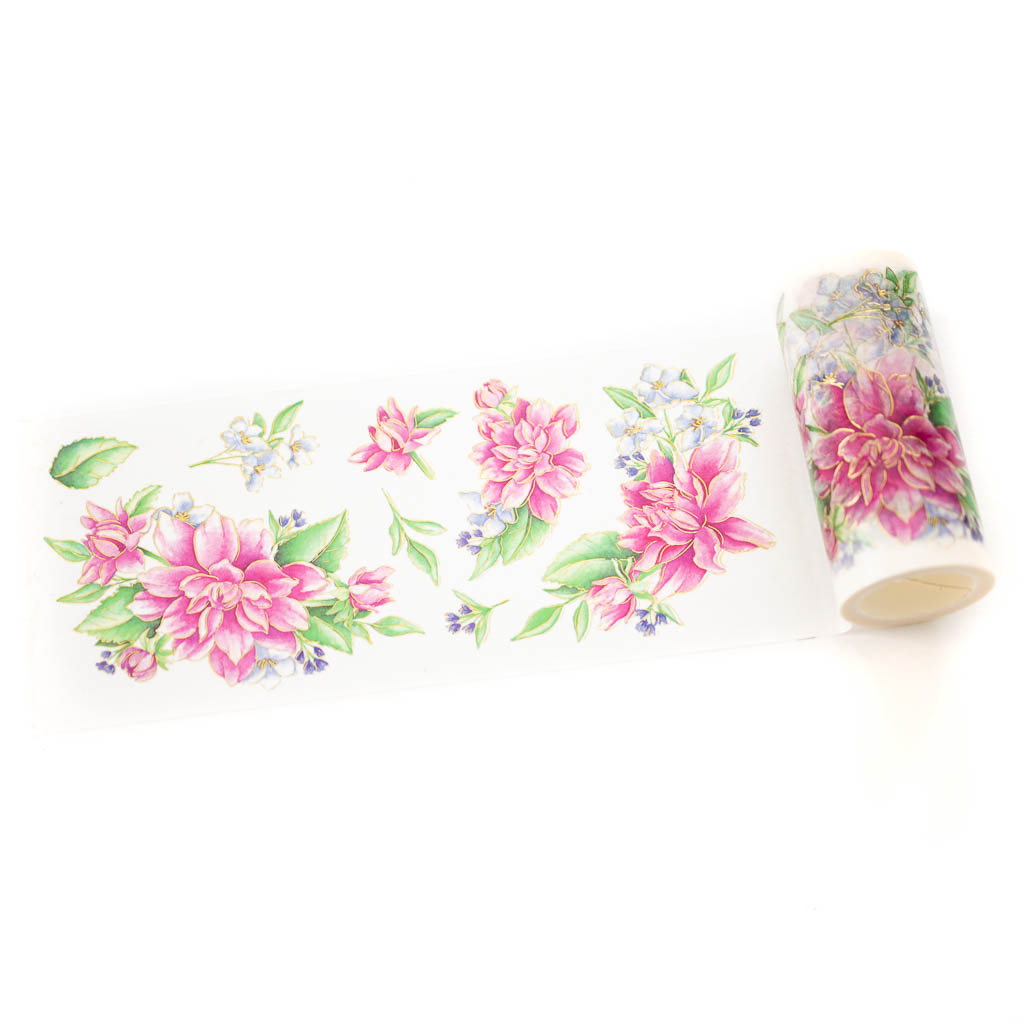
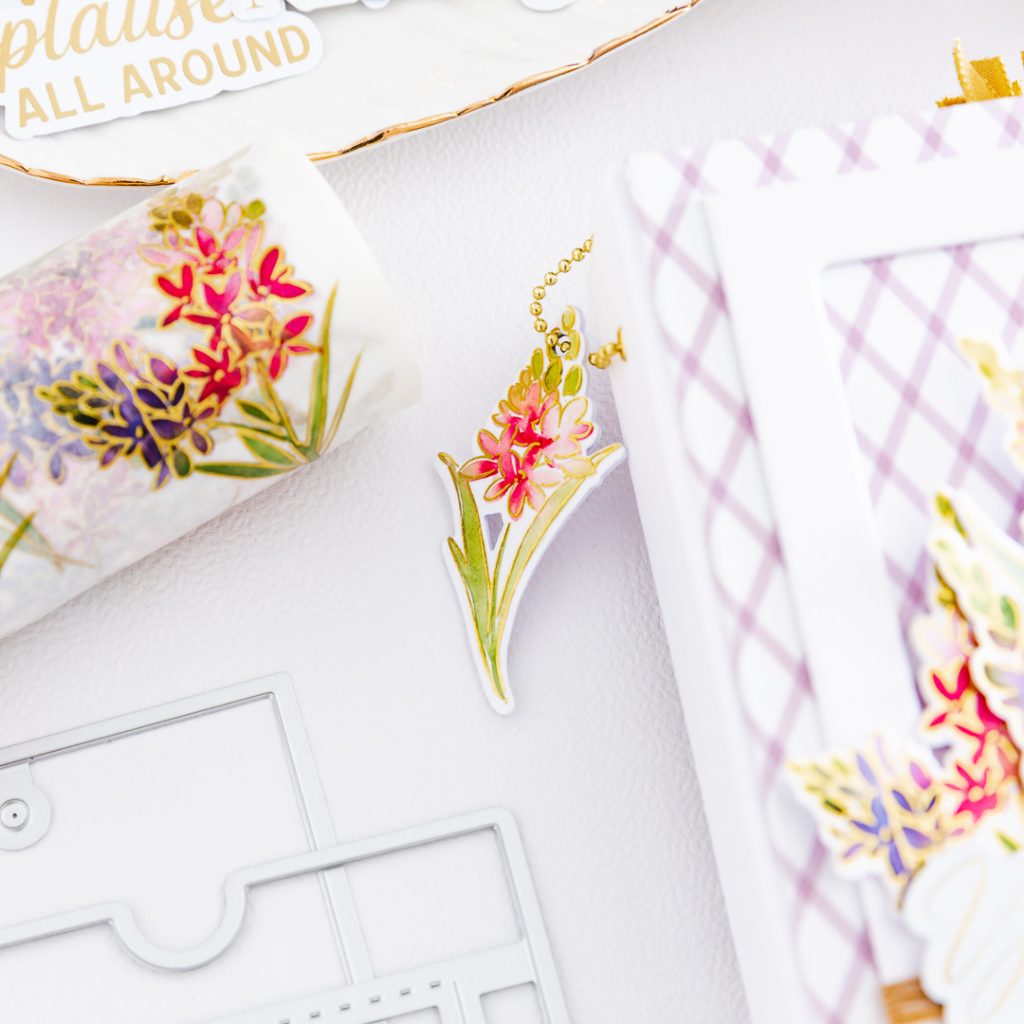
Let’s get started with this blog hop! For this release I prepared a lovely mini album for some special memories. I wanted to prepare something delicated for some memories with Federica (my goddaughter). I used the A2 Slider Die, the Tuberose Set (Tuberose Washi and Tuberose Die) and the Foiled Sentiments Set 5.
¡Comencemos con este blog hop! Para este lanzamiento preparé un mini álbum especial para unos recuerdos muy especiales. Quería hacer algo delicado para algunos de los recuerdos con Federica (mi ahijada). Utilicé el A2 Slider Die, el Tuberose Set (Tuberose Washi y Tuberose Die) y Foiled Sentiments Set 5.
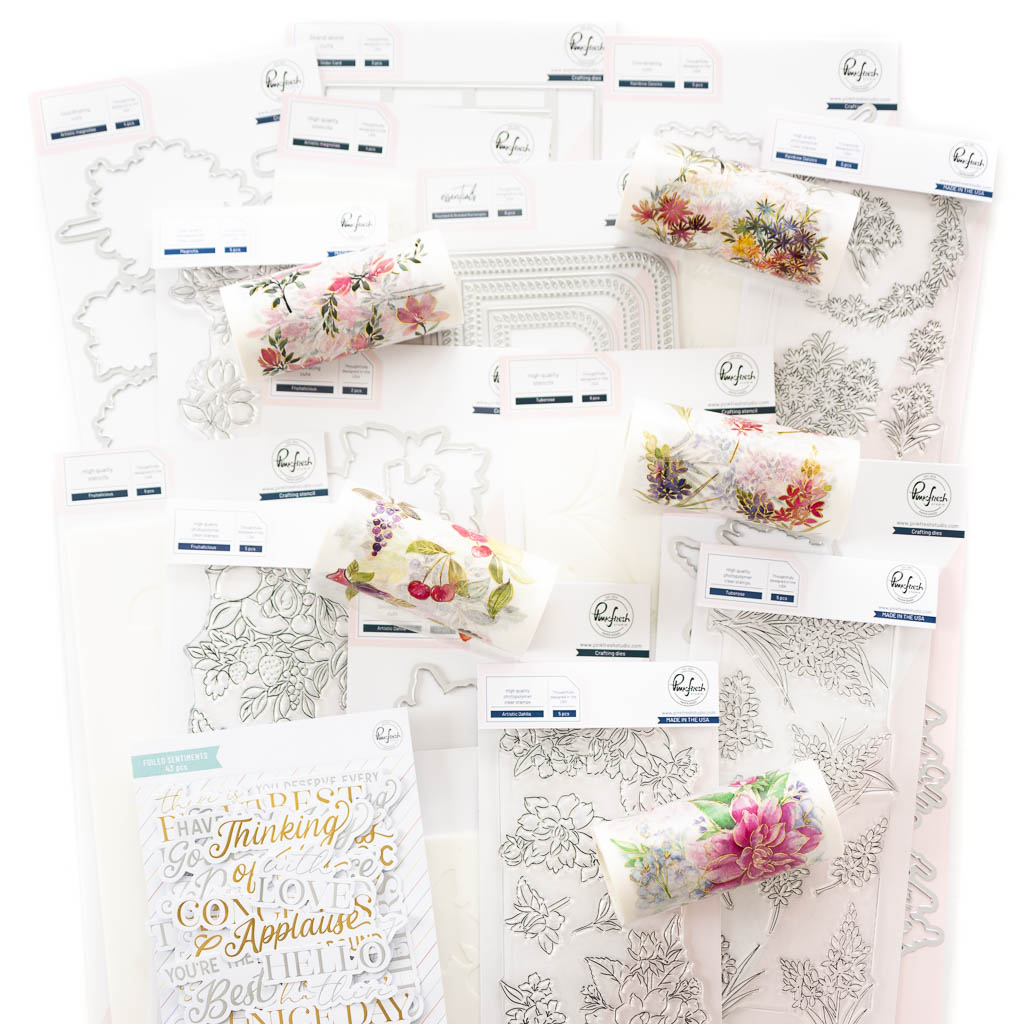
And I attach below all the photos of this release so you can see them and choose all your favorite ones.
Y les adjunto a continuación todas las fotos de los nuevos productos de este lanzamiento para que puedan verlos y elegir todos sus favoritos.

To make this project first thing to do is to prepare the mini album structure. We need to cut 3 cardboard pieces: a-2 of 4 1/4″ w x 5 1/2″ h and b- 1 of 1 1/2″ w x 5 1/2″ h for the spine. Then, you have to cover the cardboard spine piece with textured white paper and both covers with a checkered paper from the collection Good Times 12×12 paper pad. You will use the spine piece to join the two covers together.
Para hacer este proyecto lo que primero que tenemos que hacer es preparar la estructura del mini álbum. Necesitamos cortar e piezas de cartón de: a-2 de 4 1/4″ ancho x 5 1/2″ alto y b- 1 de 1 1/2″ ancho x 5 1/2″ alto para la espina. Luego, debes forrar la pieza de cartón del lomo en papel texturado blanco y las dos portadas en papel a cuadros de la colección Good Times 12×12 paper pad. Usarás la pieza del lomo para unir las dos portadas.

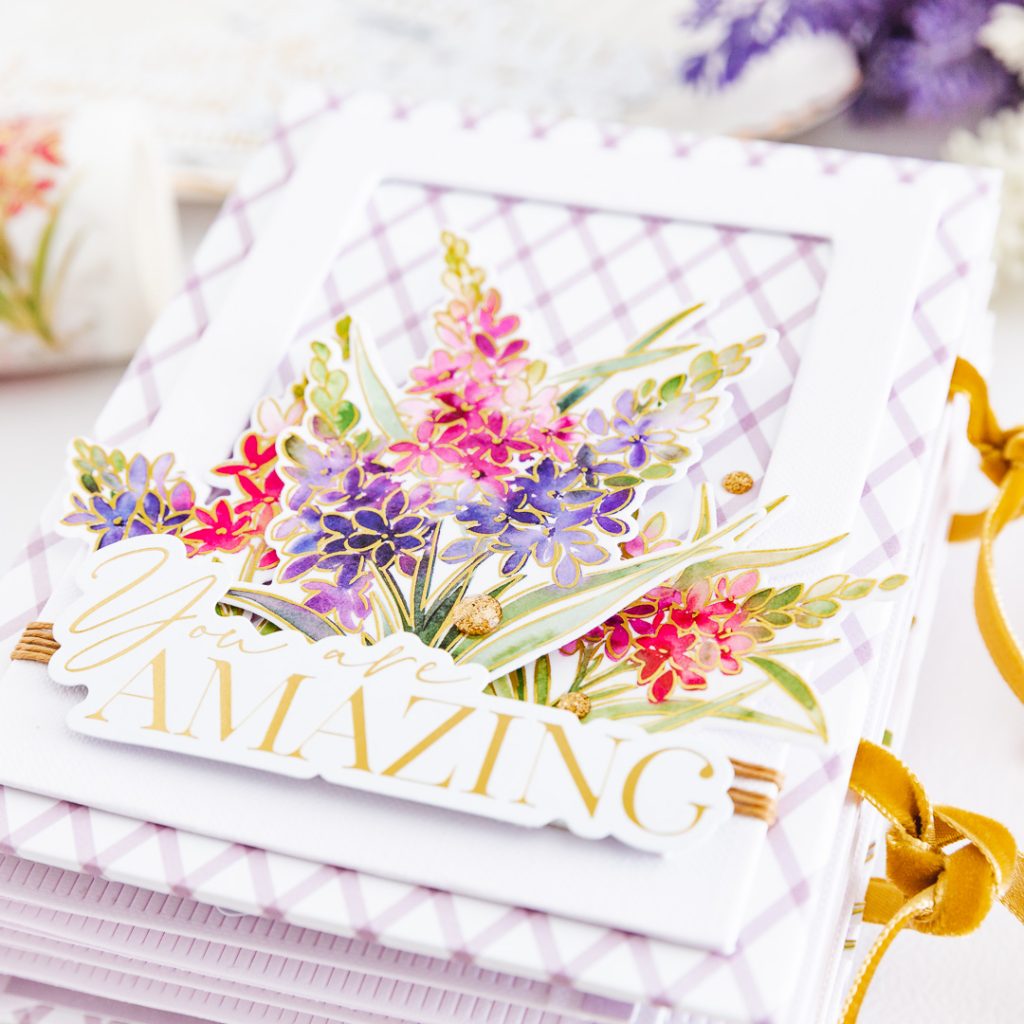
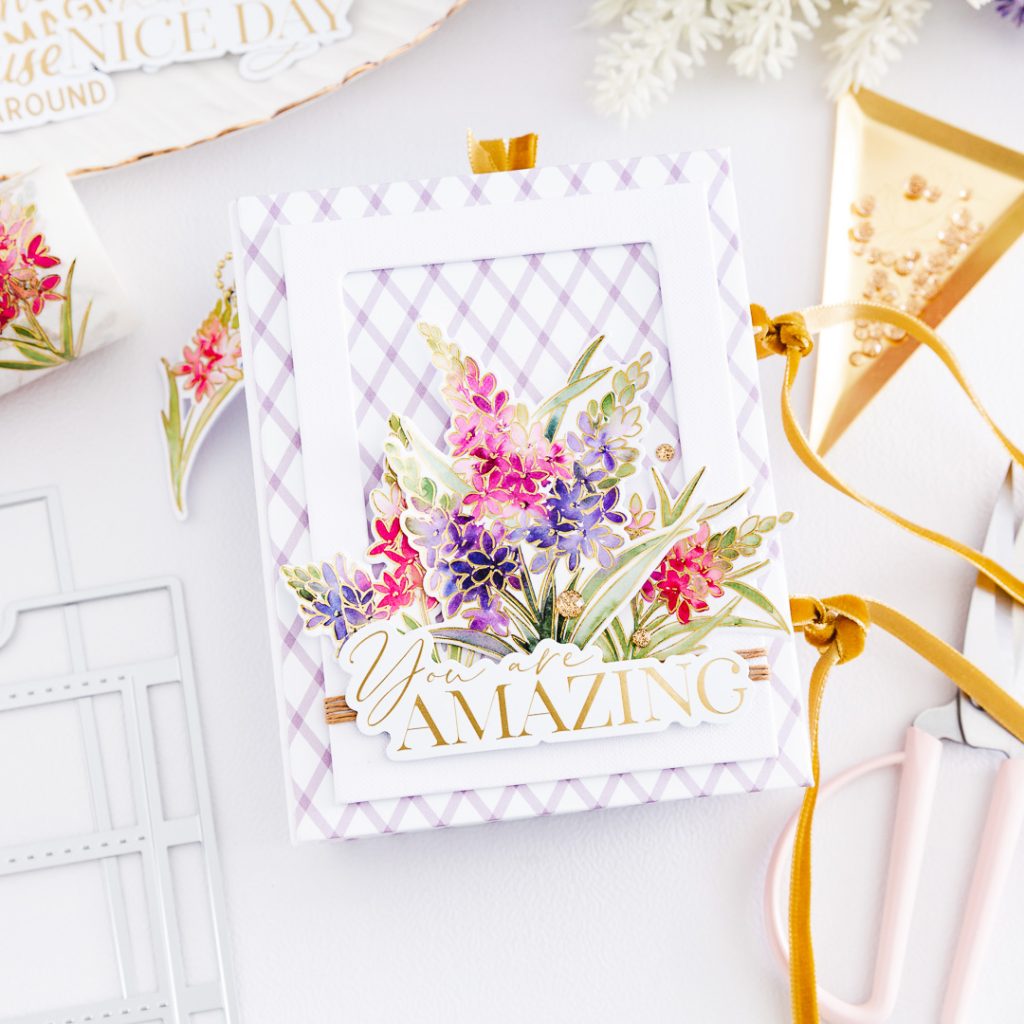
For the cover I prepared a cardboard frame that I covered in textured white cardstock. Also I prepared and cut some lovely flowers using the Tuberose Set (Tuberose Washi and Tuberose Die). They look gorgeous! Before adding the frame to the cover, I added a detail of toasted rustic thread on one of its bases. The flowers are glued in layers behind the frame. And as a final detail, I added one of the phrases from the set Foiled Sentiments Set 5.
Para la portada preparé un marco de cartón que cubrí con cartulina blanca texturizada. También preparé y corté unas lindas flores usando el Tuberose Set (Tuberose Washi y Tuberose Die). ¡Se ven hermosas! Antes de añadir el marco a la tapa, añadí un detalle de hilo rústico tostado en una de sus bases. Las flores están pegadas en capas detrás del marco. Y como detalle final, añadí una de las frases del set Foiled Sentiments Set 5.
To make the spine you need to cut 1 piece of white cardstock of 6 3/4″ w x 5″ h. Score at 1″, 1 1/2″, 2″, 2 1/4″, 2 3/4″, 3 1/4″, 3 1/2″, 4″, 4 1/2″, 4 3/4″, 5 1/4″, 5 3/4″. Shape the spine and glue it centered on the inside. Then you can add the closing ribbons of the mini album and paste the interior papers.
Para hacer la espina necesitas cortar 1 pieza de cartulina blanca de 6 3/4″ de ancho x 5″ de alto. Pliega a 1″, 1 1/2″, 2″, 2 1/4″, 2 3/4″, 3 1/4″, 3 1/2″, 4″, 4 1/2″, 4 3/ 4″, 5 1/4″, 5 3/4″. Da forma a la espina y pégala centrada por dentro. Luego puedes añadir las cintas de cierre del mini álbum y pegar los papeles interiores.
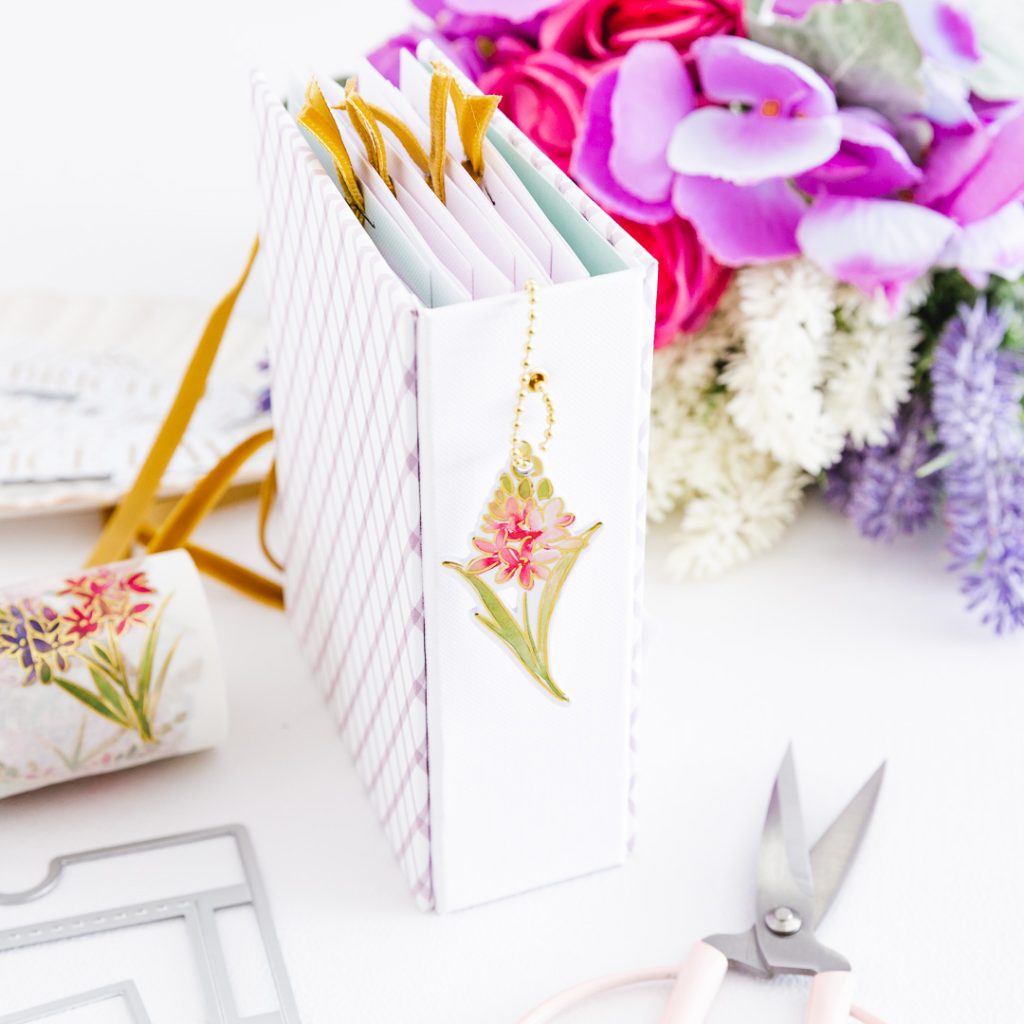
Spine details: I added a small eyelet (centered width) and I added a flower charm, which I prepared by gluing several layers of paper to give it good thickness. It looks wonderful!
Detalles del lomo: Le añadí un pequeño eyelet (centrado al ancho) y le añadí un charm de flor, que preparé pegando varias capas de papel para darle un buen grosor. ¡Se ve maravilloso!
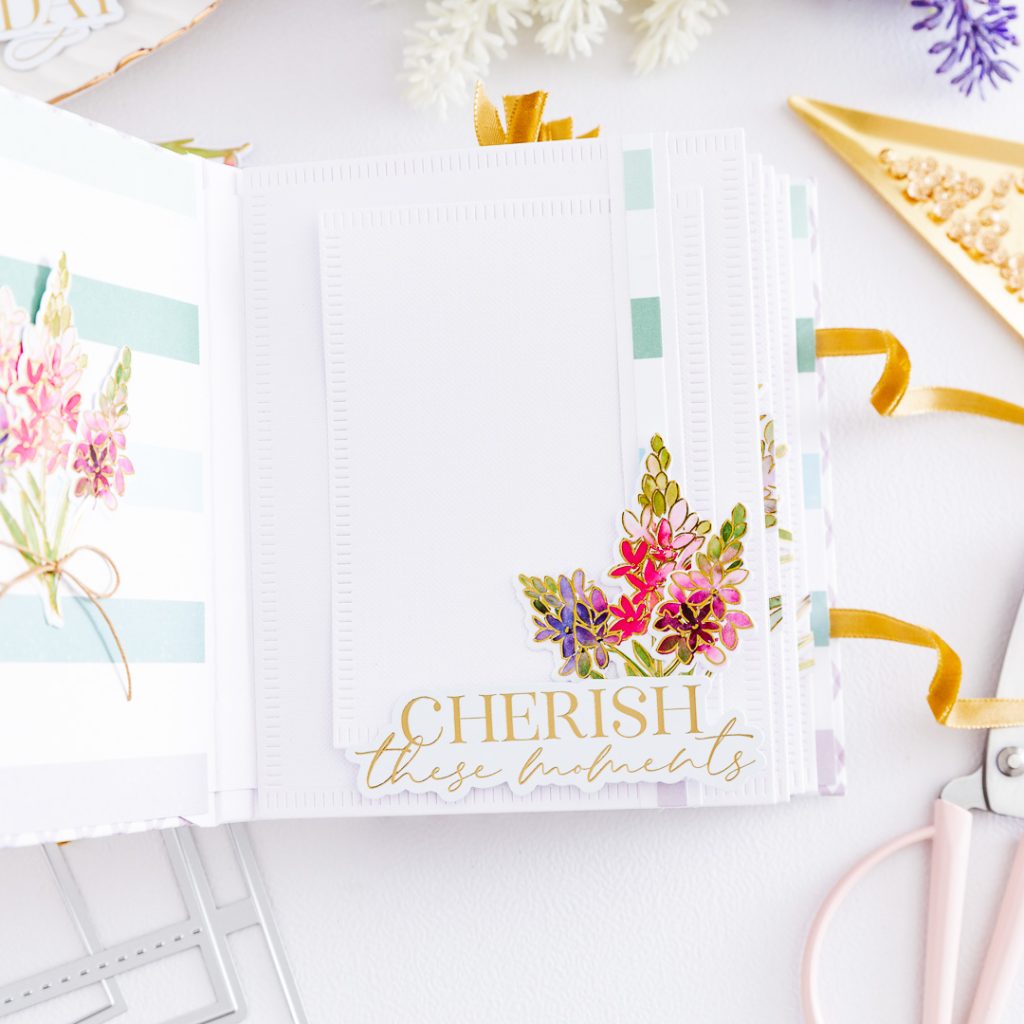
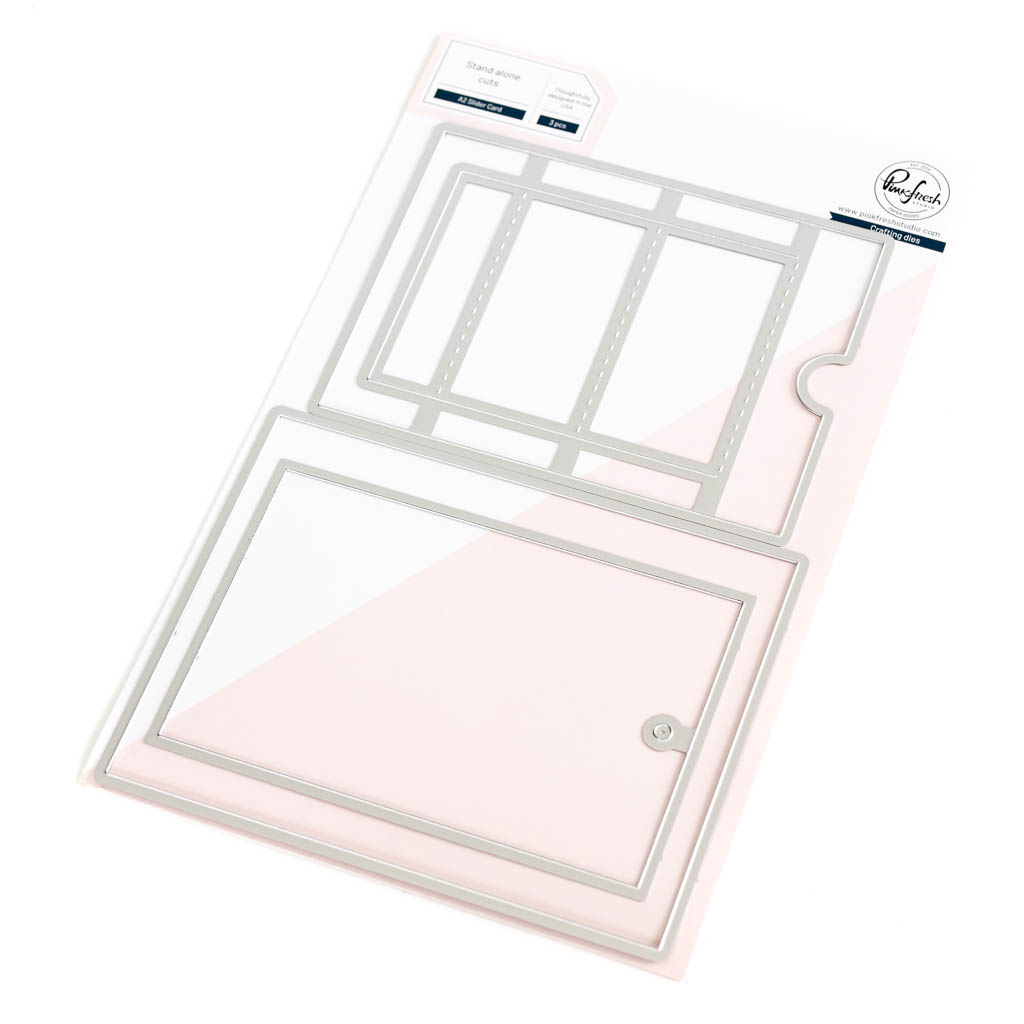
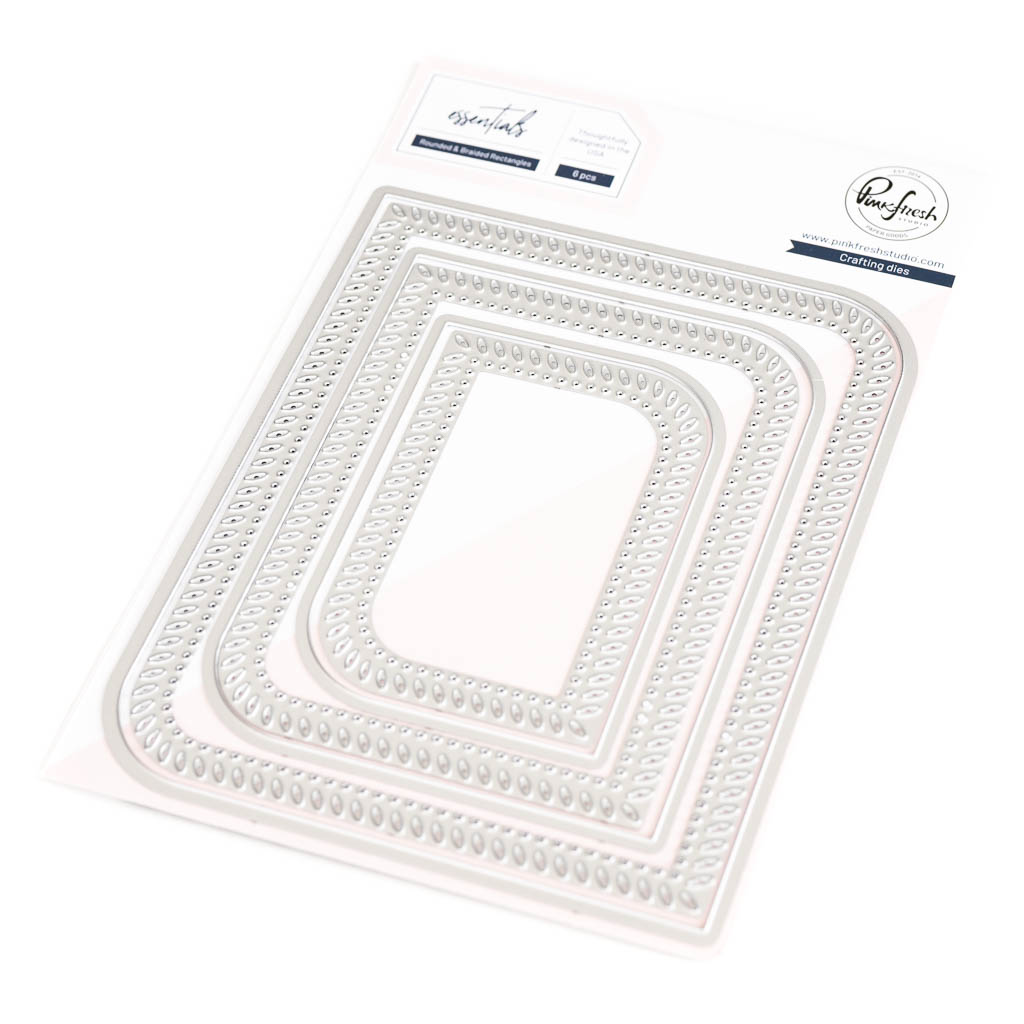
For the interior, we are going to use the A2 Slider Die and the Essentials: Blanket Stitched Rectangle Die Set. We will use these two sets to prepare the pages. Also, we will use the Essentials: Slim Stripes Die Set.
Para el interior, usaremos el set A2 Slider Die y el Essentials: Blanket Stitched Rectangle Die Set. Usaremos estos dos sets para preparar las páginas. También usaremos el Essentials: Slim Stripes Die Set.
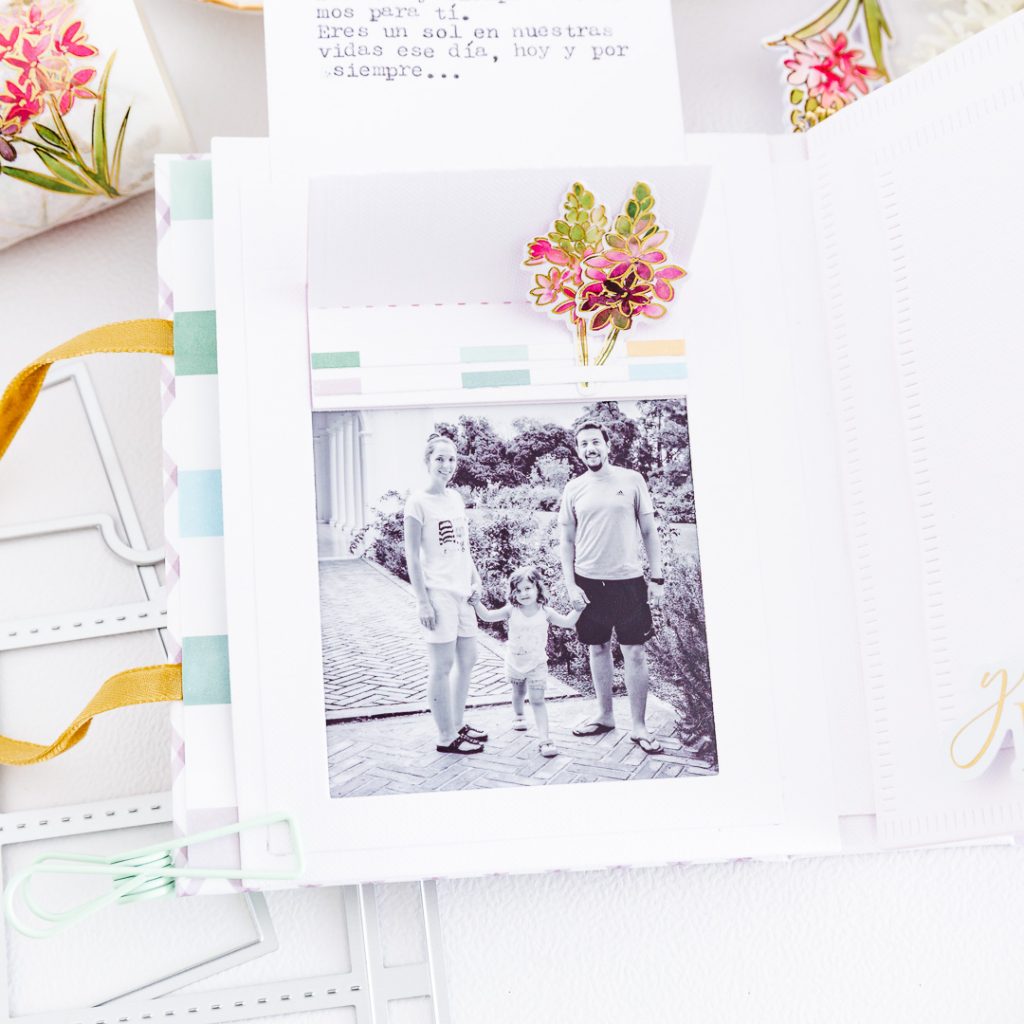
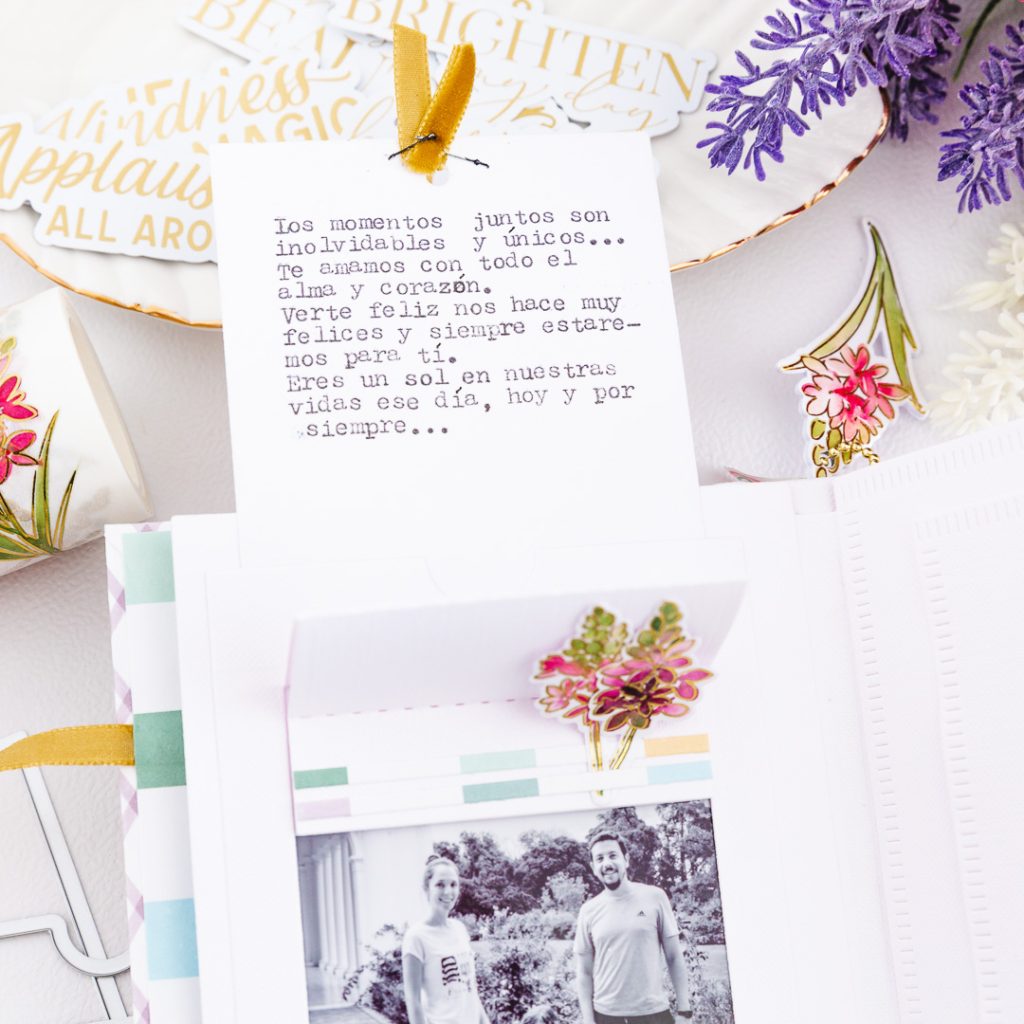
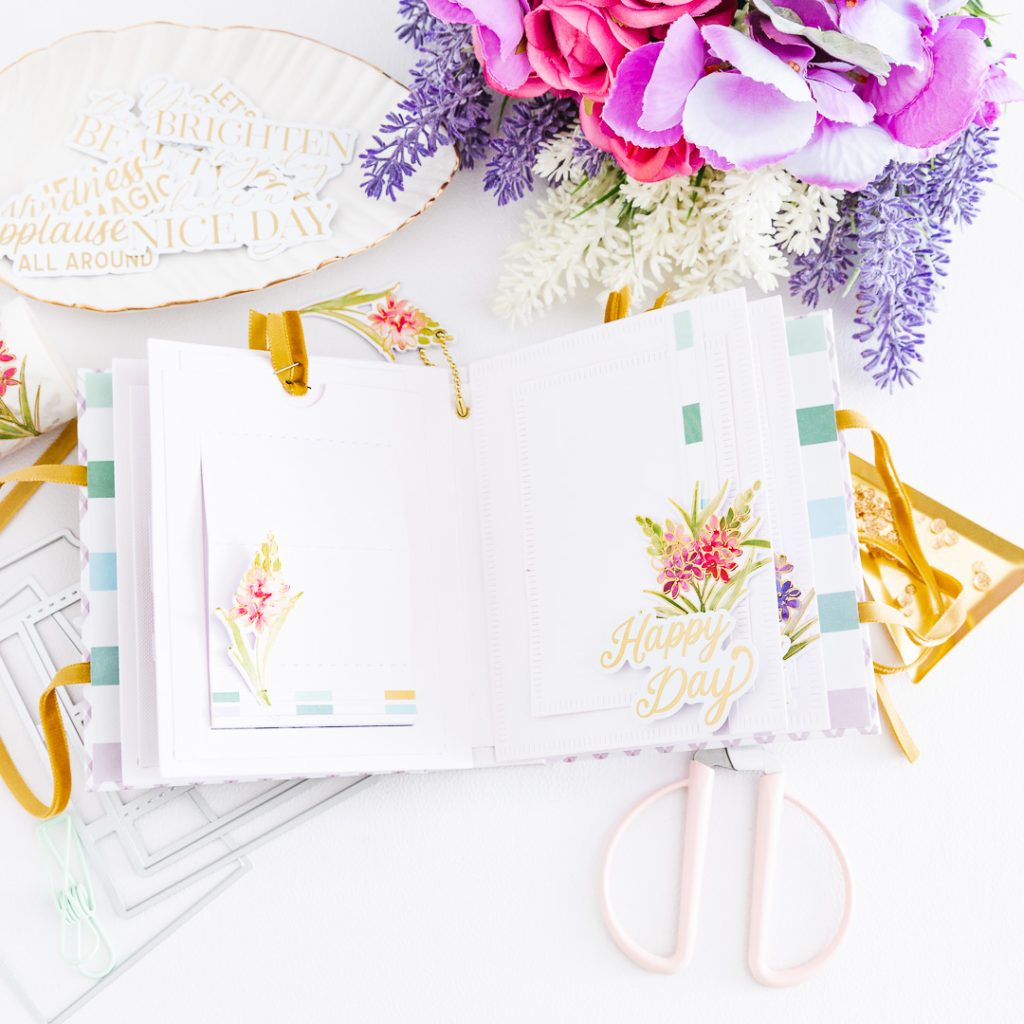
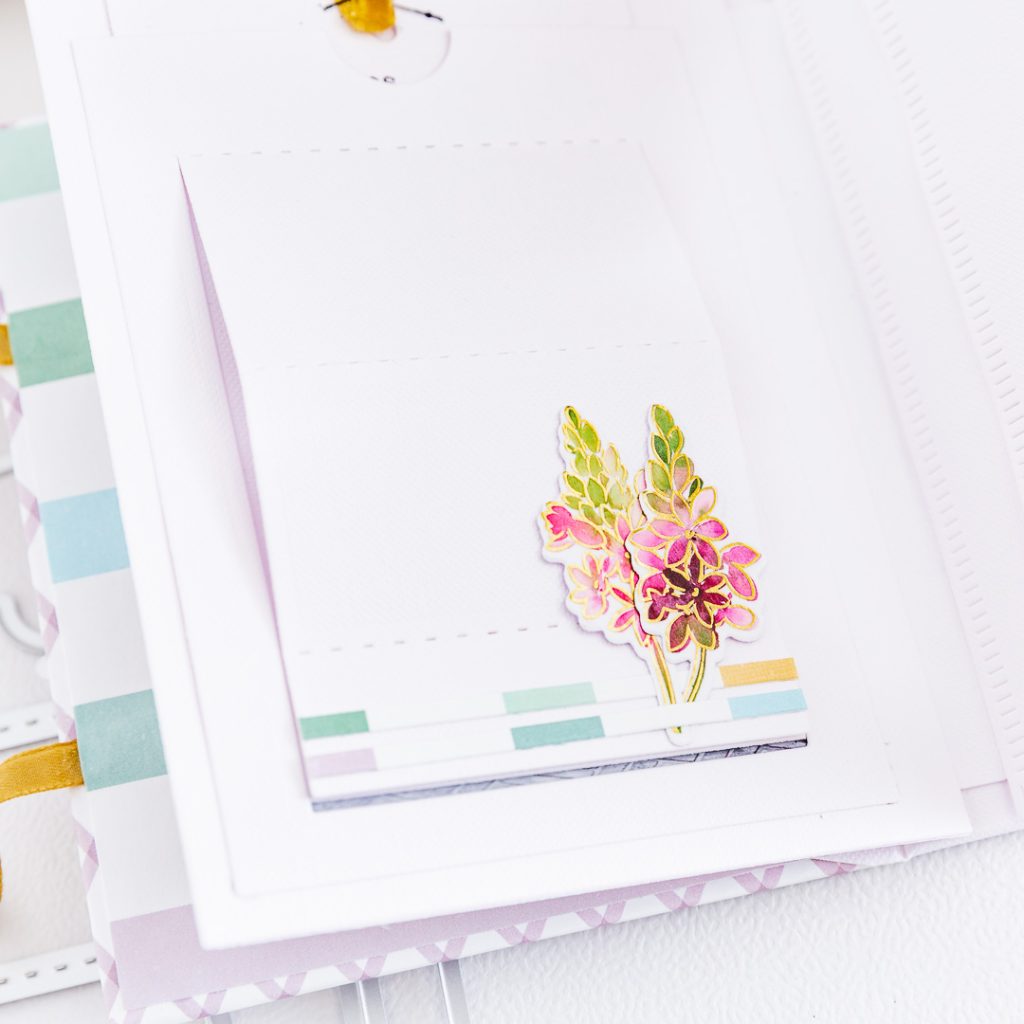
We need to cut 4 sets using the A2 Slider Die and 4 pieces of the bigger die of the Essentials: Blanket Stitched Rectangle Die Set. All of them on white cardstock. It is necessary that we have our printed photos to be able to assemble the pages and assemble the entire mechanism of the A2 Slider Die. Also that we write the entire journaling of each of the cards (as you can see in the photos). To each card (the one with the journaling) I added a handle using the ribbon as the closure. When we have everything ready, we paste the photos and assemble the mechanisms. We will already have 4 pages ready and we will have the remaining 4 to be able to form our entire interior structure.
Necestamos cortar 4 set usando el A2 Slider Die y 4 piezas con el troquel más grande del Essentials: Blanket Stitched Rectangle Die Set. Todas deben ser el cardstock blanco. Es necesario tener nuestras fotos impresas para poder armar las páginas y montar el mecanismo entero del A2 Slider Die. También tenemos que escribir todo el journaling en las tarjetas (como pueden ver en las fotos). A cada tarjeta (las de journaling) le añadí un tirador usando la misma cinta que usé para el cierre del mini álbum. Cuando tenemos todo listo, tenemos que pegar las fotos y montar los mecanismos. Tendremos listas 4 páginas y nos quedarán las 4 restantes para poder darle forma a toda la estructura interior.


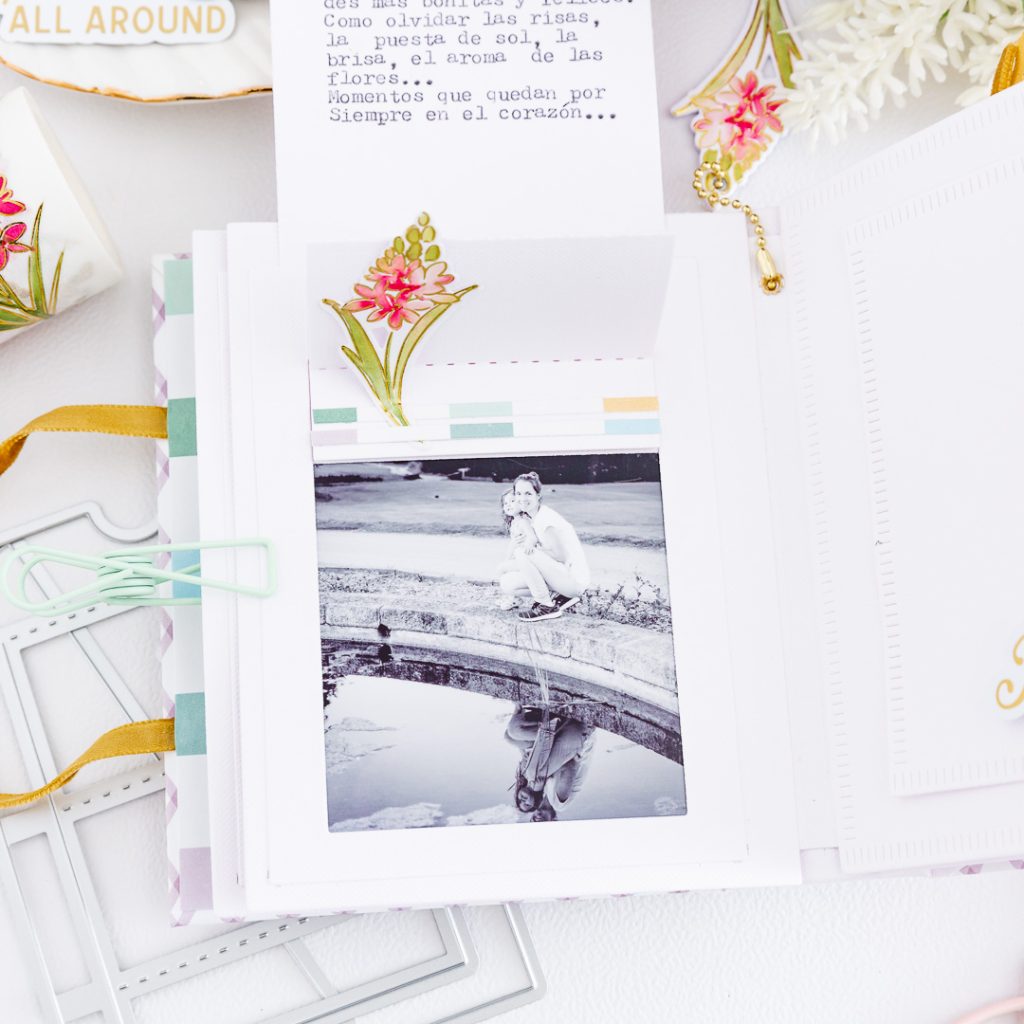
Details of the pages and final assembly: to both pages I have added some details of strips of paper that I made with the Essentials: Slim Stripes Die Set. For mechanism pages A2 Slider Die I added two thin strips of design paper and flowers from the Tuberose Set. And for the 4 pages of the Essentials: Blanket Stitched Rectangle Die Set I added one strip of white cardstonck and one strip of design paper. Also, I added some sentiments from Foiled Sentiments Set 5 and some flowers from the Tuberose Set. When everything is ready, we must glue one page of each design together, leaving the edge that will go on the spine unglued. So we can take each page to our structure and paste it.
Detalles de las páginas y armado final: a ambas páginas he añadido algunos detalles de tiras de papel que hice con el Essentials: Slim Stripes Die Set. Para los mecanismos de las páginas de A2 Slider Die agregué dos tiras delgadas de papel de diseño y flores del Tuberose Set. Y para las 4 páginas del Essentials: Blanket Stitched Rectangle Die Set agregué una tira de cartulina blanca y una tira de papel de diseño. También, añadí frases del Foiled Sentiments Set 5 y algunas flores del Tuberose Set. Cuando todo esté listo, debemos pegar una página de cada diseño, dejando sin pegar el borde que irá en el lomo. Entonces podemos llevar cada página a nuestra estructura y pegarla.
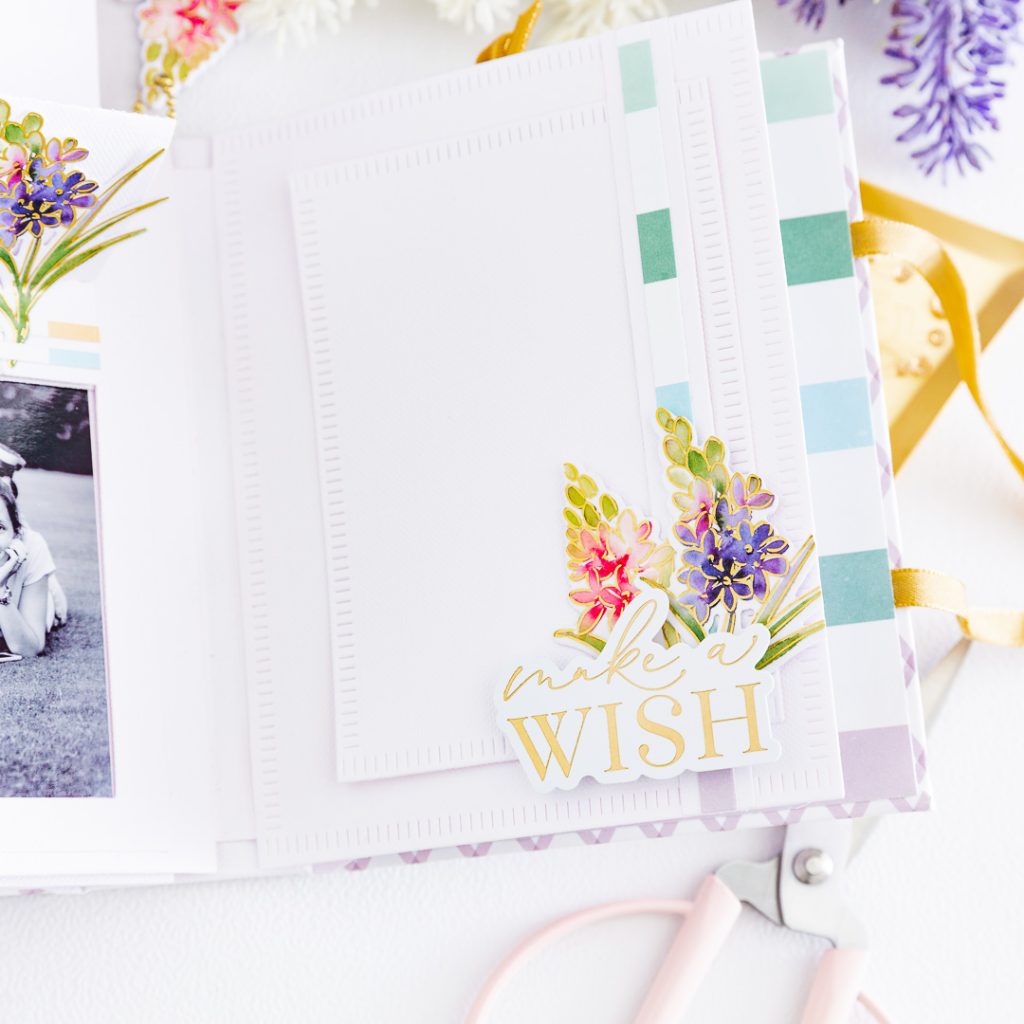
Our project is ready! We can add flower details on the inside of the covers as well as thread details. Another idea is to add smaller cards to the design of the other pages to be able to put more photos/journaling later.
¡Nuestro proyecto está listo! Podemos añadir detalles de flores en los interiores de las portadas así como también detalles de hilo. Otra idea es añadir tarjetas más pequeñas al diseño de las otras páginas para poder luego poner más fotos/recuerdos.
List of products used/ Lista de productos utilizados:
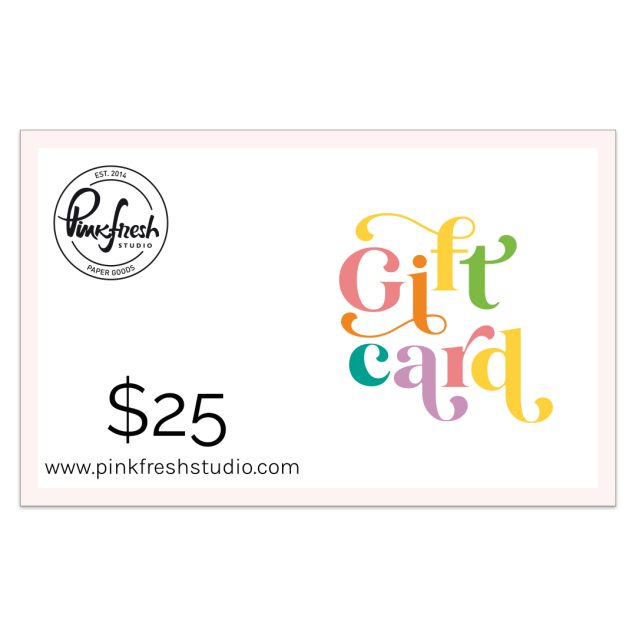
Pinkfresh Studio will be giving away the full release on the Pinkfresh blog & YouTube channel. Also Pinkfresh Studio is giving away a total of Ten $25 gift cards winners chosen from the blog hop. The winners will be chosen from the comments.
Pinkfresh Studio regalará el lanzamiento completo en su blog y canal de YouTube. Además, Pinkfresh Studio está regalando un total de diez tarjetas de regalo de $ 25 a los elegidos del blog hop. Los ganadores se elegirán a partir de los comentarios.
The winners will be announced on APRIL 5, 2023 on the Pinkfresh Studio Giveaway Page.
* Please check Giveaway Page within 2 weeks to claim the prize.
Los ganadores se anunciarán el 5 de ABRIL de 2023 en la Giveaways Page de Pinkfresh Studio.
* Consulta la Giveaways Page en un plazo de 2 semanas para reclamar el premio.
Thank you for joining me for this blog hop. See you next time! Good luck!
Muchas gracias por acompañarme en este blog hop ¡Hasta la próxima! ¡Mucha suerte!


 17.11.36")
91 comentarios
This mini album is stunning! I love how you added the interactive slider to the page. So very clever!
These projects are absolutely amazing!
Amazing mini album! This is super gorgeous!
Es una pasada. Me encantó el mini y me lo apunto para replicarlo!!! 🥰🥰🥰
Celes, this Tuberose is my favorite of all the washis today! I am amazed at your album – and love the velvet ribbon!
=]
What a beautiful release ! I Love all the beautiful flowers in this collection, and the gold foiled washi is spectacular! my favorite is Artistic Dalia set. Your album is very very beautiful !
Amazing project!
Beautiful album! Love the idea of mini albums that you and other designers are coming up with!!
So clever to use the slider die to hide the journaling … gorgeous design.
Hi, Celes – WOW! You’ve robbed me of breath!! Holy smokes! These are PHENOMENAL! The recipient of this album is so lucky. I love the first panel you shared w/ the «Amazing» sentiment. It’s arrestingly beautiful! Love the colors, the way you set it up… and the interactive element of all of these is brilliant. GREAT WORK!
Lori S in PA (EEUU)
So pretty
Just wonderful. beautiful job!
Great release and Awesome album! I love the slider reveal die!
All your hard work really pays off in this hop! Everything you did is amazing! Thanks so much.
Wow!! Absolutely amazing project. The tuberose is my favorite.
I love the mini album. What a great way to use the interactive die. Also, those flowers are my favorite!
Your album is so pretty!! What a great idea…
Your mini photo album is an absolutely lovely piece of eye candy! Love the integration of the slider die. Your use of the tuberose set has inspired me to purchase it and begin creating!
What a wonderful way to document your sweet goddaughter! The whole album is amazing and beautiful! Thank you so much for sharing and inspiring!
Beautiful mini album!! So delicate and breathtaking. Beautifully done!
Love the cover of the album. So pretty
Beautiful projects! I love the tuberoses!
Every detail on and in this album is gorgeous! Love it!!!
What an amazing album! I LOVE the flowers and gorgeous gold!
Amazing mini album!! Love the soft colors with pops of color from the flowers!!!
Your mini albums are gorgeous and love the elements you incorporated throughout: the Gold Foiled Washi, Velvet Ribbon and the Colors you chose. Your card ideas are amazing, thank you for sharing.
Gorgeous, Gorgeous, Gorgeous! How perfect was this washi for your goddaughter! The colors are fabulous!
Beautiful layouts.
Your album will bring you smiles as you look back through the years.
Thanks for sharing.
Creative use of the slider die for your memory album! So pretty!
Very pretty samples – I look forward to trying this new interactive die.
Lovely project. This release has a lot of amazing products
This is a beautiful album, Celes! Thank you for sharing. Journaling on the slider piece really lets the tuberose and decorations shine!!! And your instructions are such that I want to try to make this album! Fantastic! (I need more adjectives- haha!)
Your album is absolutely beautiful!
omg what a gorgeous album – beautifully crafted
Beautiful album. Love the slider popup pages!
WOW, what a great release! I’m in love with the tuberose products! Thanks for the chance to win.
WOW WOW WOW
Stunning! Your mini album is precious, like the photos it holds! Thank you for sharing your talents and all of the detailed instructions in your blog post!
Que bonita!!! Gracias.
This album is stunning! Love the colors you picked!
Love the mini album! Very special
Wow! what a beautiful and amazing gift for your goddaughter,
I’m sure it will be a cherished treasure,
Your mini album is absolutely gorgeous! You’ve made me even more excited to receive the Tuberose washi I ordered!
You have created this mini album that is absolutely STUNNING! What a beautiful project!
What a cute book!
So pretty! I think this is my favorite washi in this release!
Lovely album! So pretty and creative.
Beautiful idea to make an album with all the sliders and gorgeous washi florals!
Thanks for sharing all the details for your amazing mini album. It is so beautiful. You are very talented!
Your album is gorgeous. Thanks for sharing
Wow tu album esta precioso!!! Me encanta!
Beautiful album and elements
This is incredible!!! I love that adorable flower charm!
Beautiful mini album
These are such gorgeous projects! Lovely work!
Love all the inspiration
Beautiful the way you decorated your album and used the flowers and pop up with your photos.
The Tuberrose set is one of my favorites. I love every way you used it.
You are so talented thank you for sharing
Eres un fenomeno! Te salio incredible! Y con esos colores tan hermosos. Wow! Saludos desde San Antonio, Texas.
Such a sweet treasured keepsake. I just love the elegant, clean album you have created with those beautiful washi tapes and dies!
Absolutely gorgeous! I love this release and the washi tapes are always so beautiful.
What a beautiful book, each page is so lovely. And that cover is stunning!
Beautiful album and love the sliders with photo’s beneath!
beautiful, beautiful album!!!!
Such a beautiful album for a special little girl. I know she will treasure it always. I admire you for creating an ambitious project. It inspires me to reach out and do more. Thank you! 💖
Such a beautiful mini album. So creative.
I just love your mini albums, you actually got me started on making them from the last Pinkfresh scrapbook class
What a lovely memorable gift of your goddaughter. This album will be cherished forever. Your design is amazing.
Such a beautiful keepsake.
Your projects are wonderful — love them all!
What a stunning keepsake.
Your projects are always so gorgeous! Thank you for the detailed instructions on how you created the album and used the product. I am in love with the interactive die & tuberose set! Gorgeous!!
Such a gorgeous project!
Beautiful album! So nicely done! Thank you for the inspiration.
Gorgeous album.
So many great memories.
thanks for sharing.
Such a beautiful mini album. Its stunning.
Love the frame and pretty background! Gorgeous project!
love your mini album! So precious!
The gold with the other colors really stands out. I’m in love!
Gorgeous mini-album. Love the products you’ve used, this new release is wonderful.
Love this album–so pretty.
Such a beautiful album, love the details and slider elements.
What a marvelous mini album! It’s beautiful!! 🥰
Such a lovely and thoughtful gift.
Such a gorgeous mini album! So pretty! I love all the elements that you incorporated into it!!
Absolutely incredible and beautiful mini album from this month’s release!!
Wow what a stunning mini album. So clean and crisp!
I was not surprised that you made a mini-album. You are at your best when you make minis. And this one was a winner. You made this release just shine. Great job as always.
Love your album, it’s so pretty
I love this mini album you created. What a creative use of the new slider die. The Tuberose washi is my absolute favorite! Just beautiful design!
Los comentarios están cerrados.